Welcome to Moda!
Prairie Rose Garden Quilt
Prairie Rose Garden Quilt
Published:
Sep 20 2015 - 23:00


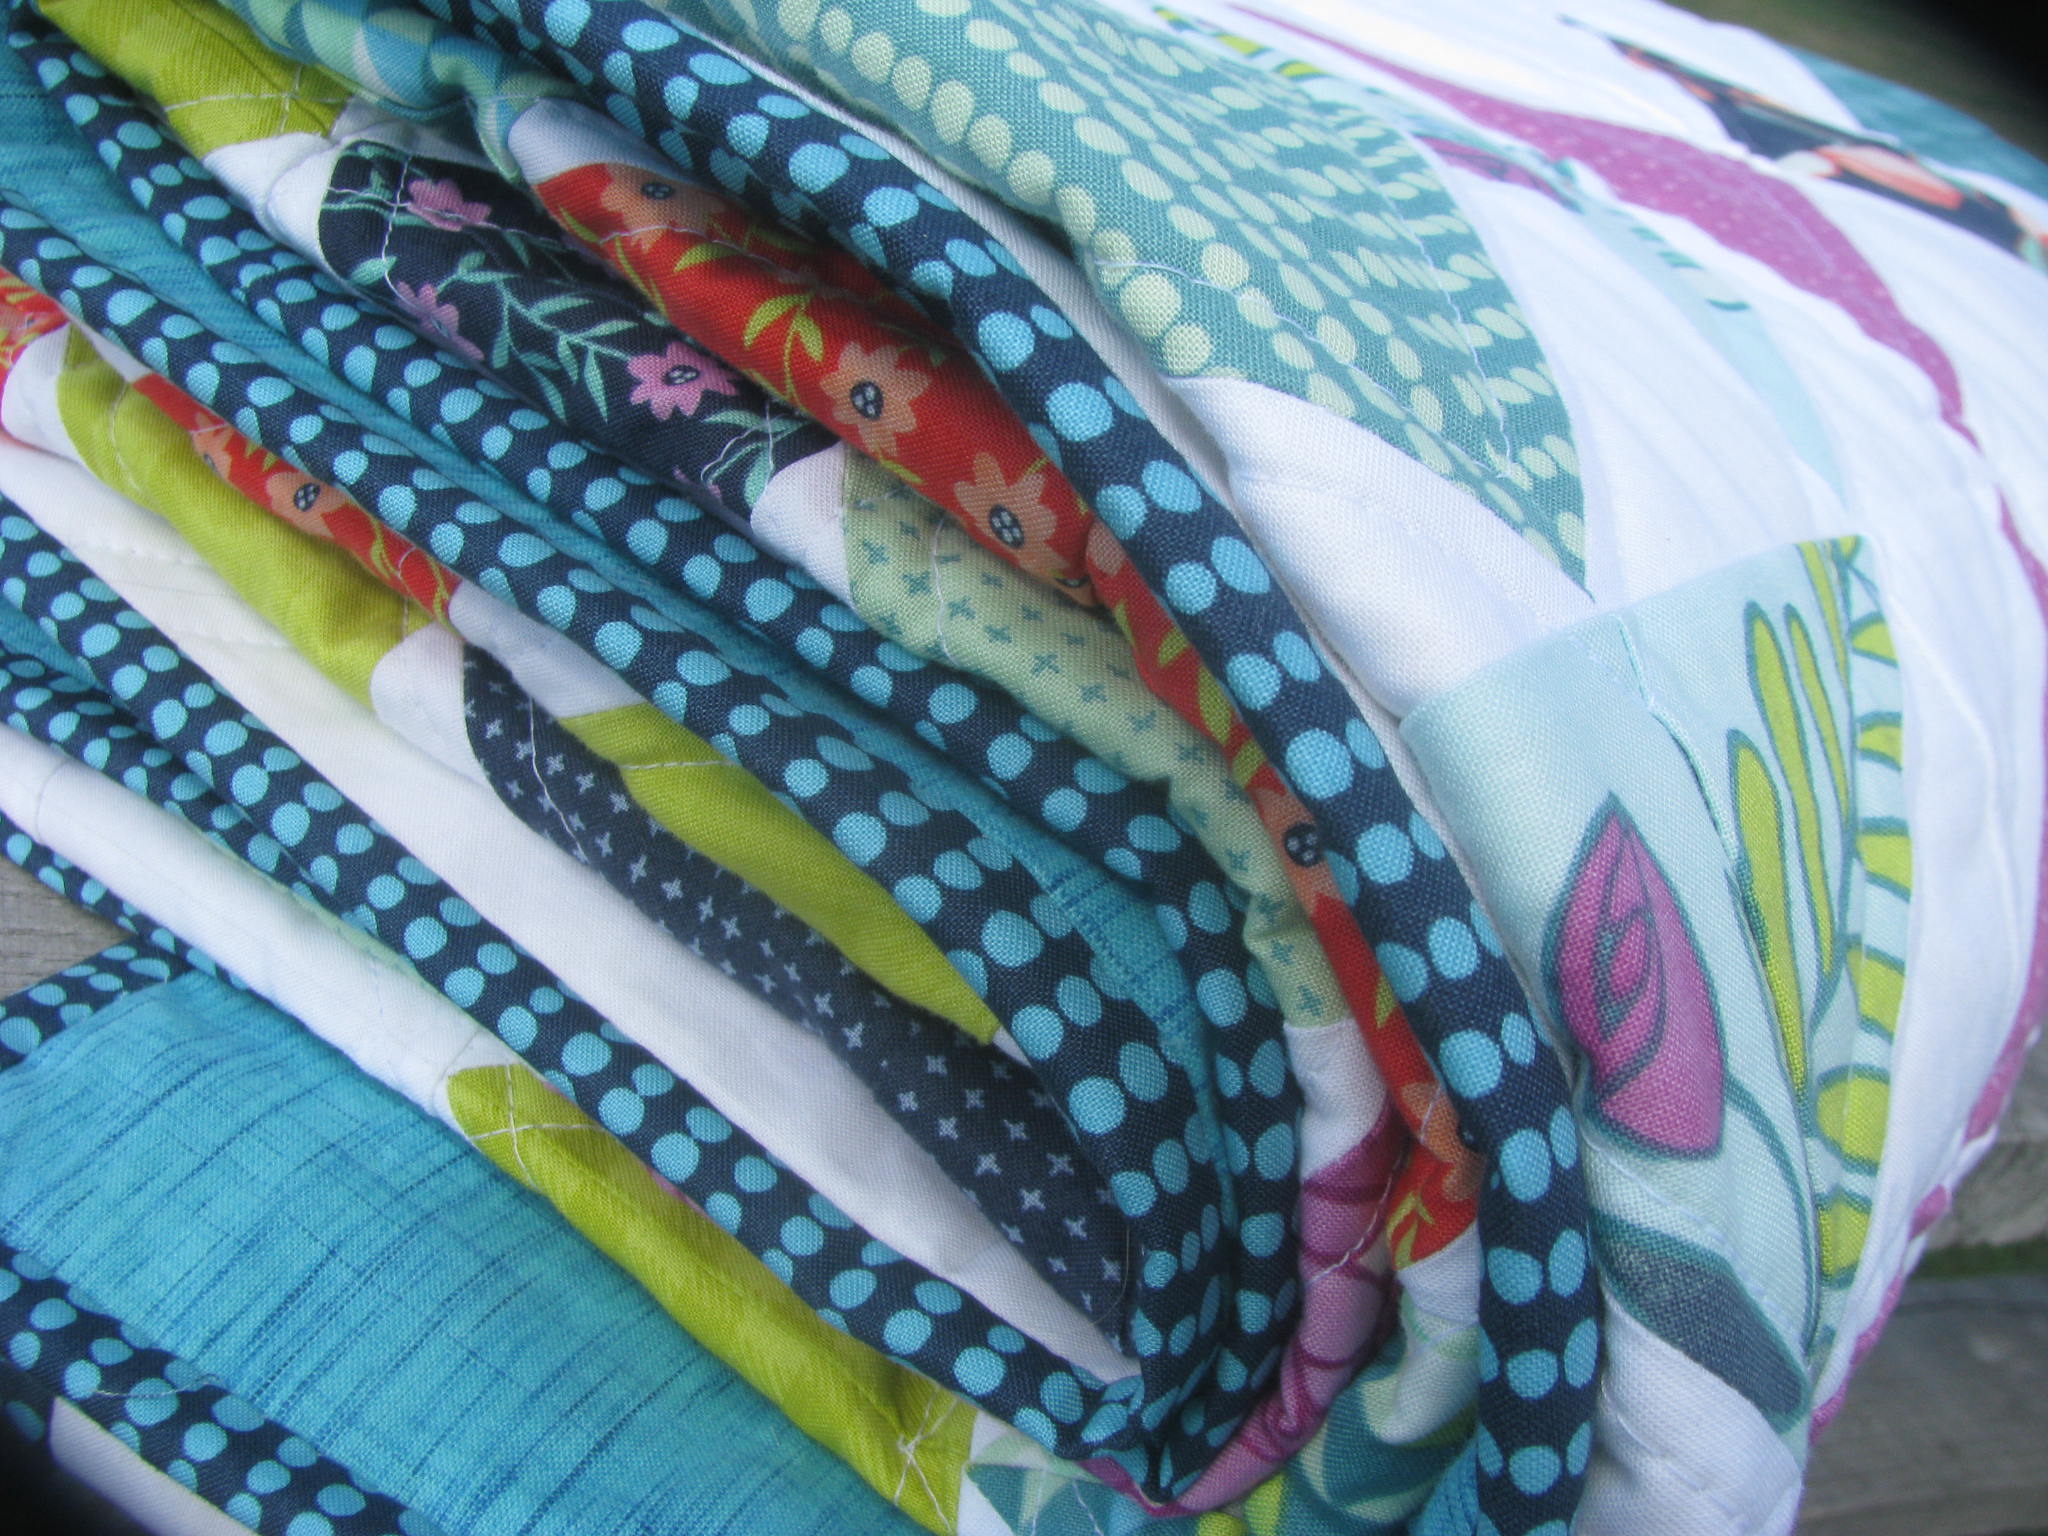
For those of us not so liberally endowed with a "green thumb", today I give you "Prairie Rose Garden"... orderly rows of roses, complete with stepping stones, and a tidy little border! No sore knees or dirty fingernails from the making of this garden, and the blooms will endure fresh, from season to season!
![]()
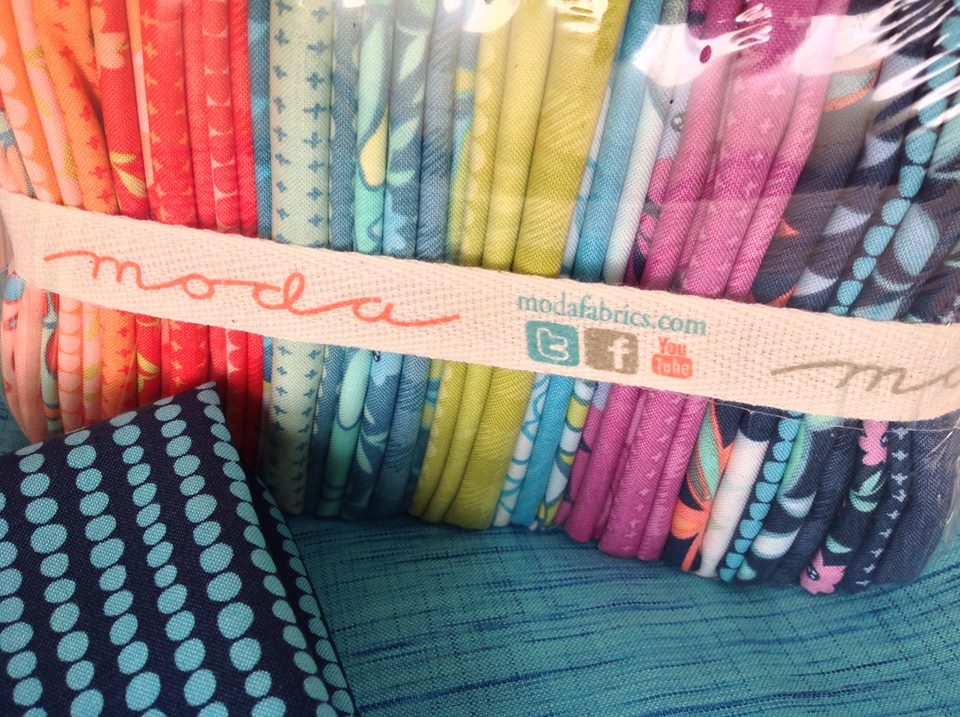
1 Fat Quarter bundle, Tucker Prairie by 1Canoe2
4 3/4 yd background, Bella White
4 1/2 yd backing, Cross Weave woven in sky (12120 61)
1/2 yd binding, Stormy 36005 11.
Optional is a "scrappy" binding made using (1) 2 1/4"strip from each of 15 fabrics.
![]()
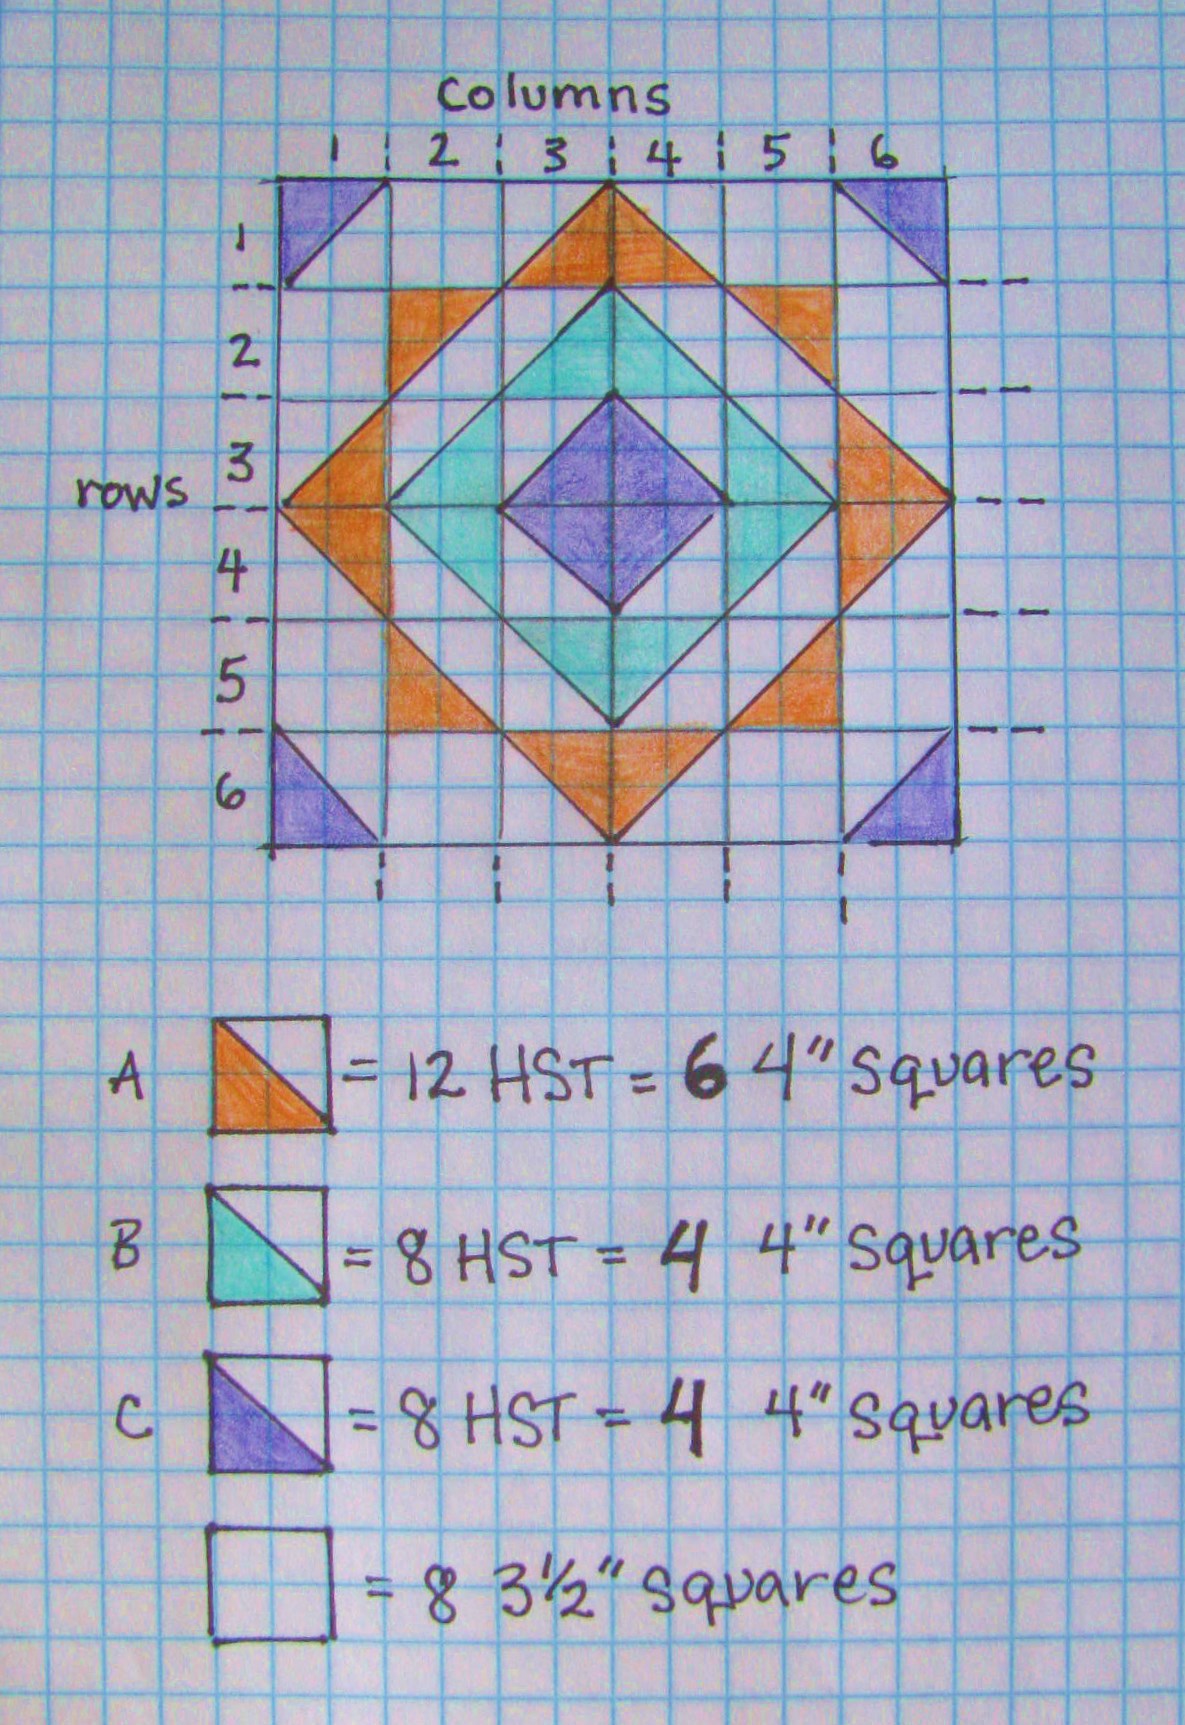
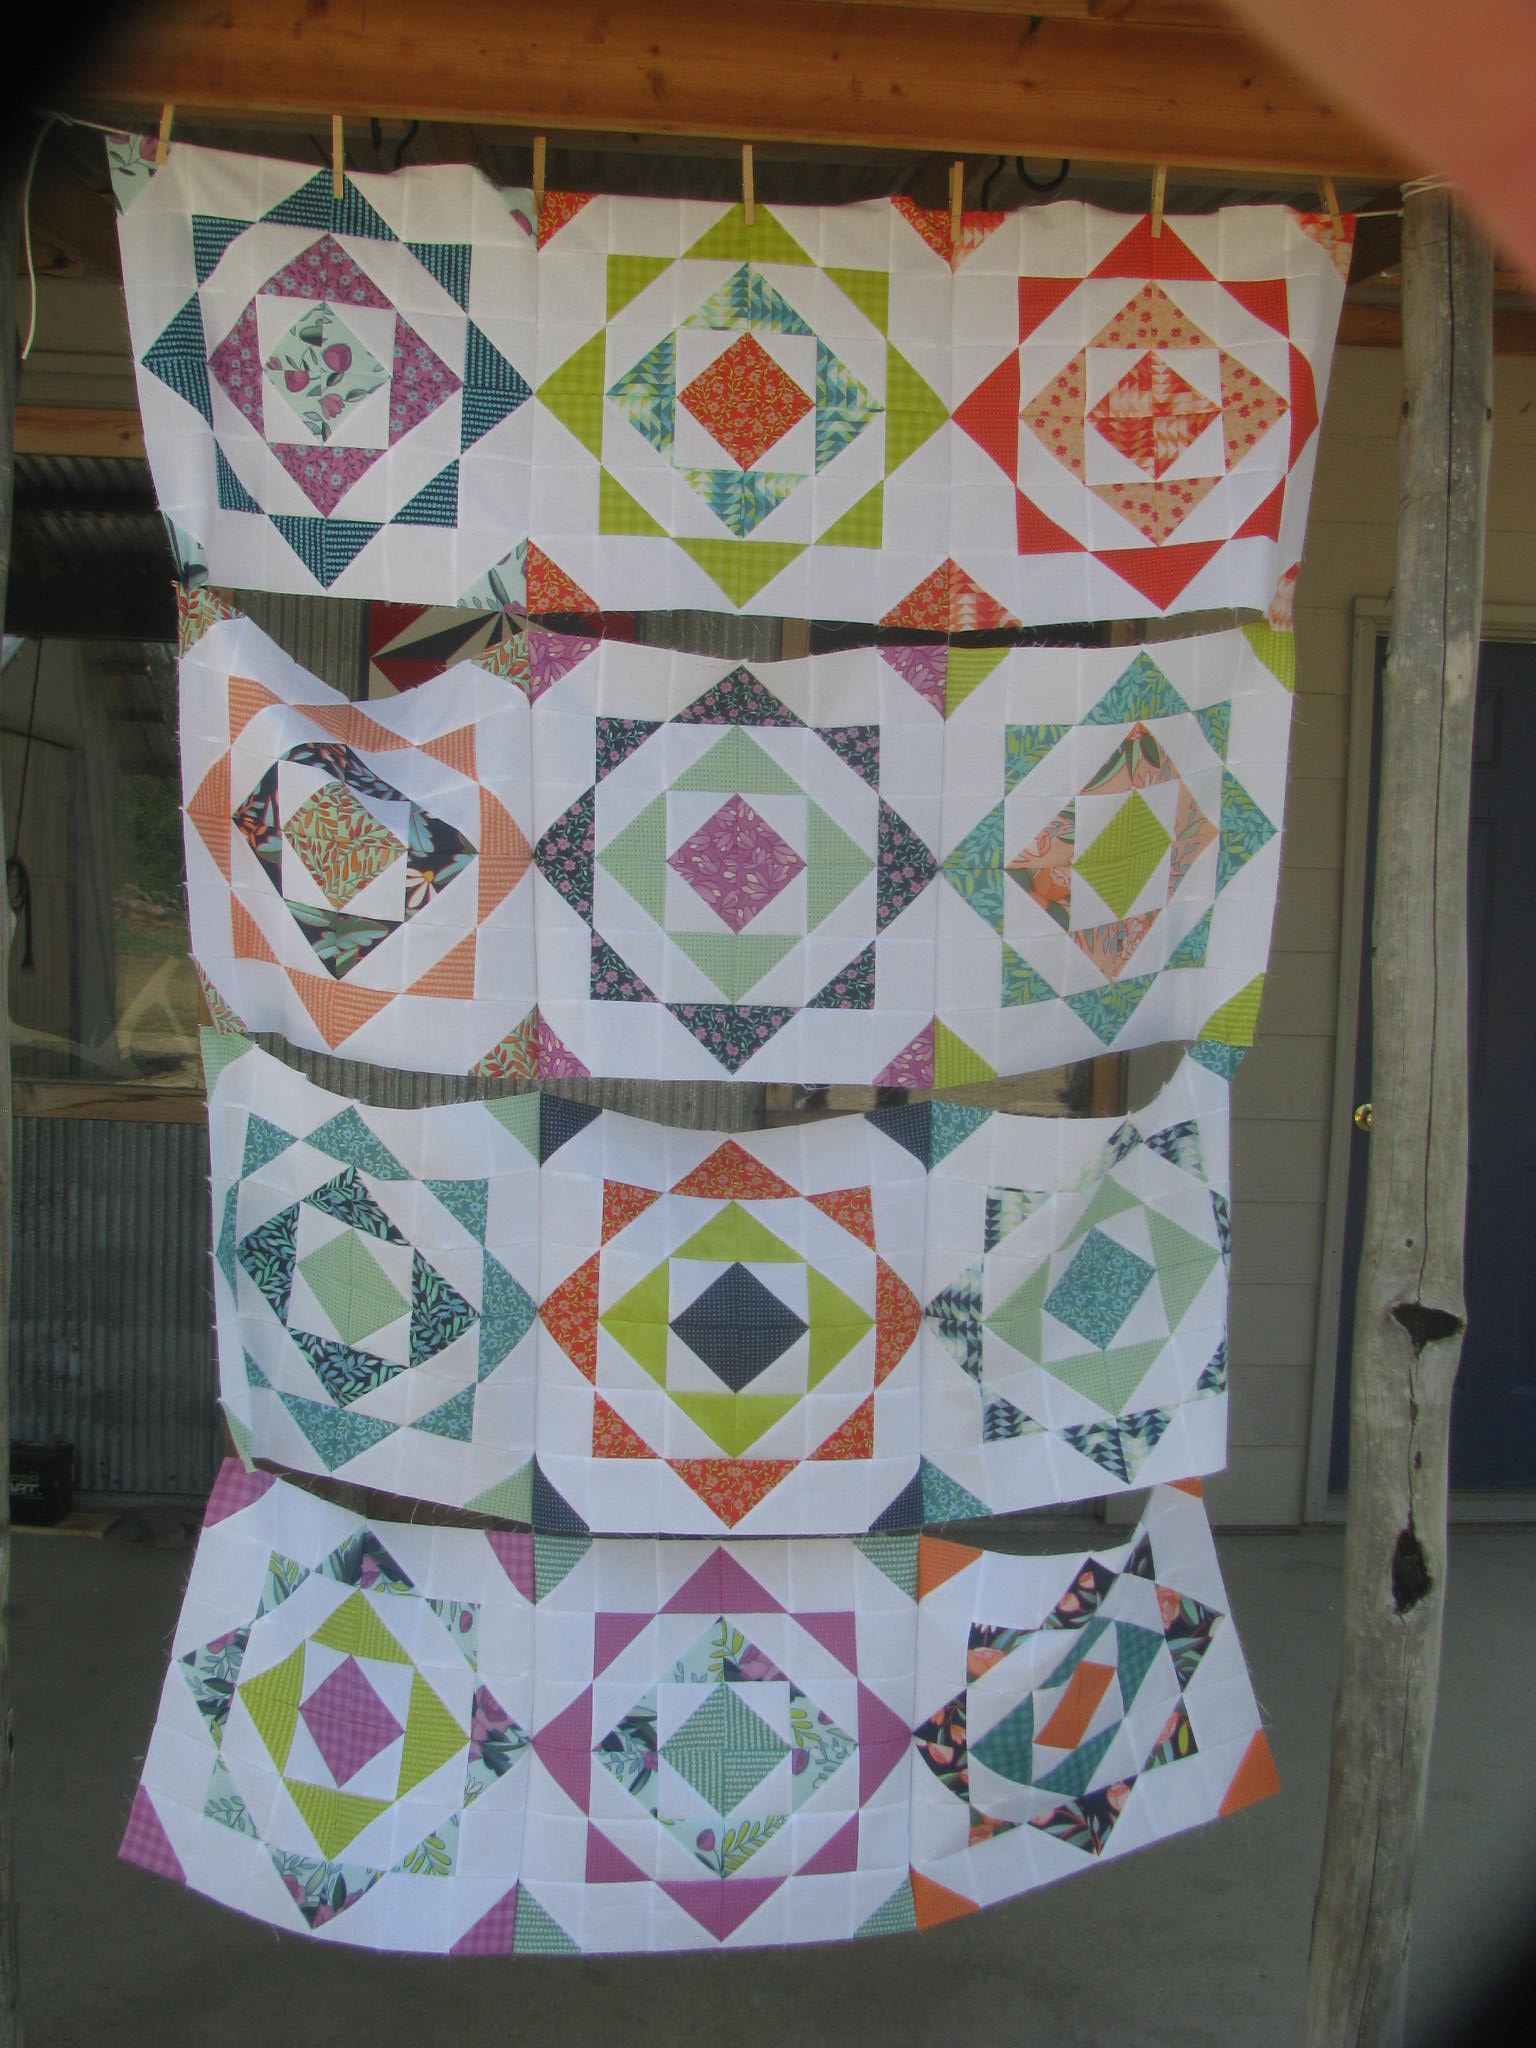
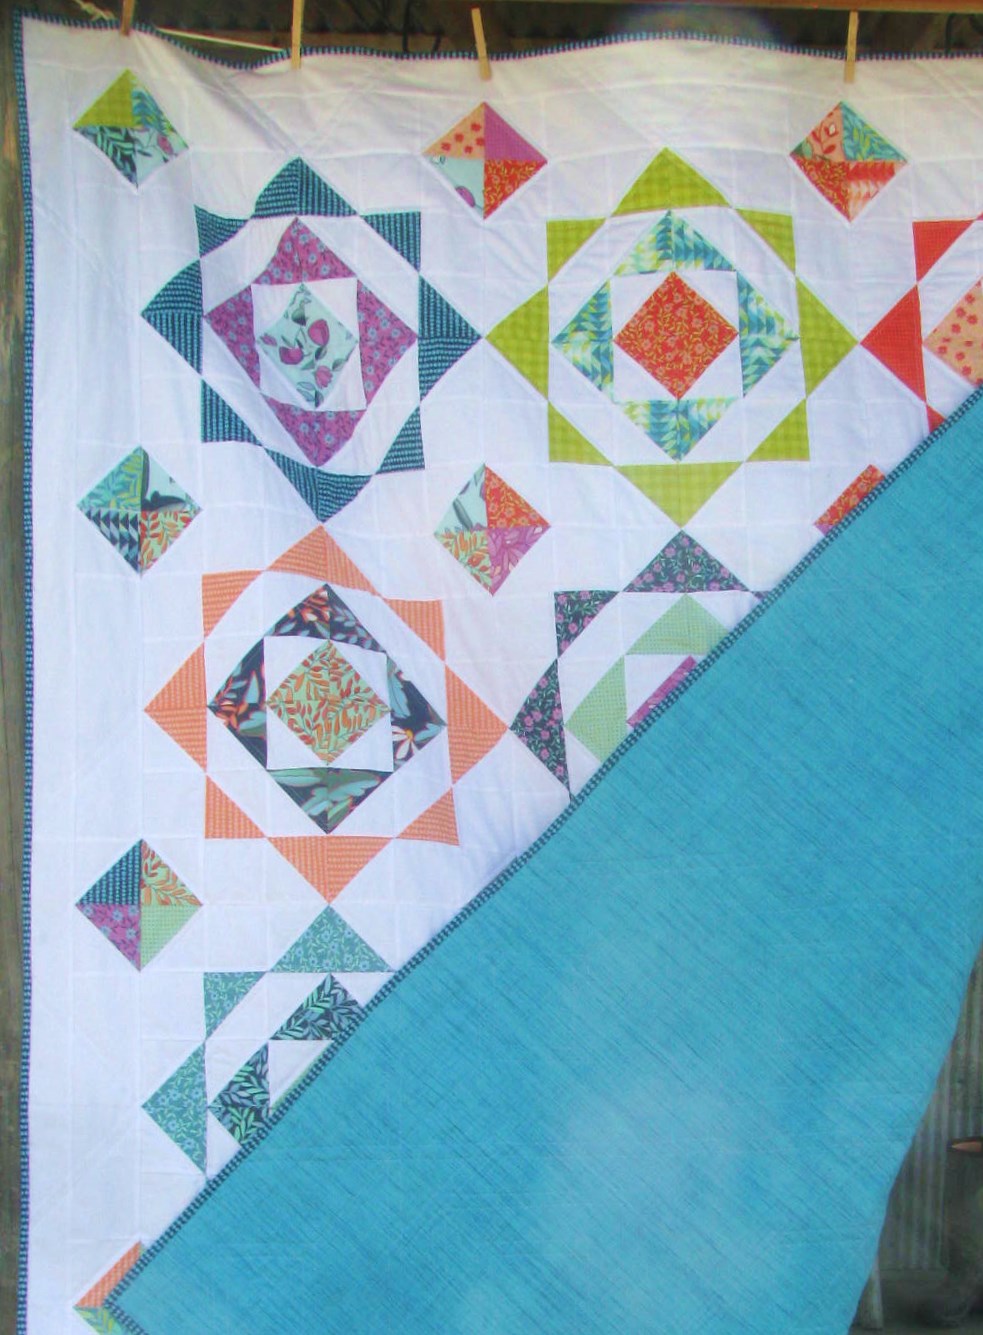
For our Prairie Rose Garden quilt, we are making 12 18" Prairie rose blocks, and a simple pieced border, with an additional 2" border all around.
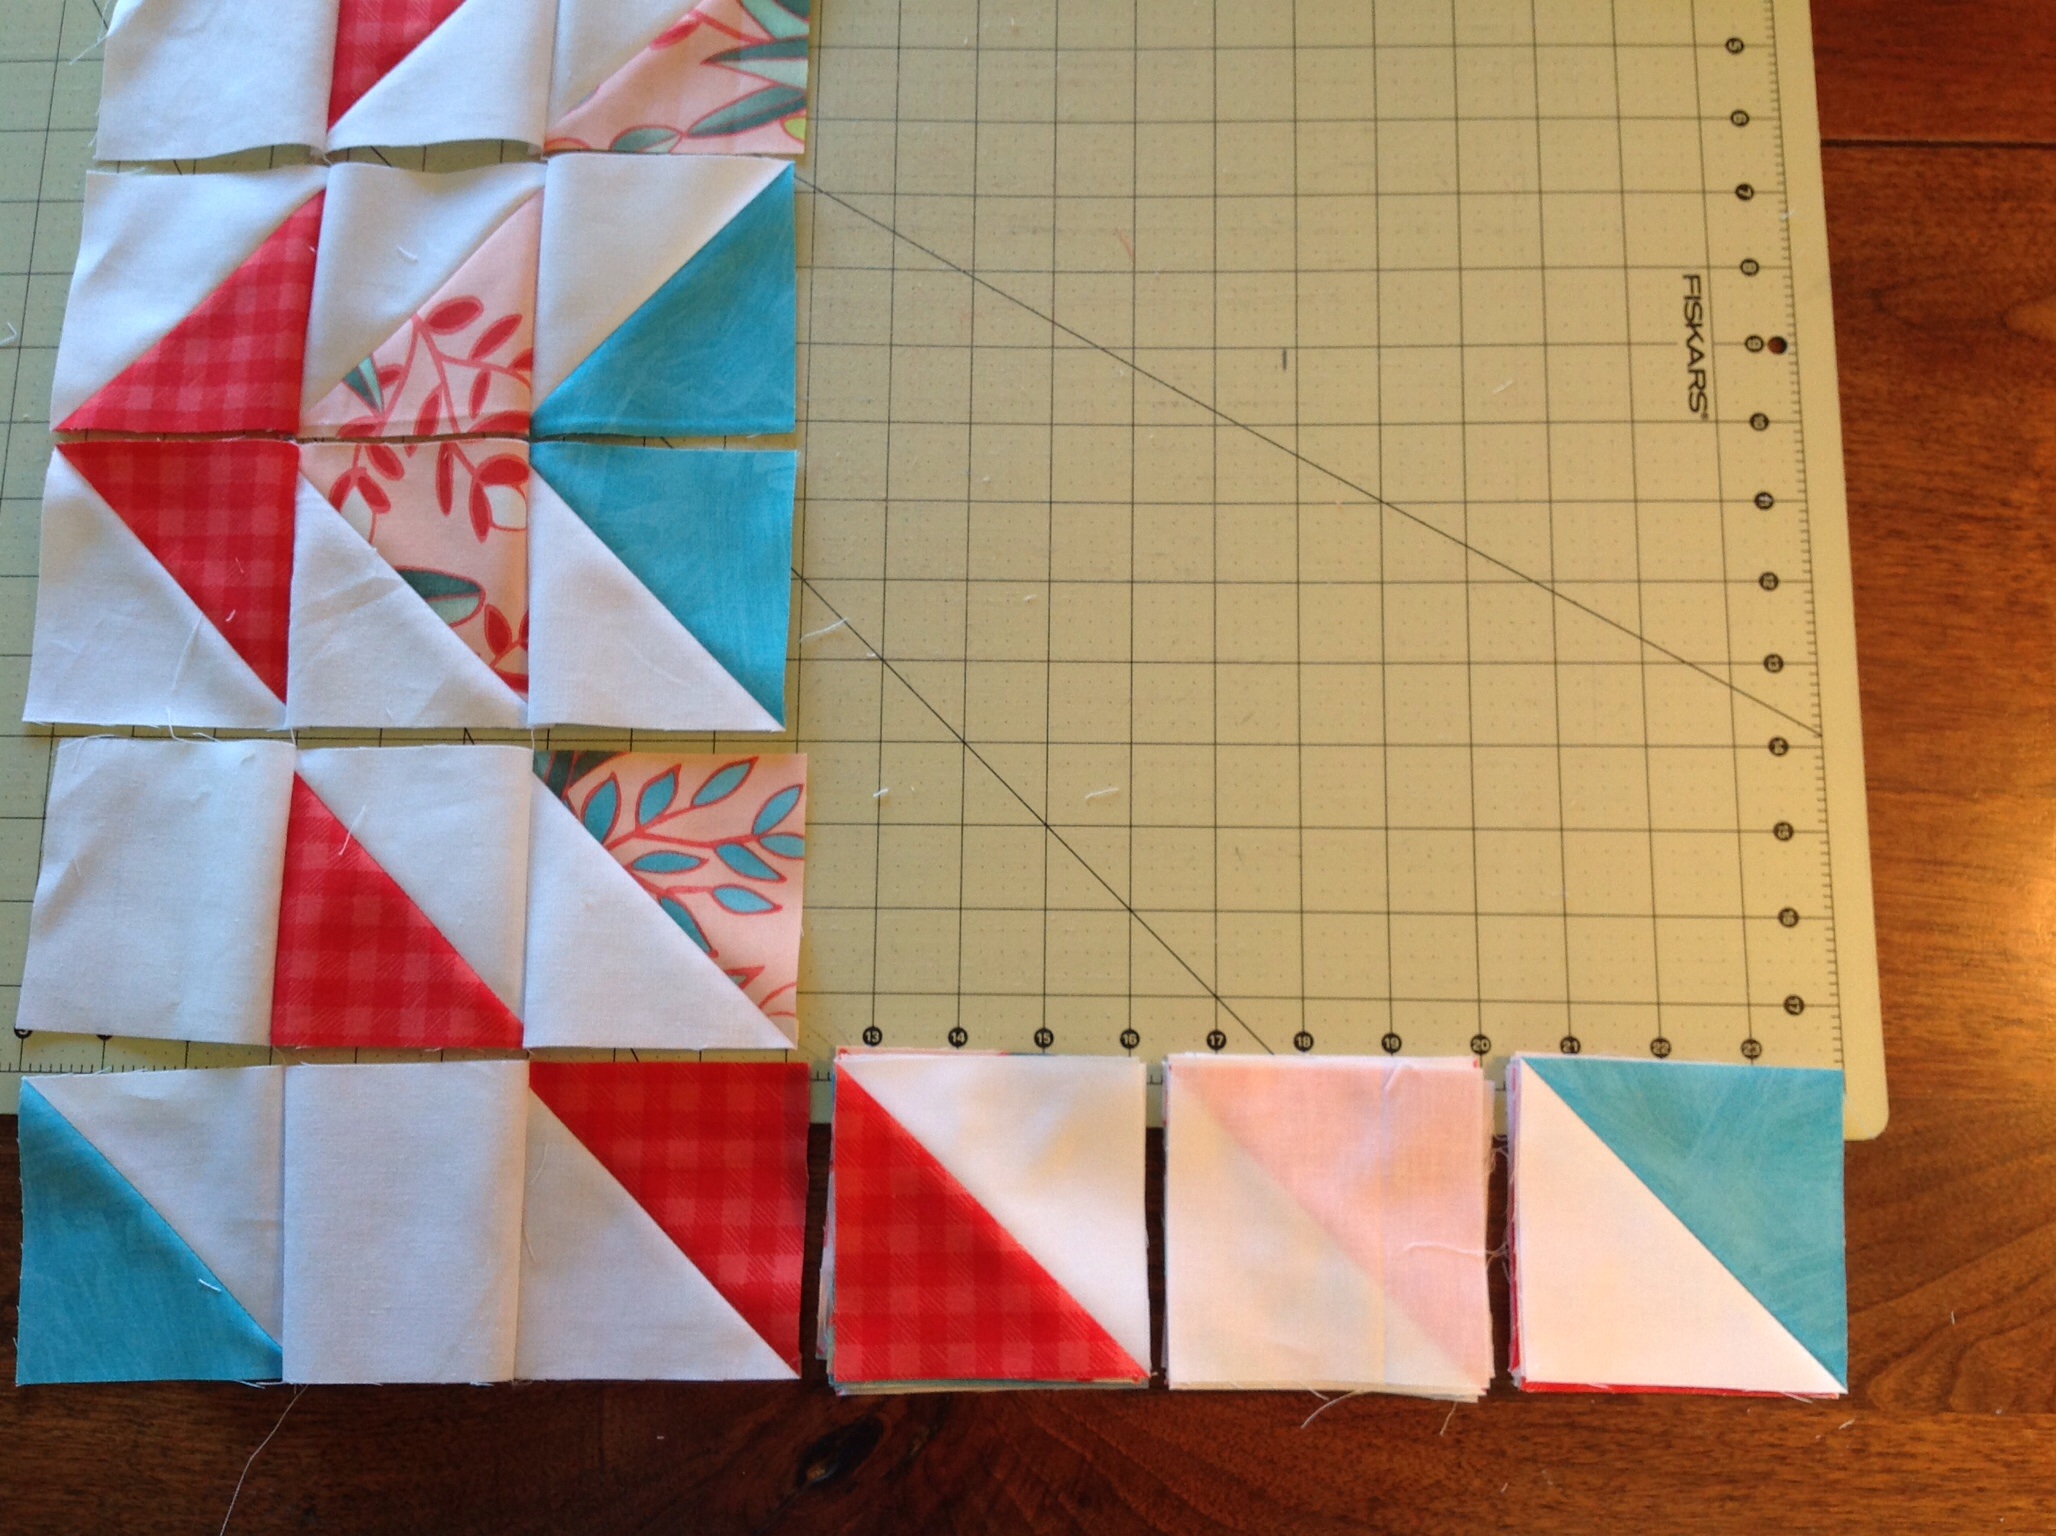
Each block is a 36-patch block comprised of 28 Half Square Triangles (HSTs) and 8 white squares.
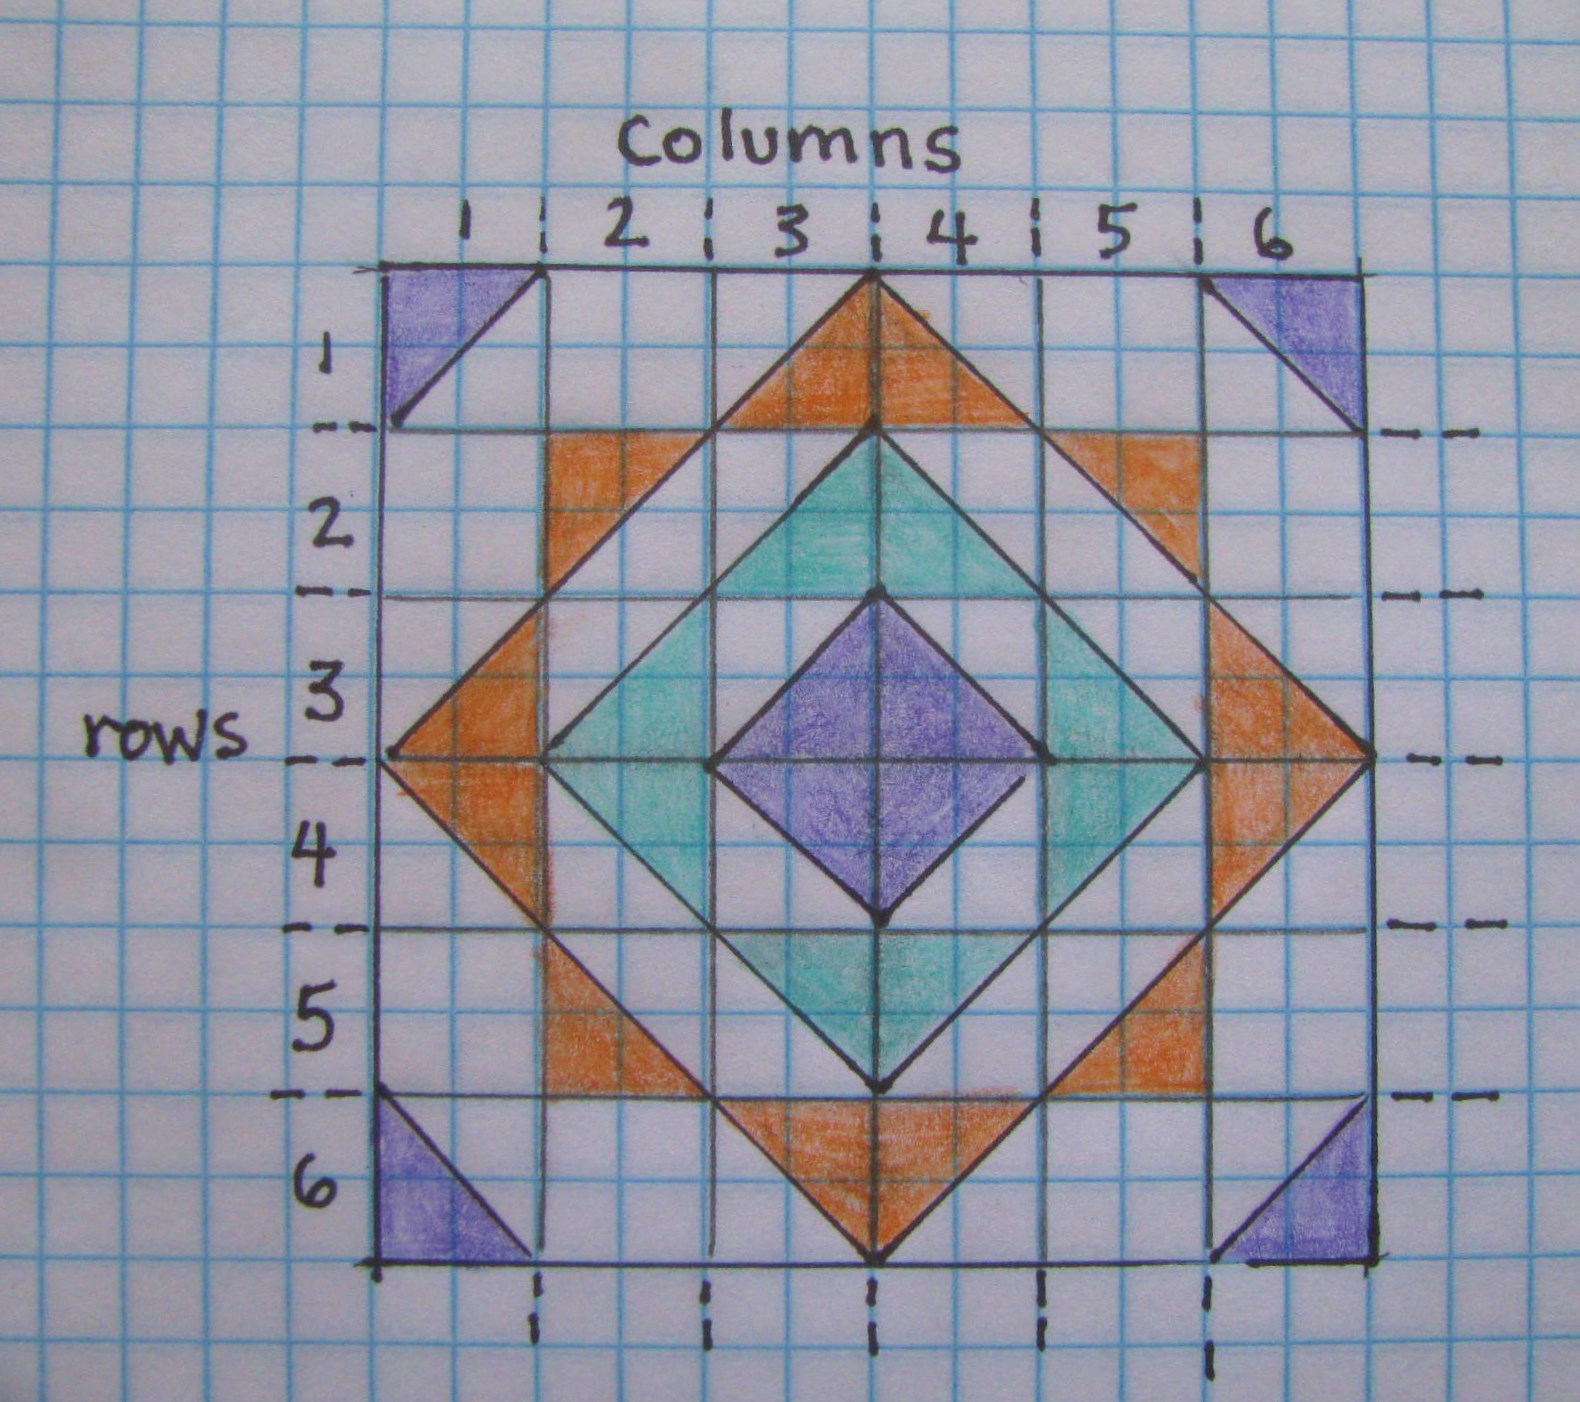
Each "Rose" has a "center", C; "middle", B; and "outer", A, and 4 HST corners, also C, that make the "stepping stones" when all the blocks are joined together. The pieced border, that completes the outer "stepping stones" requires an additional 32 random HSTs.
Cutting Instructions:
From Bella White yardage:
- for HSTs: Cut 19 strips 4" x WOF (Width Of Fabric). Subcut 10 4" squares from 18 of the strips and 4 4" squares from the last strip. Total 184 4" squares. With pencil and straight-edge, mark ALL these on one diagonal.
- for Background Squares: Cut 8 strips 3 1/2" x WOF. Subcut 12 3 1/2" squares per strip. Total 96 3 1/2" squares.
- for Pieced Border: Cut 5 strips 3 1/2" x WOF. Subcut 3 3 1/2" x 12 1/2" rectangles per strip. Total 15, use 14.
- for Additional White Border: Cut 8 strips 2 1/2" x WOF. Sew into 4 pairs, joined at the short ends.
That was the easy part, now for the FUN part!
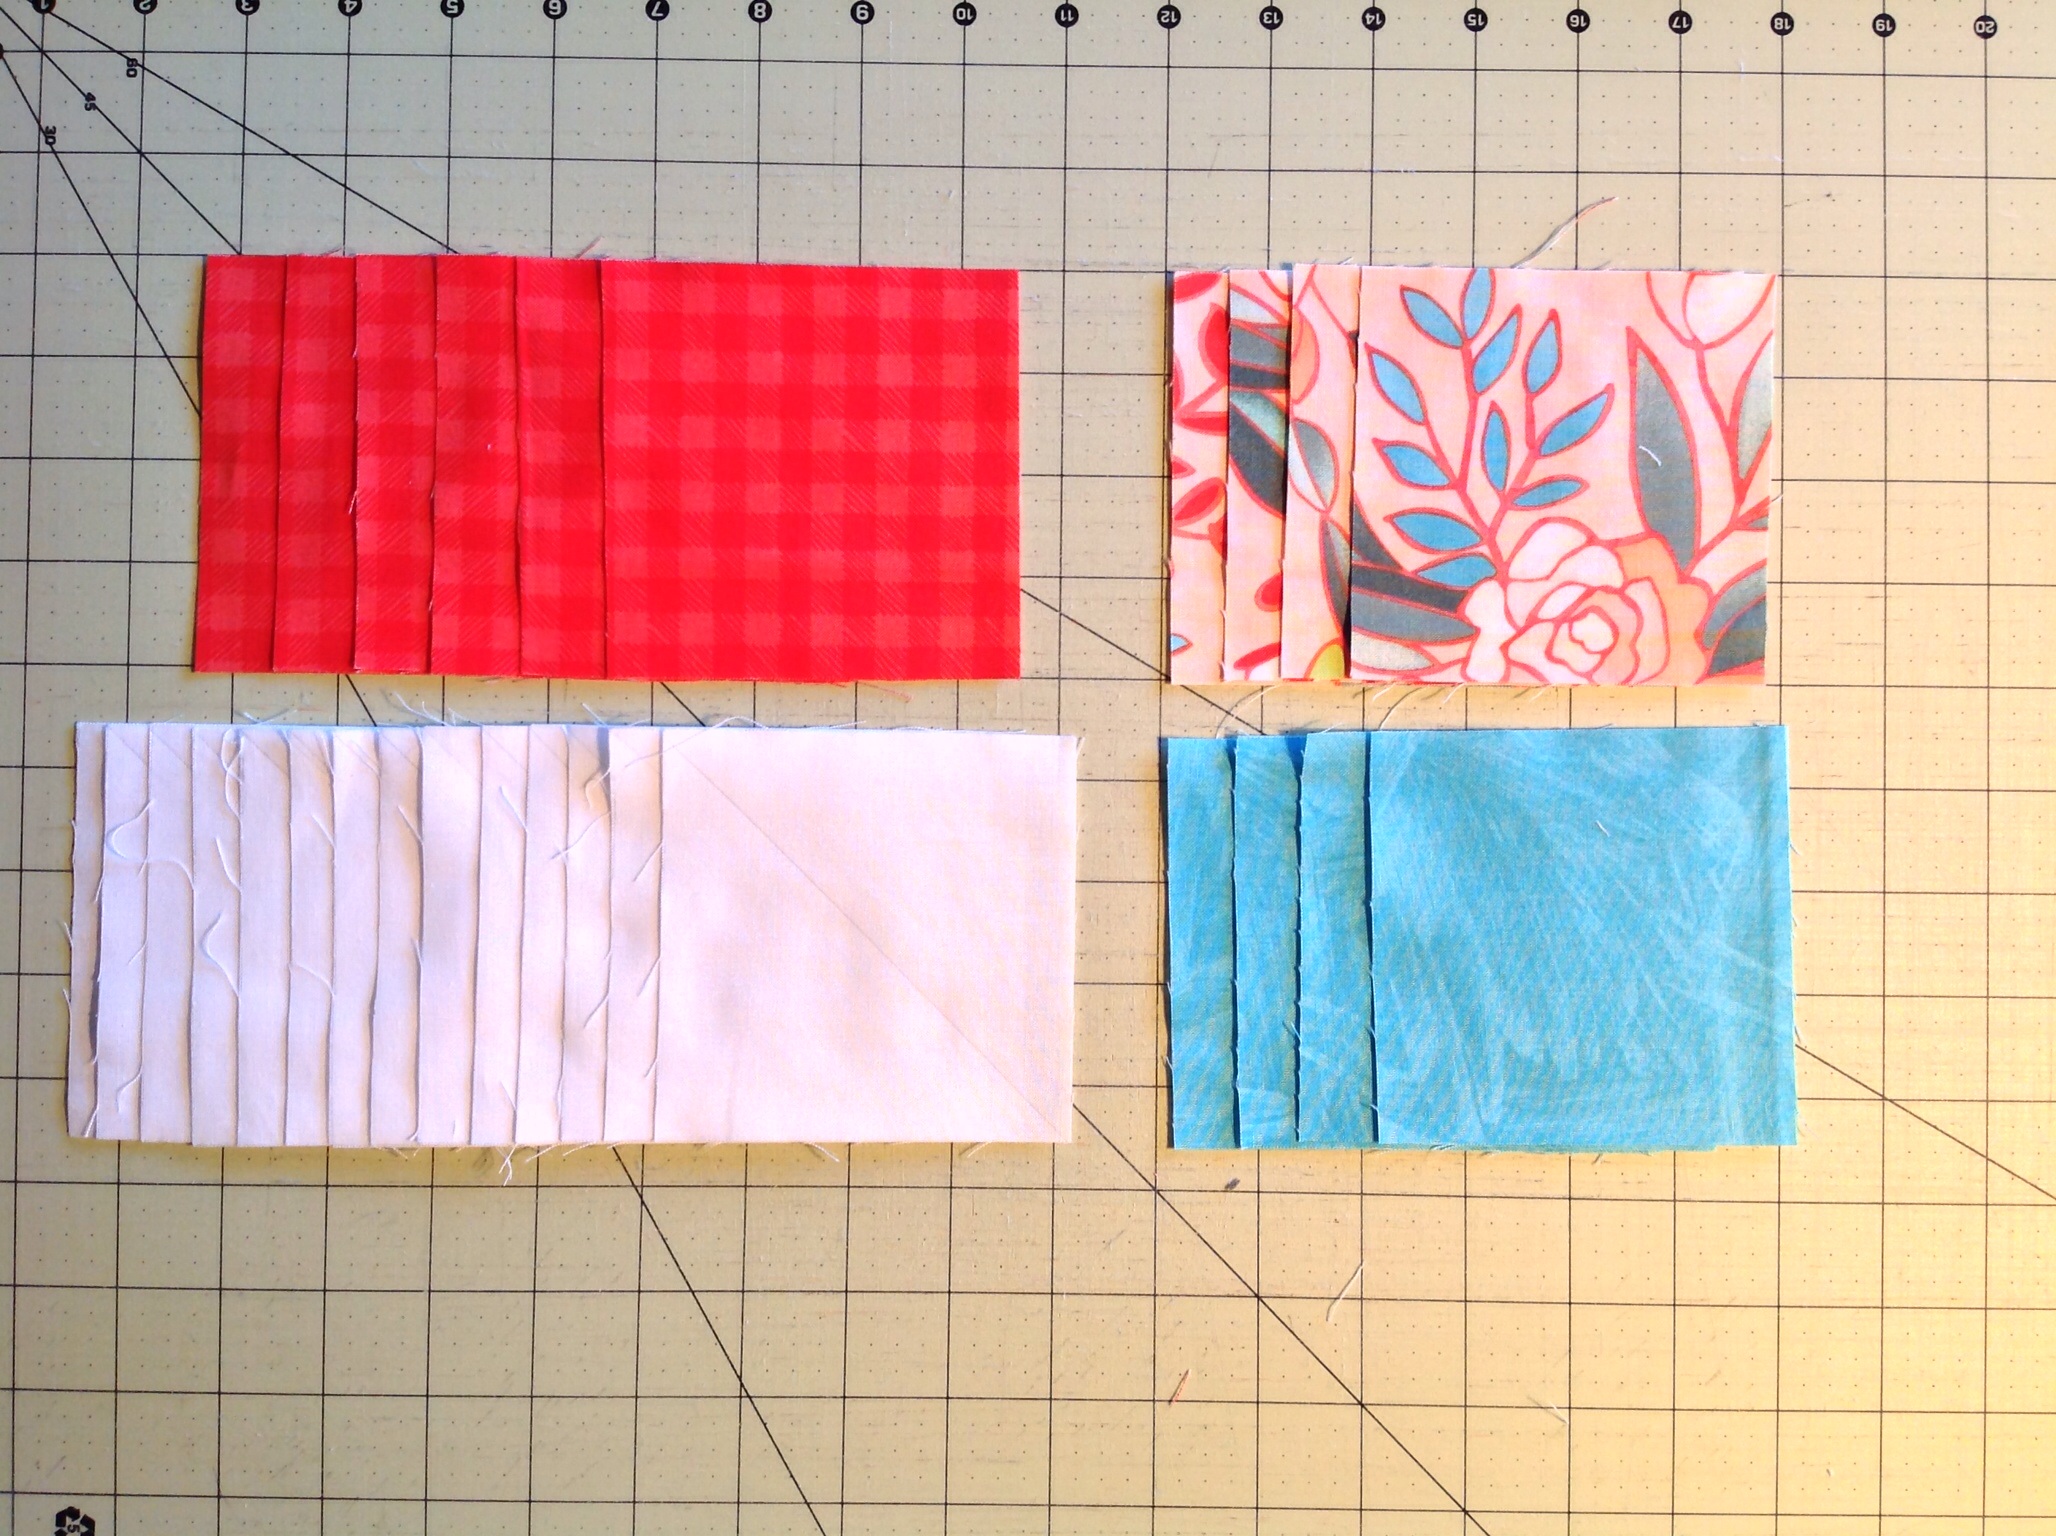
Our Prairie Rose Garden has 12 roses that each require a combination of 3 fabrics. The cutting for these is easy, but a bit messy as you choose your combinations. Rather than planning out all 12 combinations at one time, begin with 2-3 combinations, and cut them, then you are able to use some of those same fabrics in other combinations. So with that part of the process in mind, and referring to the diagram, here are the cutting instructions for each block, as you decide on each combination:
Fabric A: Cut 2 strips 4" x 21" (width of FQ). Subcut 1 strip into 5 4" squares, and 1 4" square from the second strip.
Fabric B: Cut 1 strip 4" x 21". Subcut into 5 4" squares, use 4.
Fabric C: Cut 1 strip 4" x 21". Subcut into 5 4" squares, use 4.
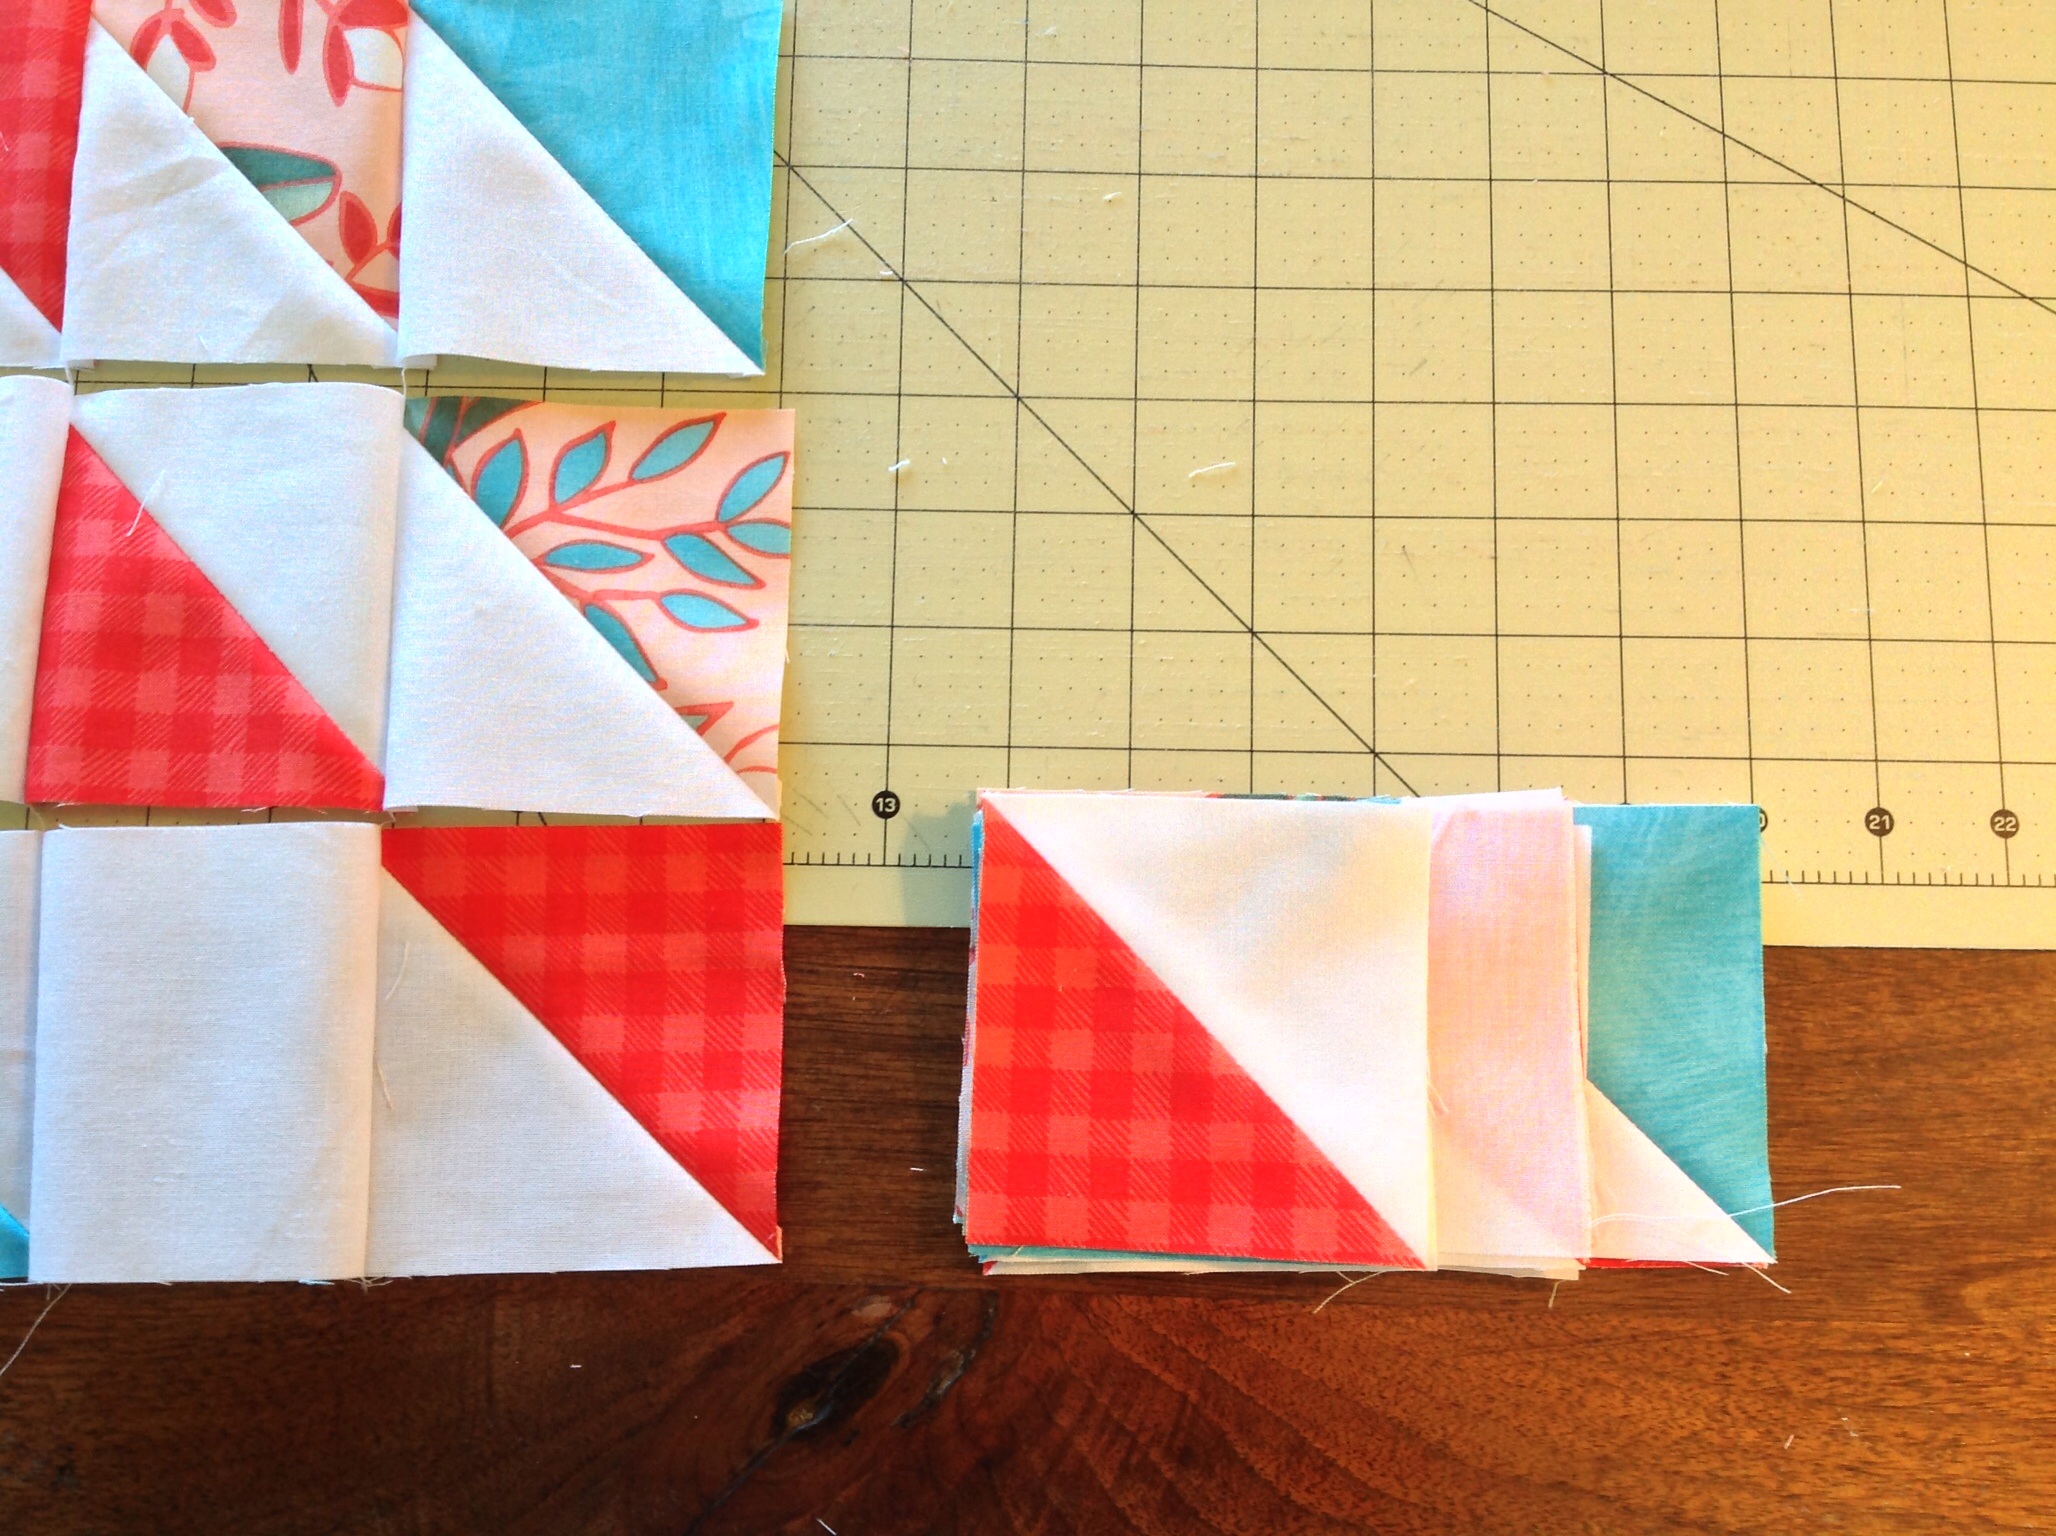
As you will see, there will be extra squares and partial strips as you cut, aiding you as you choose the rest of your block combinations. Also keep in mind as you accumulate extra squares that the pieced border requires 16 random squares of your choosing, which will result in 32 HSTs.

Separate the 4" white squares into 12 short stacks of 14 each, which leaves one more short stack of 16 for the border squares. Separate the 3 1/2" white squares into short stacks of 8 each.
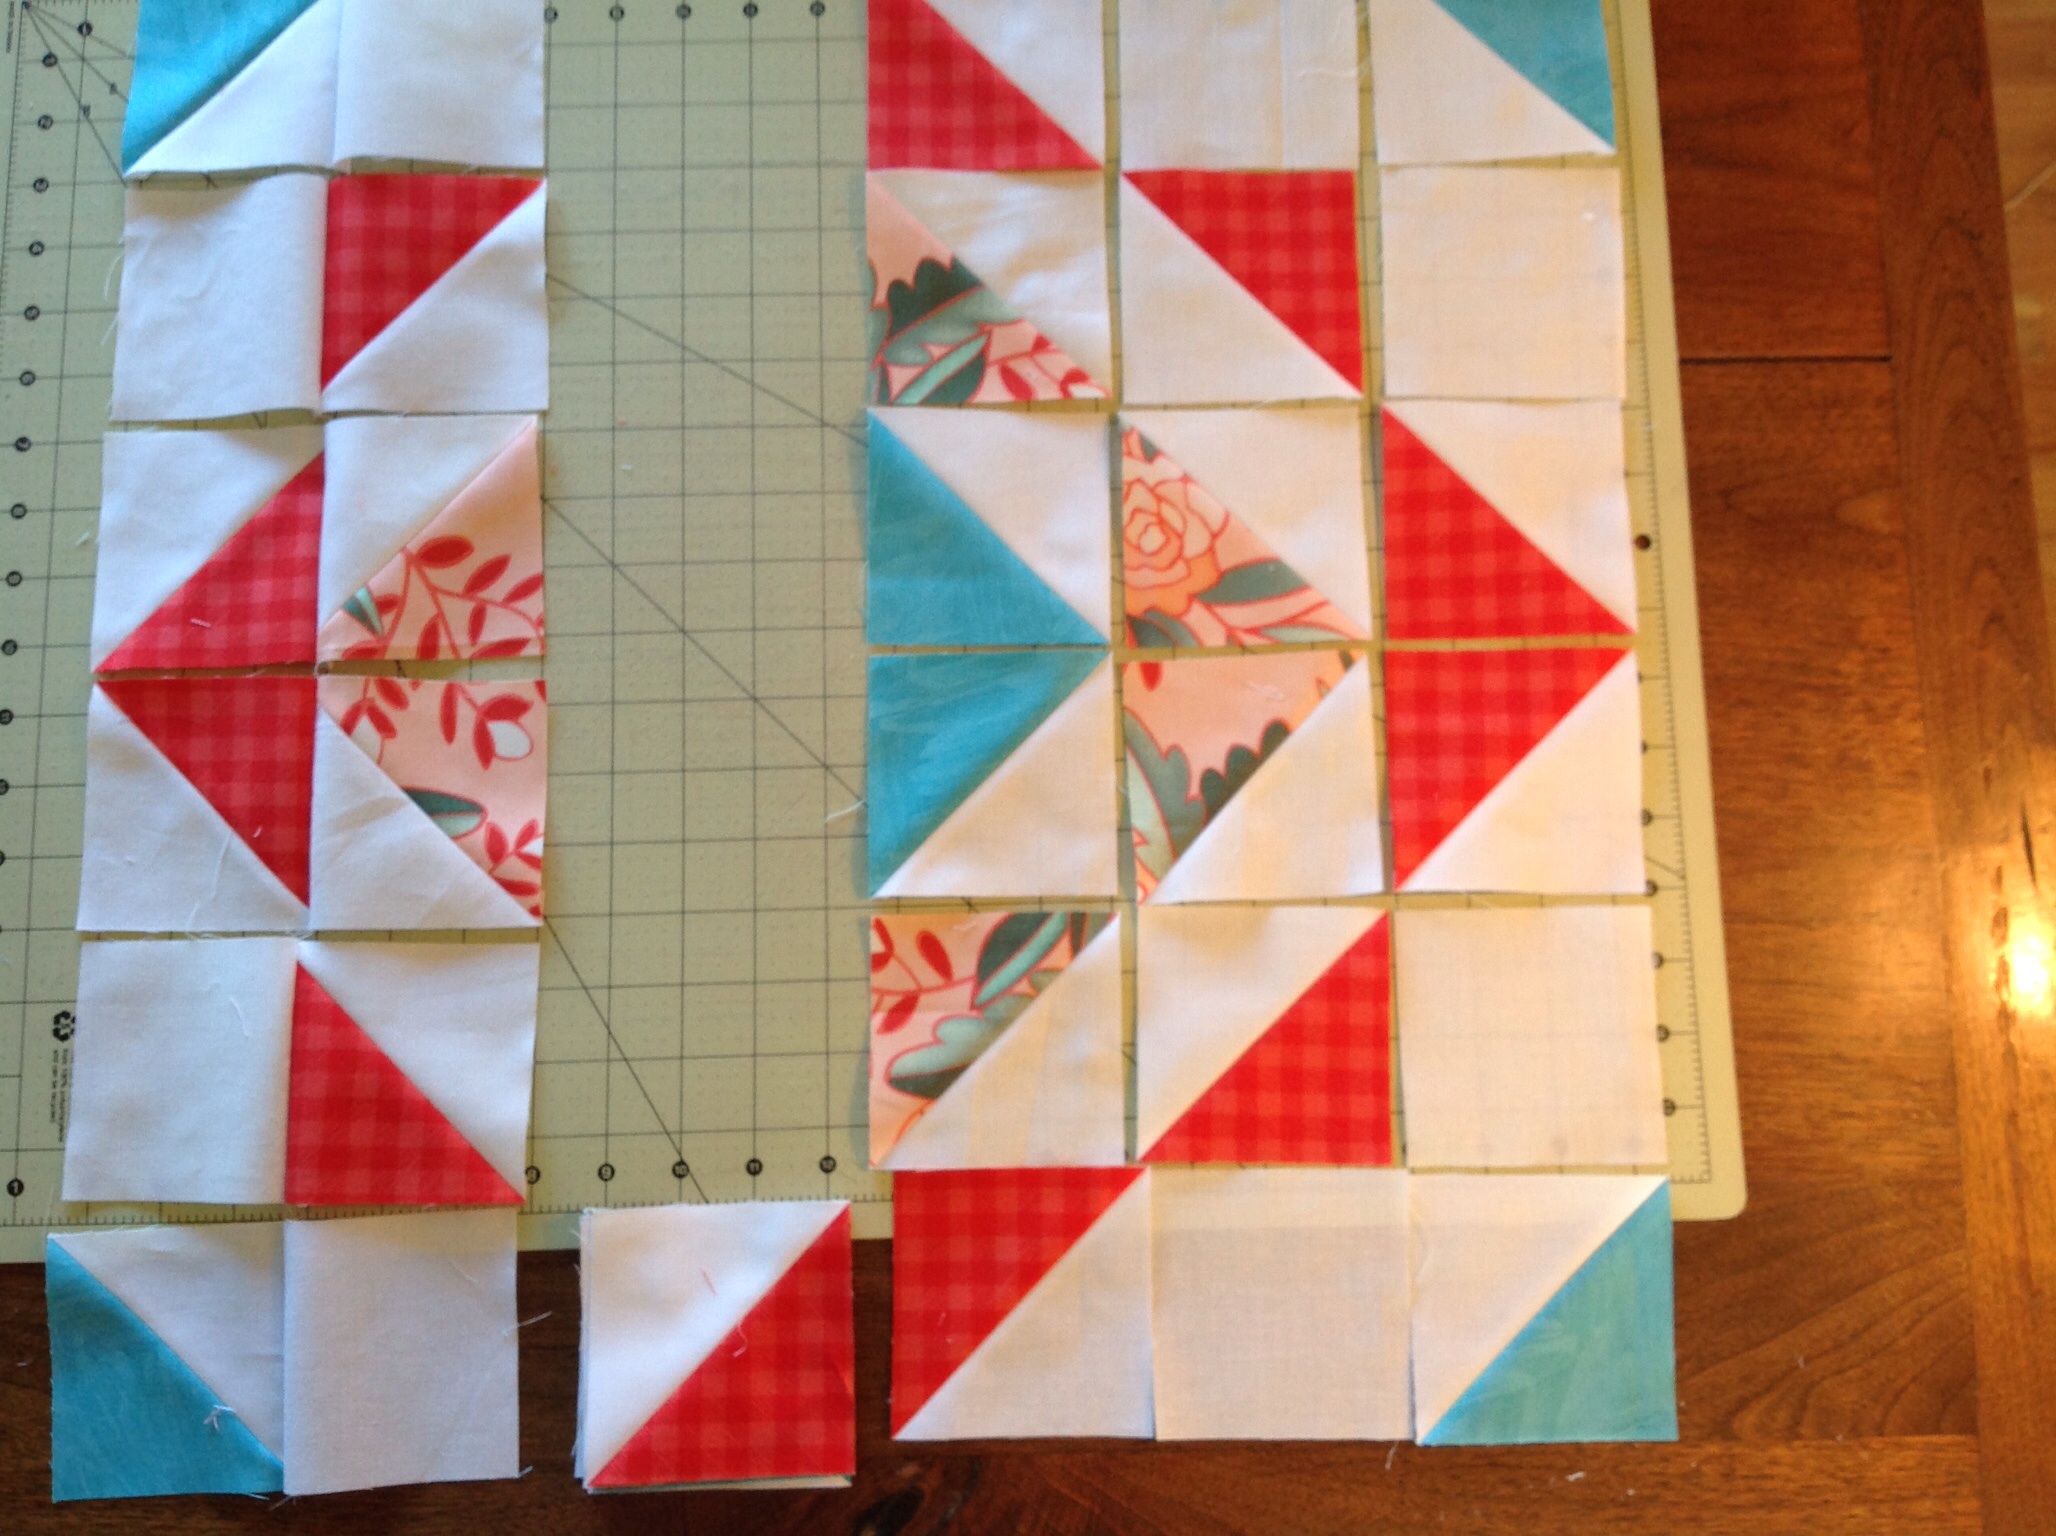
HST and Block Construction:
This pattern is all about Half Square Triangles. I found it helpful to breakdown the HST/block construction into smaller bites of 2-3 blocks at a time so as to not be overwhelmed with 300+ HSTs to make and trim before moving on to the gratification of seeing the blocks completed!
Step 1: Taking one stack of 4" white squares and one block's worth of print squares:
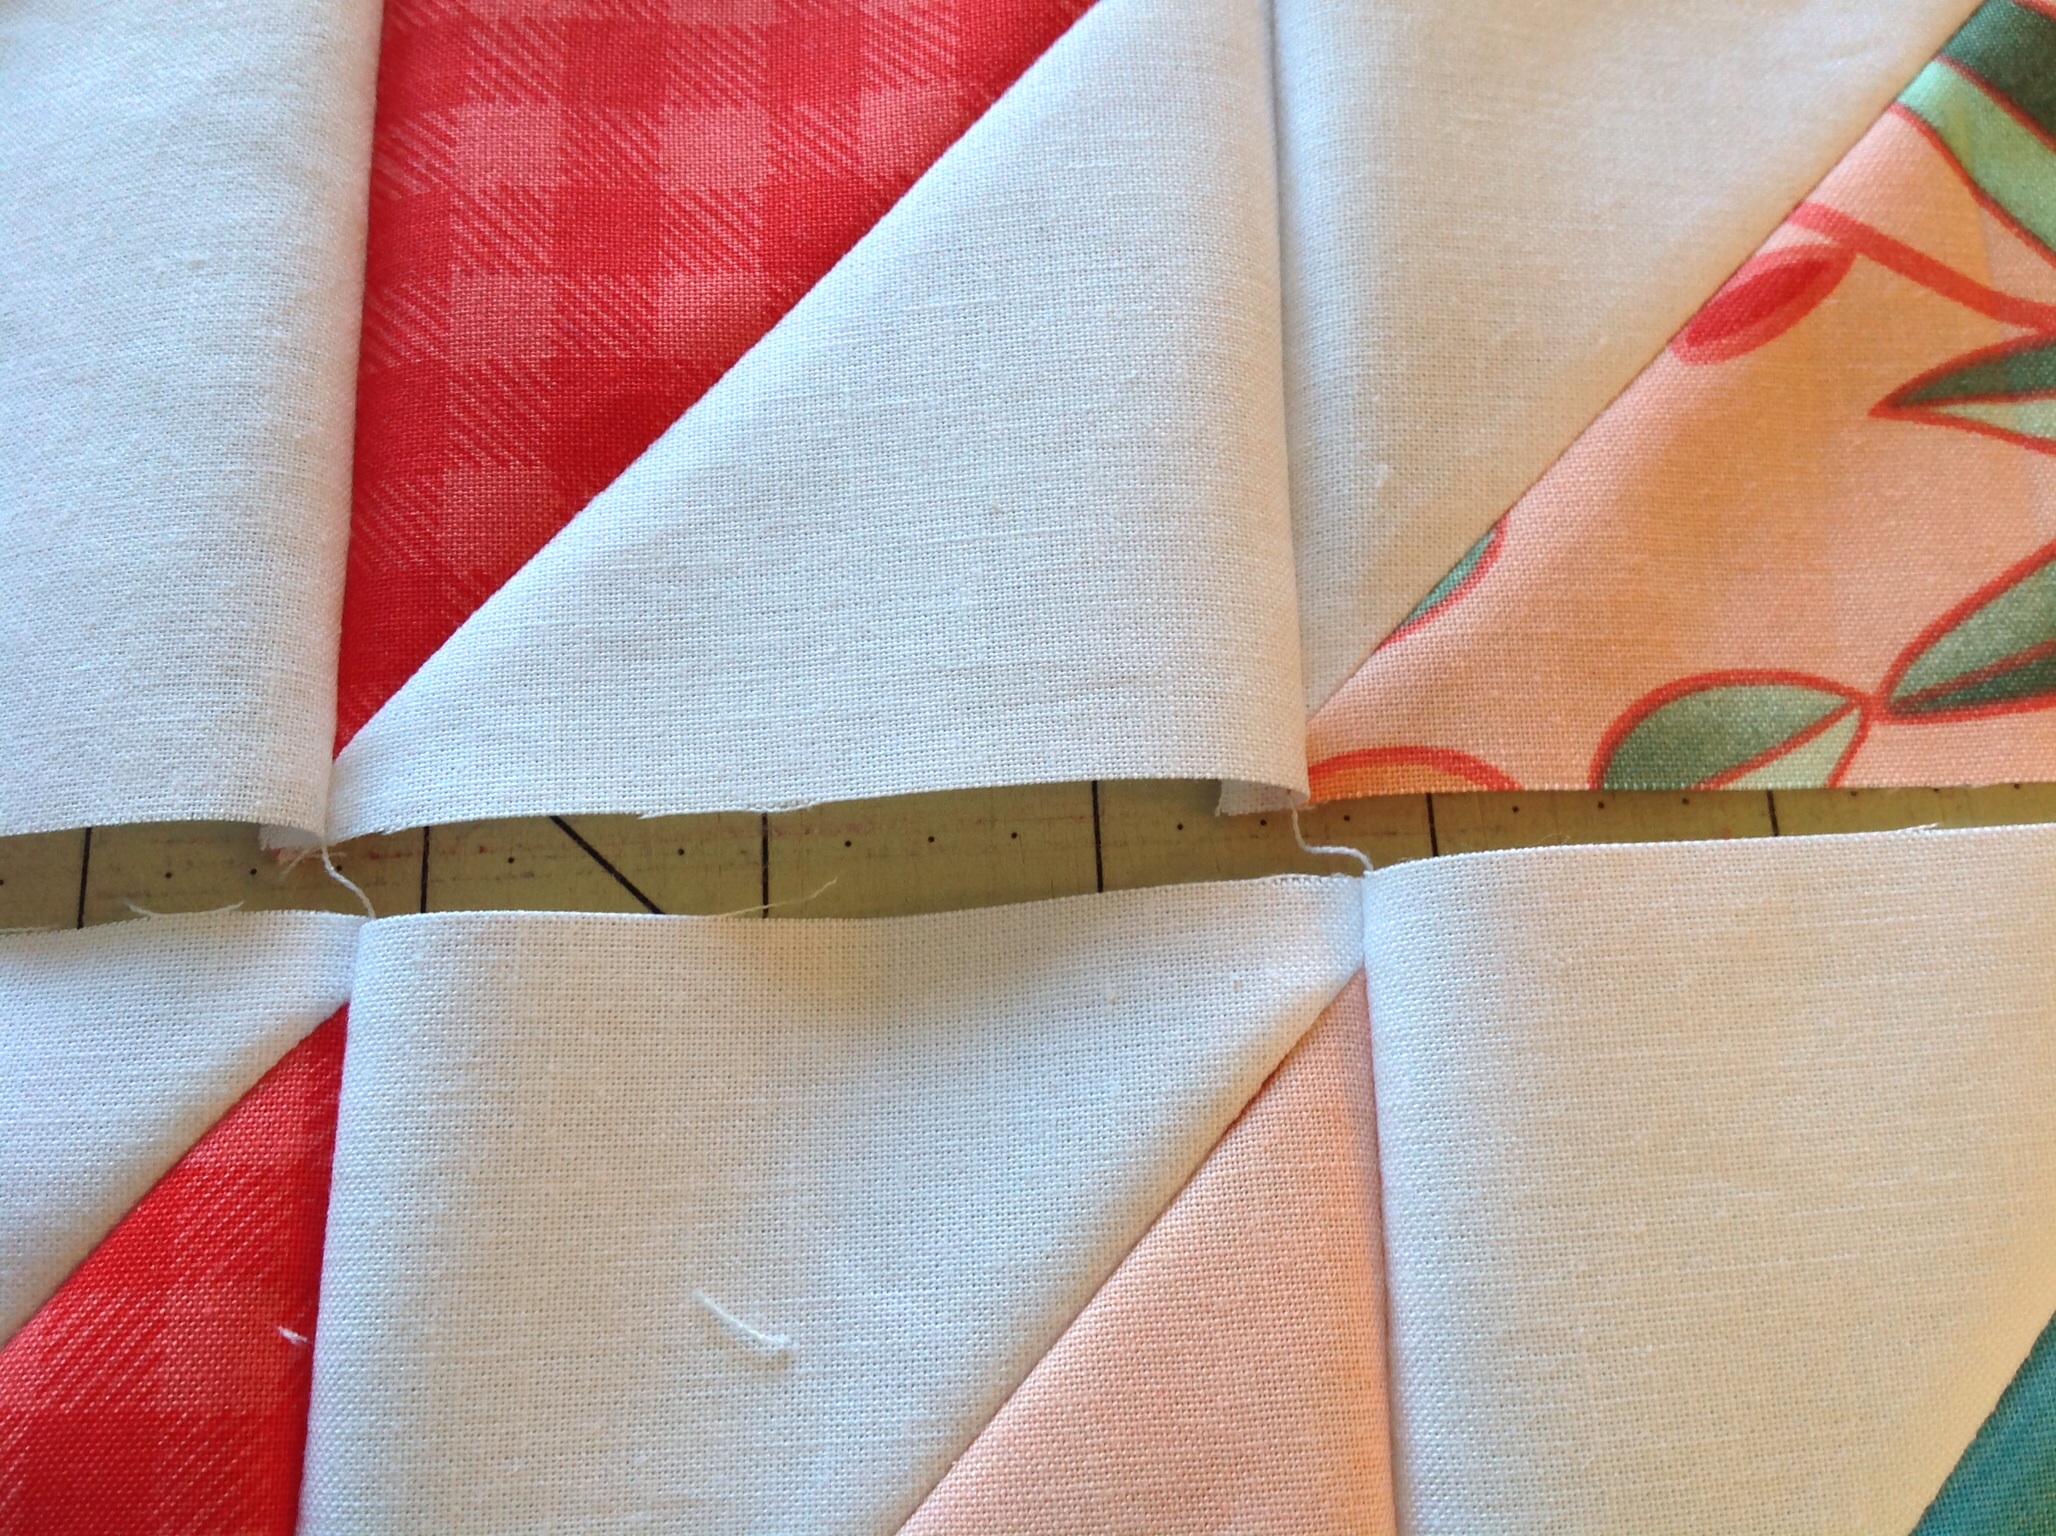
Pair one 4" white square with each 4" print square, right sides together, chain piece as you stitch 1/4" from the drawn diagonal line on each white square. Without clipping the connecting threads, stitch 1/4" on the other side of the line. Press. Snip the connecting threads and cut on the diagonal line. Press the resulting HSTs open and trim to 3 1/2".

Bring 3 blocks up to this point so you have all the HSTs for 3 blocks made and trimmed ready to assemble into blocks.

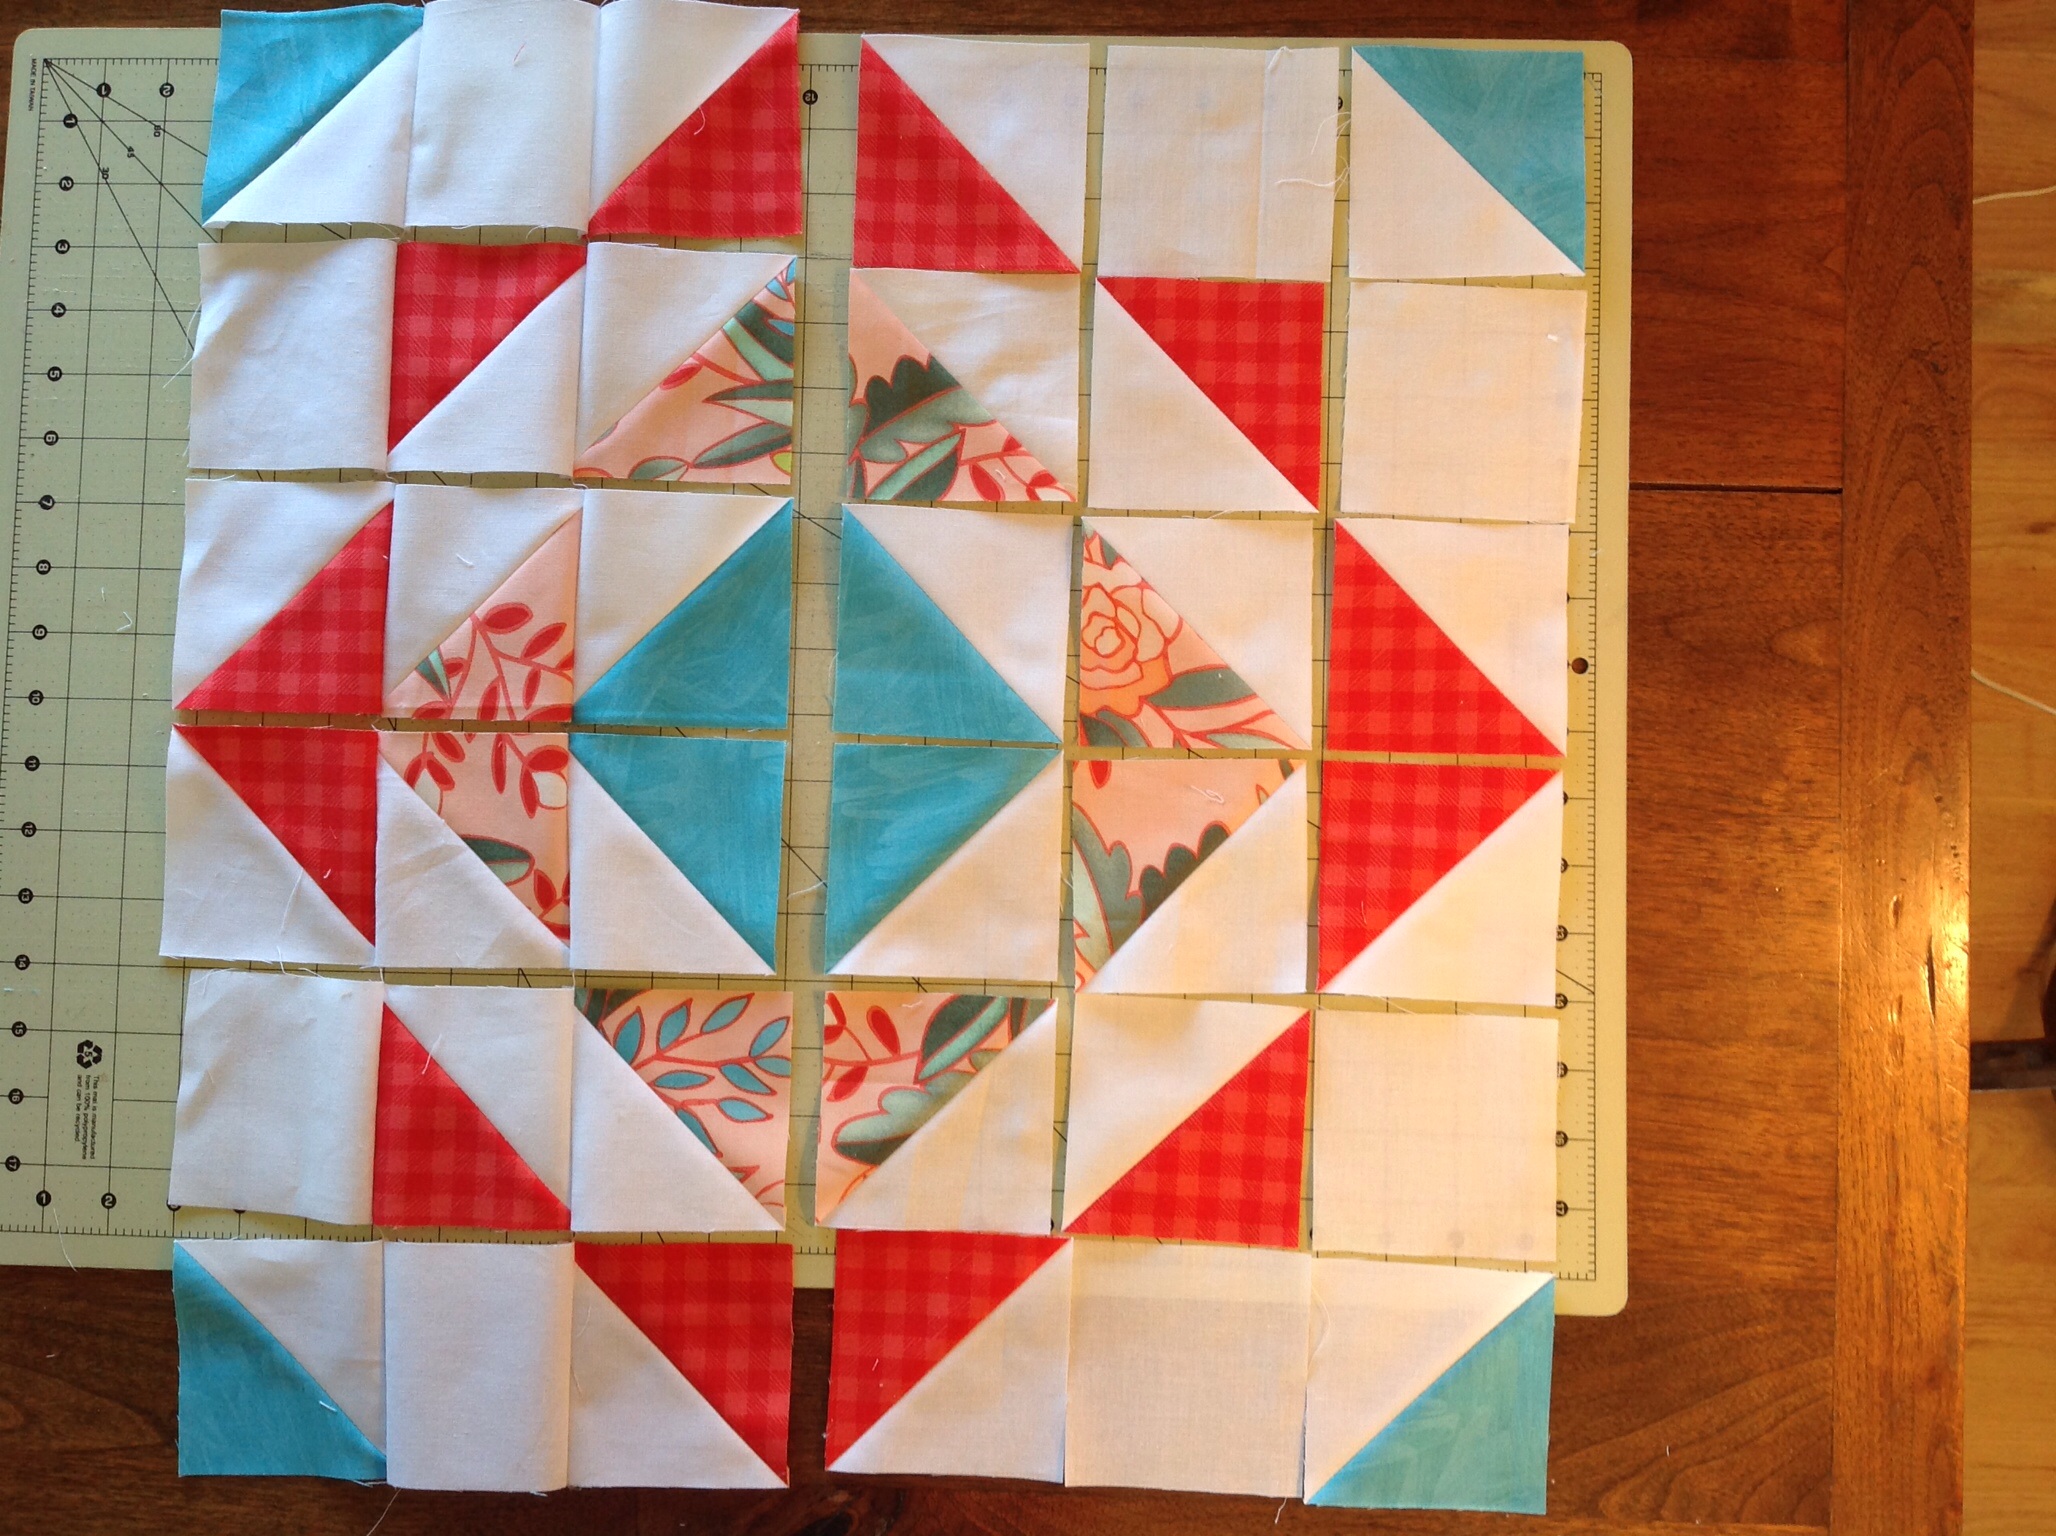
Step 2: Block Construction
Lay out block according to the block diagram, adding the 8 3 1/2" white squares to the HSTs.

"Flip" column 2 units over onto column 1 units, so they are right sides together. Chain piece together along right edge, using 1/4" seam allowance.


Continue to column 3, stacking the units in top (row 1) to bottom (row 6) order. Chain piece to the first columns.
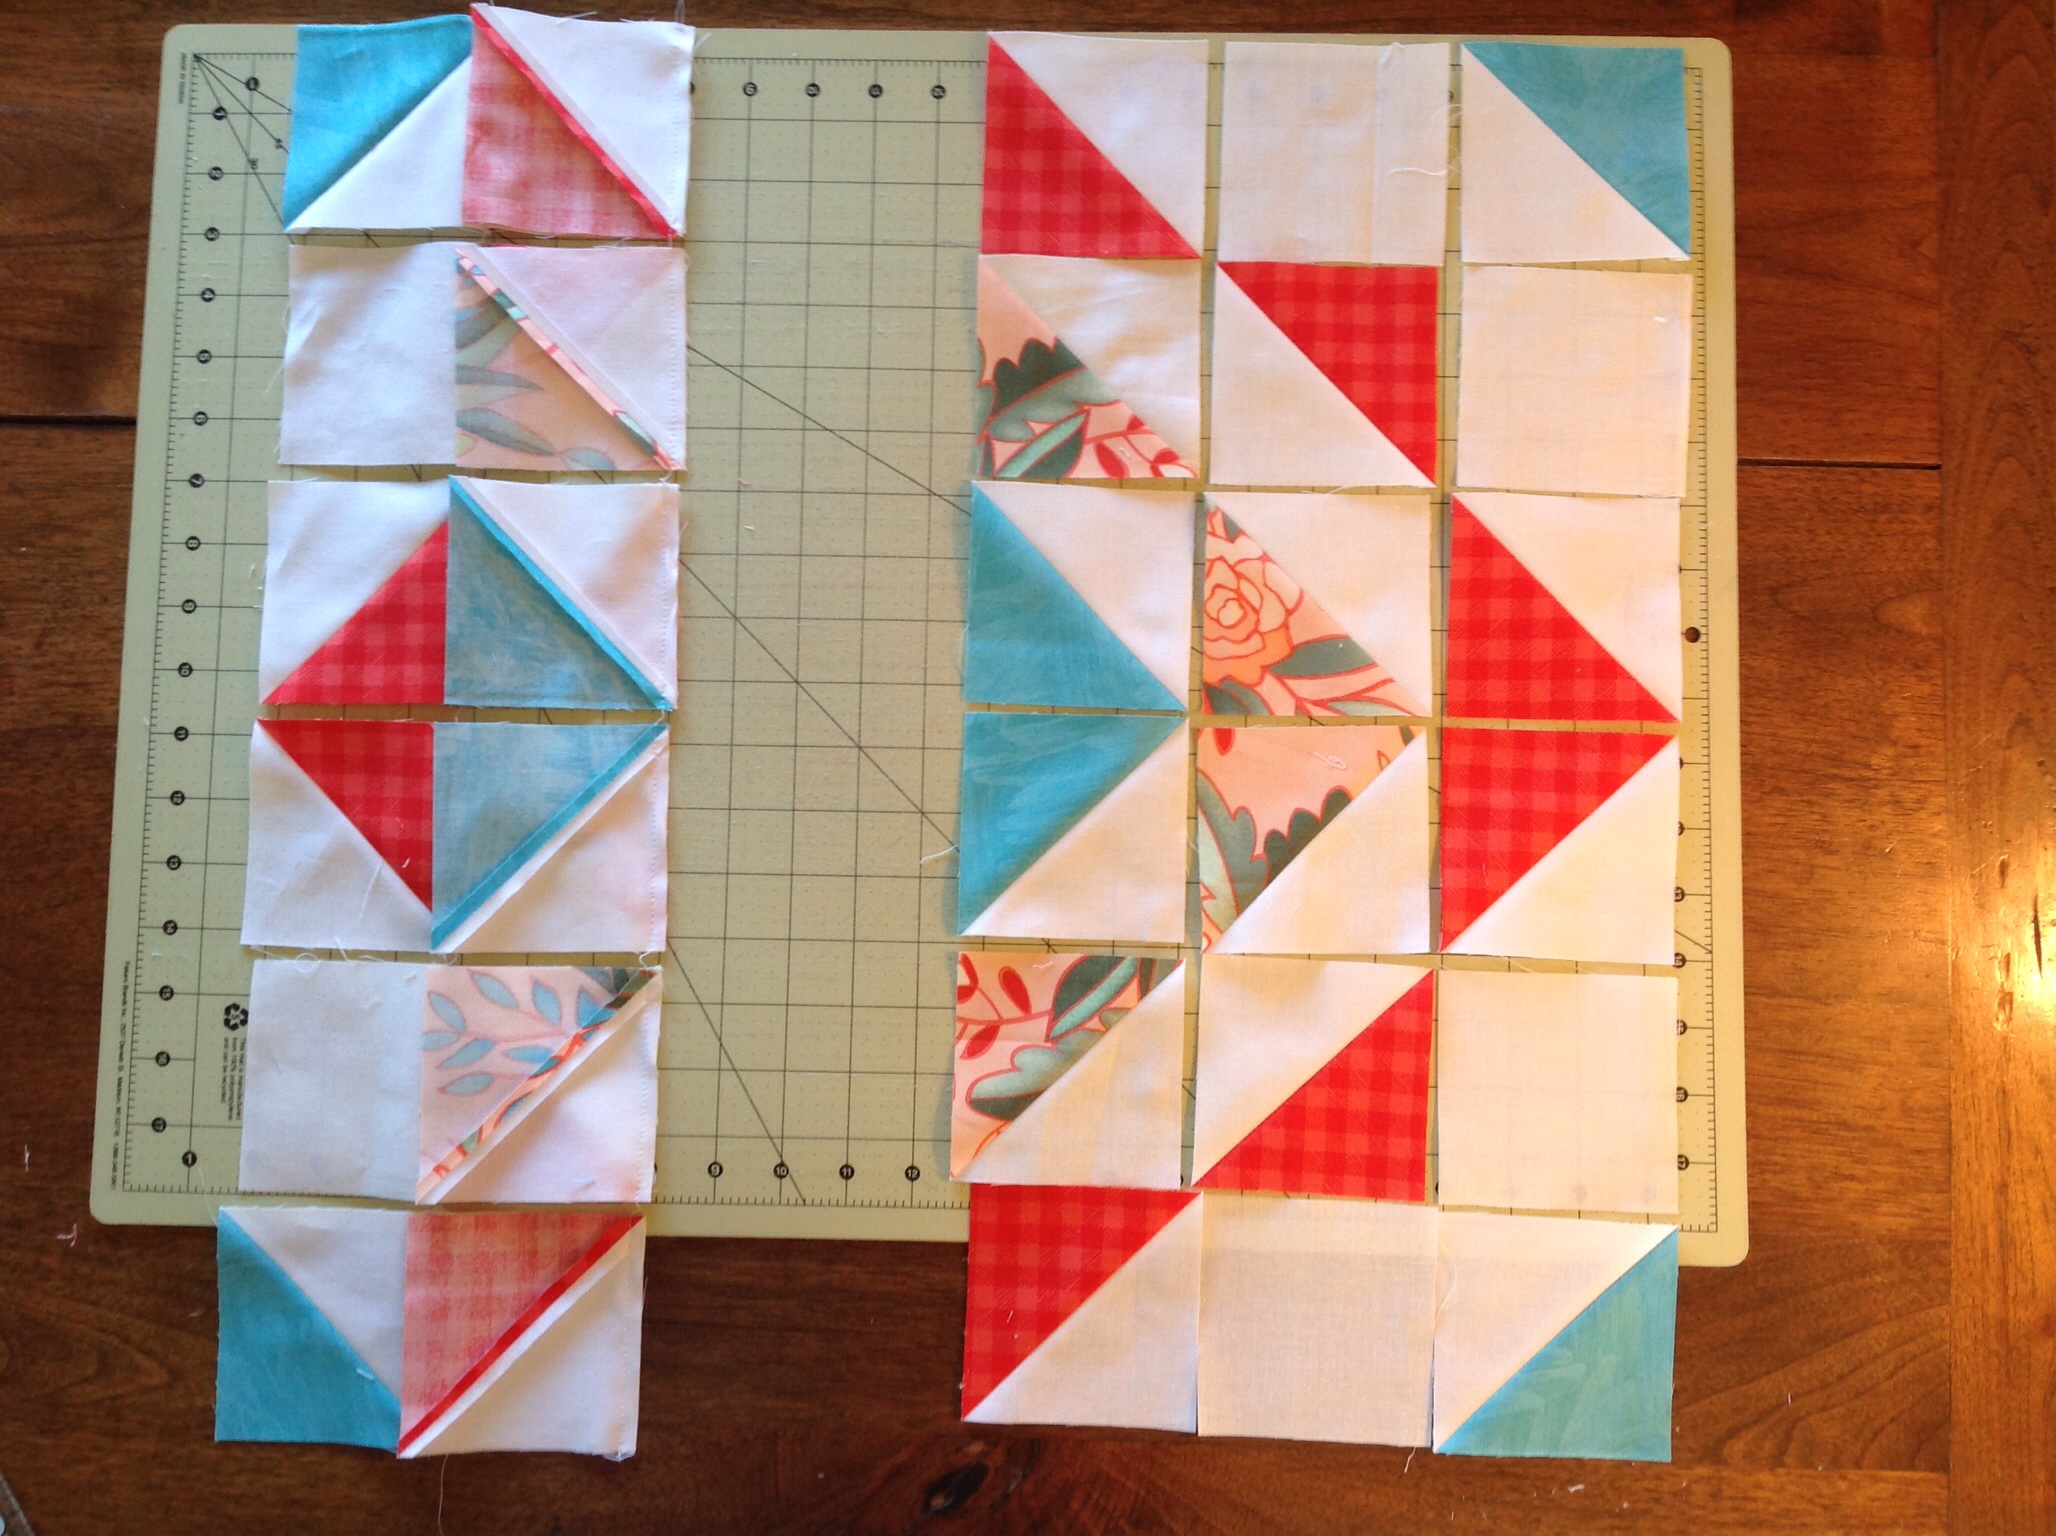
Do not snip any of the connecting threads between the growing rows.....
Stack the 3 remaining columns in the same top to bottom order, being mindful of their orientation as you take them to your machine...
Chain piece each column onto the growing rows, until all are completed. Don't snip those threads!

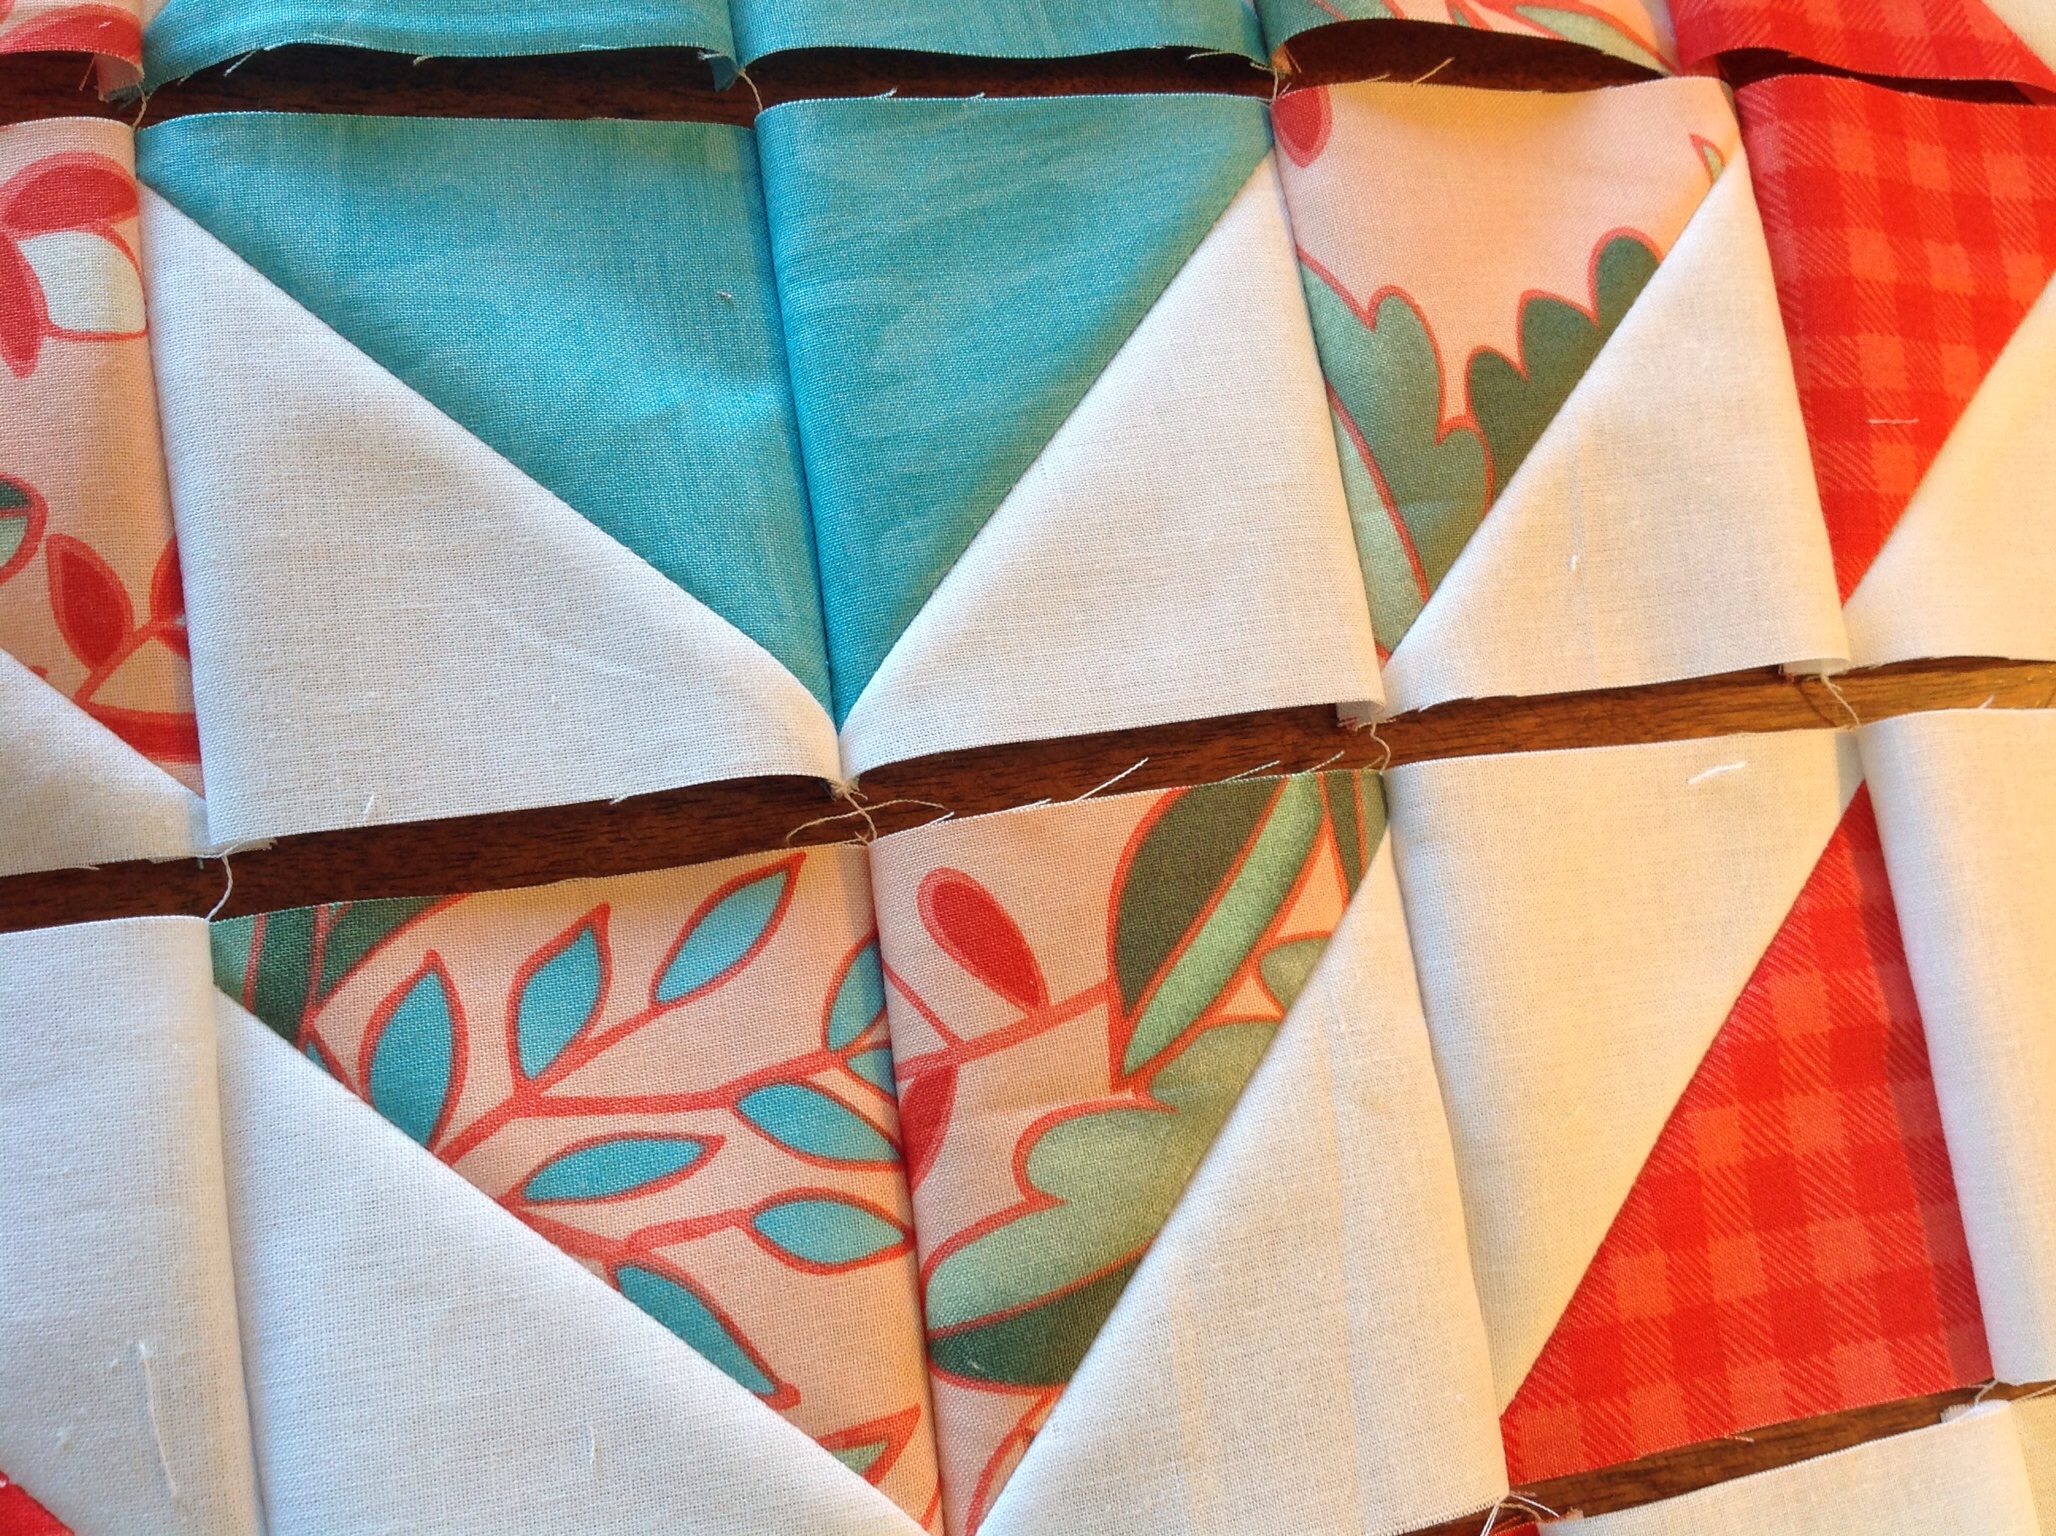
Press rows 1, 3 and 5 one direction. Press rows 2, 4 and 6 in the opposing direction. Once your block is to this "web" stage, it is simply a matter of sewing the rows together. You never do have to snip those threads!

 Press all the seams in one direction.
One nice thing about the web method of block construction is the ease with which everything stays in order. If you have more than one of these webs completed, you can stack them up and easily walk away from the project without fear of "losing your place" when you return to it. All the rows/columns are in permanent order, even before the block is sewn together.
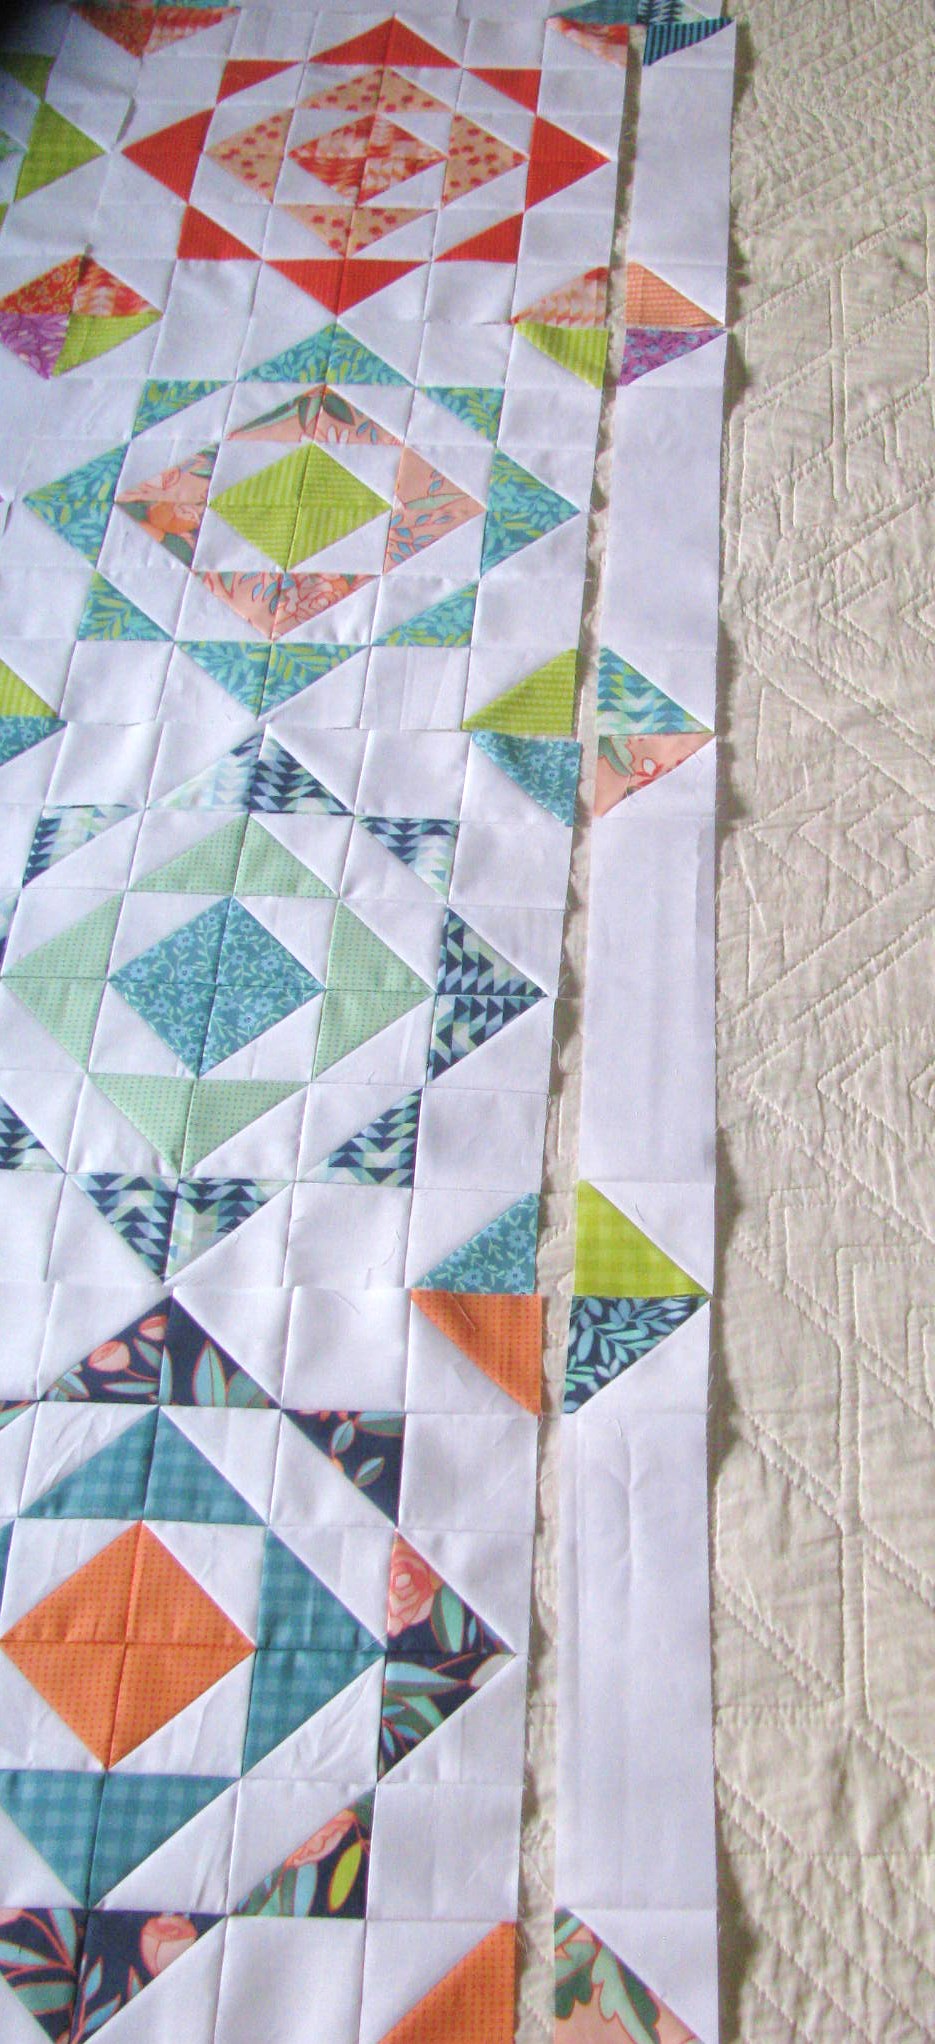
Step 3: When all 12 blocks are completed, arrange them in 4 rows of 3 blocks each. Sew blocks together into rows. Sew rows together. You may use the "web" method in this step as well.

Step 4: Pieced Border Assembly
Using 16 random print 4" squares of your choosing and the remaining 16 white 4" squares, make 32 HSTs by following the previous instructions. Be sure to press and trim each HST to 3 1/2". Next, referring to the following diagram, arrange the 32 HSTs around the assembled top to finish the "stepping stones", filling in the spaces between the HSTs with the 3 1/2" x 12 1/2" rectangles.
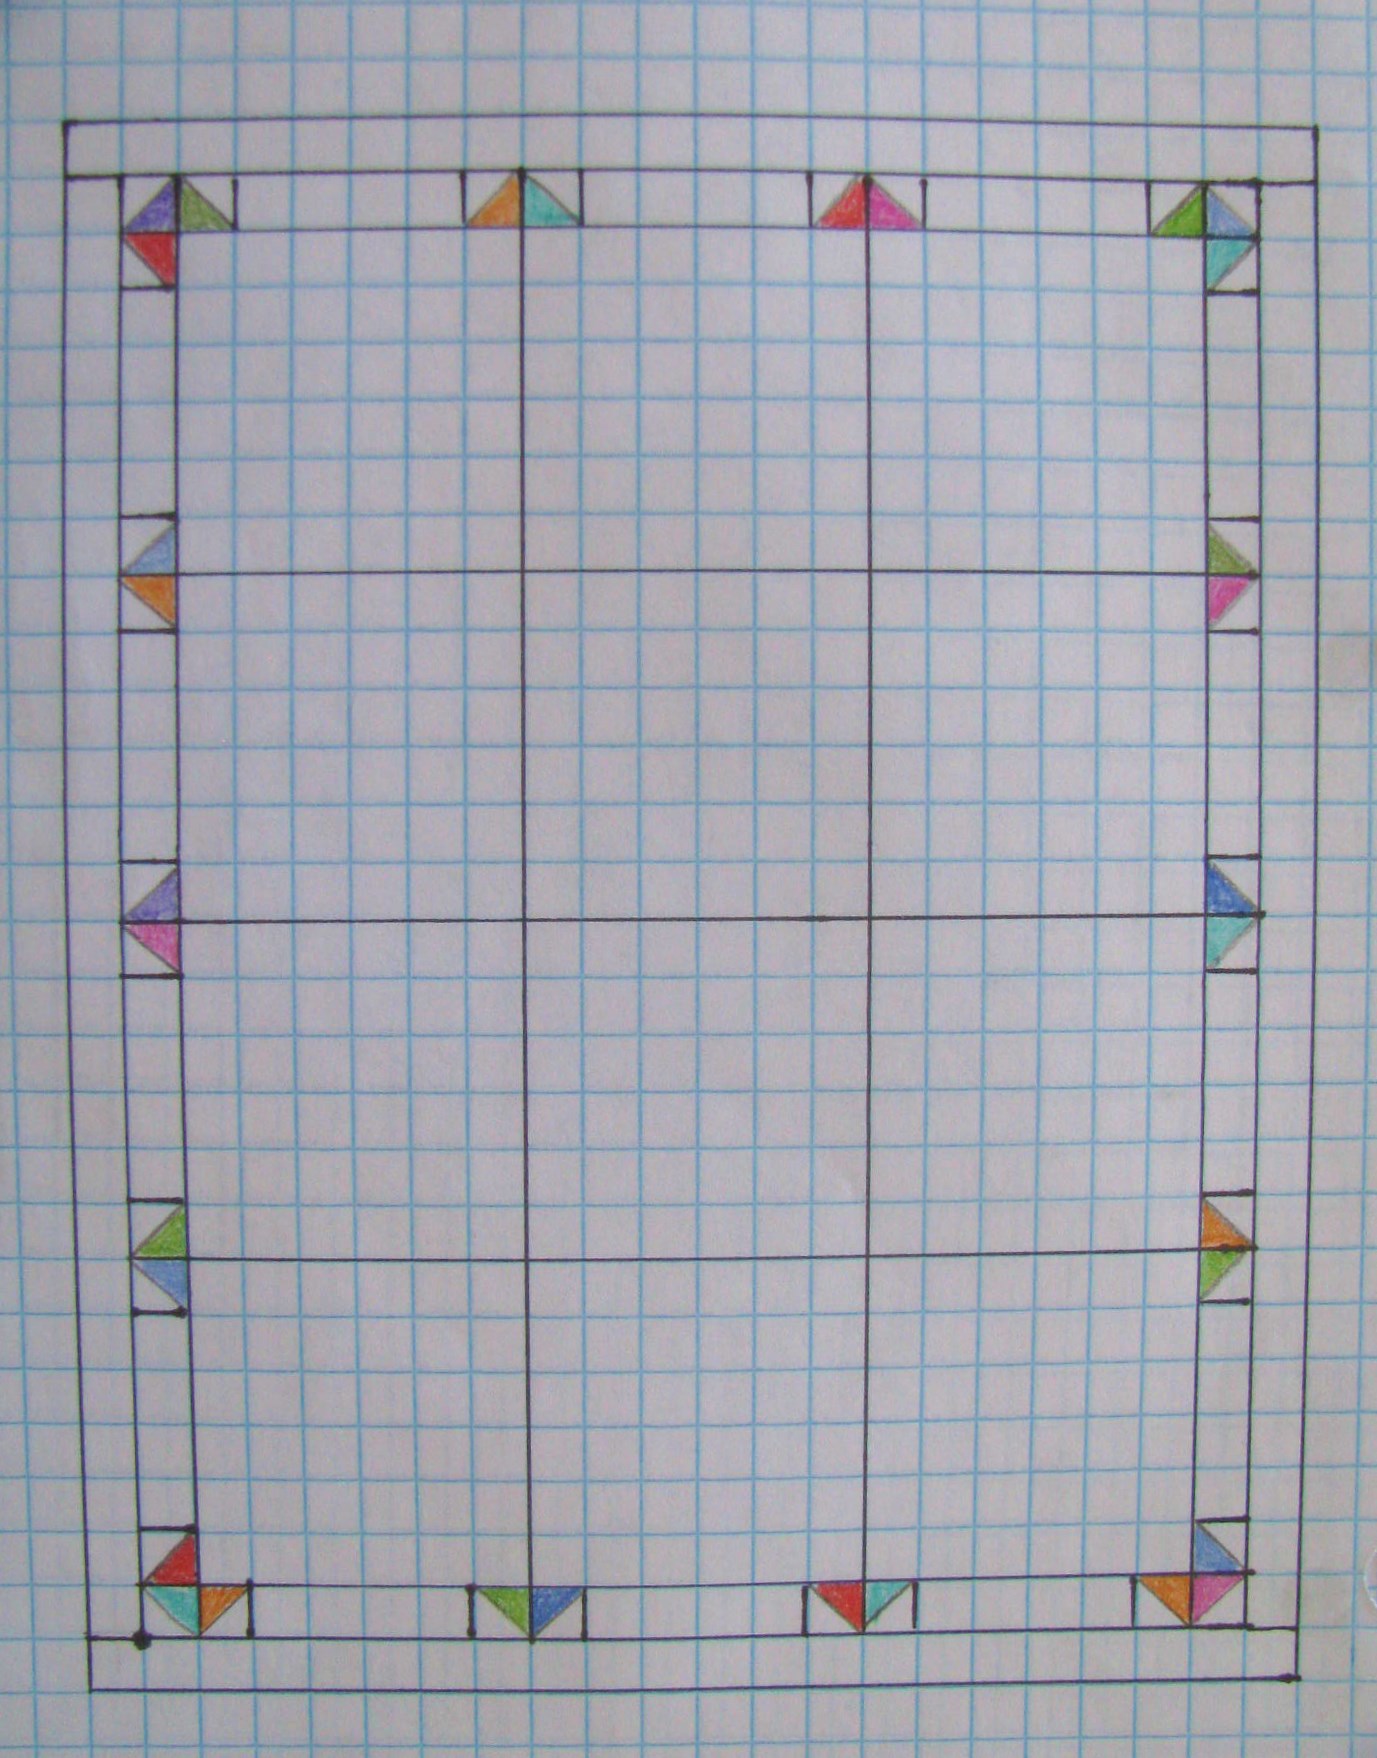
For each side make 4 of these units, total of 8:

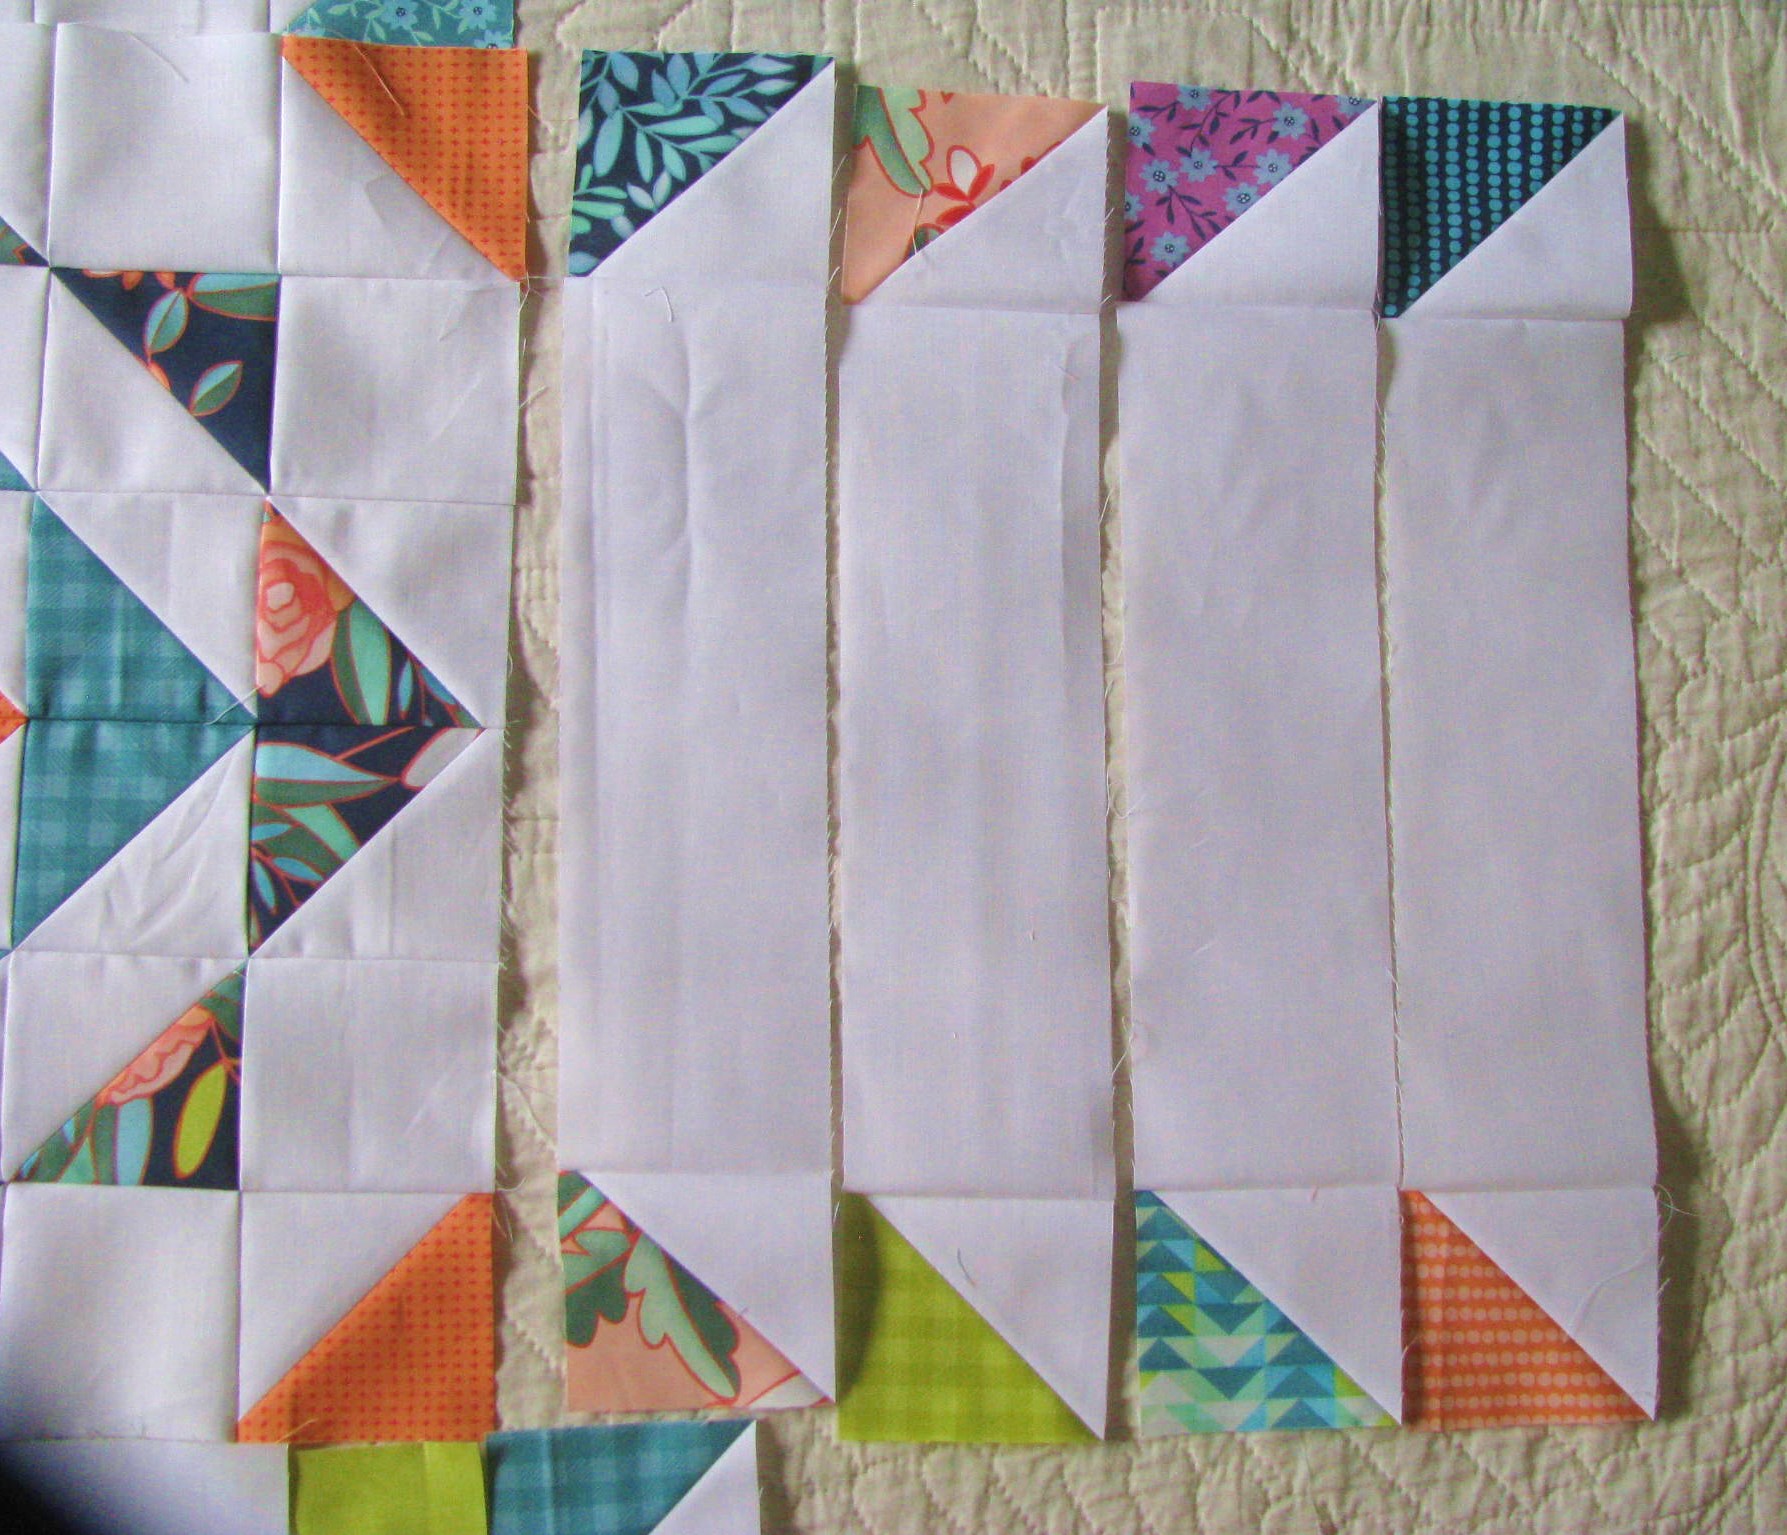
For the top and bottom, join 4 pairs of HSTs, then join to 3 rectangles:

So that there are 4 pieced strips. (In the photo, the strips are oriented so that the top and bottom show on the right and left. My apologies.)

Attach the side strips first. Pin liberally. Then attach the top and bottom, again, pin liberally to keep the strips from shifting.
For the final 2" border, sew one pair of 2 1/2" strips to each side first, pin liberally. Trim to square the corners. Then add the remaining strips to the top and bottom, pin liberally. Trim to square the corners.

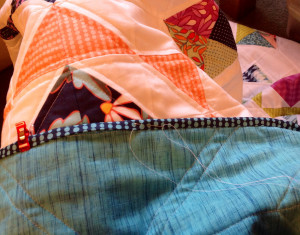
Your Prairie Rose quilt top is finished! Assemble your backing, and prepare your quilt sandwich. I used the Moda Cross Weave in sky, and LOVE it! Baste and quilt to taste. Trim and bind using your favorite method. I cut 7 2 1/4" strips, plus a 12" strip 2 1/4", joined end to end, and pressed in half, lengthwise. Machine stitched to the front and hand stitched to the back
.
For a fun scrappy option, use 1, 2 1/4" x 21" strip from each of 15 FQs of your choice. Join end to end, press in half lengthwise, and sew on using the method of your choice. I didn't think of that until after I had already planned on the Stormy dots....oops!
![]()
One 64" x 82" throw quilt, perfect for any season! This pattern would also be very fun in a variety of solids, or even the new Ombre basics from V and Co! The block pattern also lends itself to "Big Block" quilts and, set 2 x 2, makes for a wonderful baby size quilt! So have fun in your Prairie Rose Garden!
Sarah Zimmerman
{cedarfork.blogspot.com}
![]()
Posted in: