Welcome to Moda Fabrics!
Crazed Quilt
Crazed Quilt
Published:
Sep 13 2016 - 23:00


Hello there quilty friends! If we haven't already met, I'm Pamela Morgan from Sweet Little Stitches, and I'm back again today to share a fun quilt with you using Shannon Gillman Orr's Acreage line and my favorite Moda Cross Weave.
The tutorial I'm sharing today features 20 foundation paper pieced blocks, separated by sashing made from the Cross Weave fabric. If you're unfamiliar with foundation piecing, I use the method shown {HERE} in this great video tutorial. I will also guide you through, step-by-step, with pictures below.
In addition, I've also created a special label block to coordinate with this quilt, and if you're interested in that tutorial, click {HERE} to visit my blog!

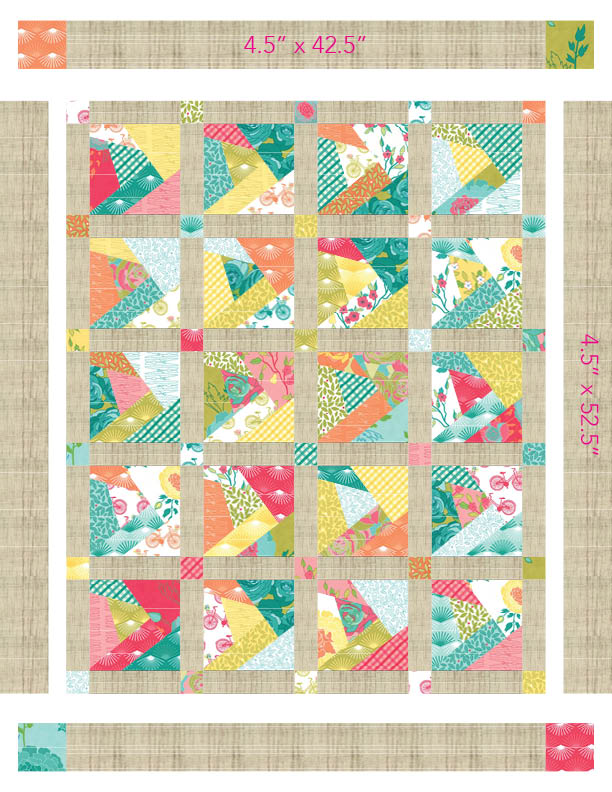
This quilt finishes at 51" x 61".
![]()

1 Layer Cake® {Acreage by Shannon Gillman Orr - SKU 45500LC}
1 Charm Pack {Acreage by Shannon Gillman Orr - SKU 45500PP}
1 5/8 yards sashing fabric {Cross Weave in Natural - SKU 12120 16}
3.5 yards backing fabric {Acreage by Shannon Gillman Orr, Scroll Aqua Sky - SKU 45500 15}
0.5 yards binding fabric {Acreage by Shannon Gillman Orr, Gingham Pond - SKU 45507 16 }
![]()
Before we get started, we're going to practice the French art of mise en place (pronounced MEEZ ahn plahs), which means to gather or arrange all of our ingredients and tools before we begin our project (hey, I know it's a culinary term, but this is the Moda Bake Shop, right?!).
Once you've gathered your fabric, you're also going to need several other materials. First, you're going to need to print the two-page PDF pattern, found {HERE}, and you're gonna need some clear tape and your paper-cutting scissors.

When printing this pattern, make sure that the "fit to page" option is not selected, or your blocks won't be the correct size. Select the option that says "actual size."

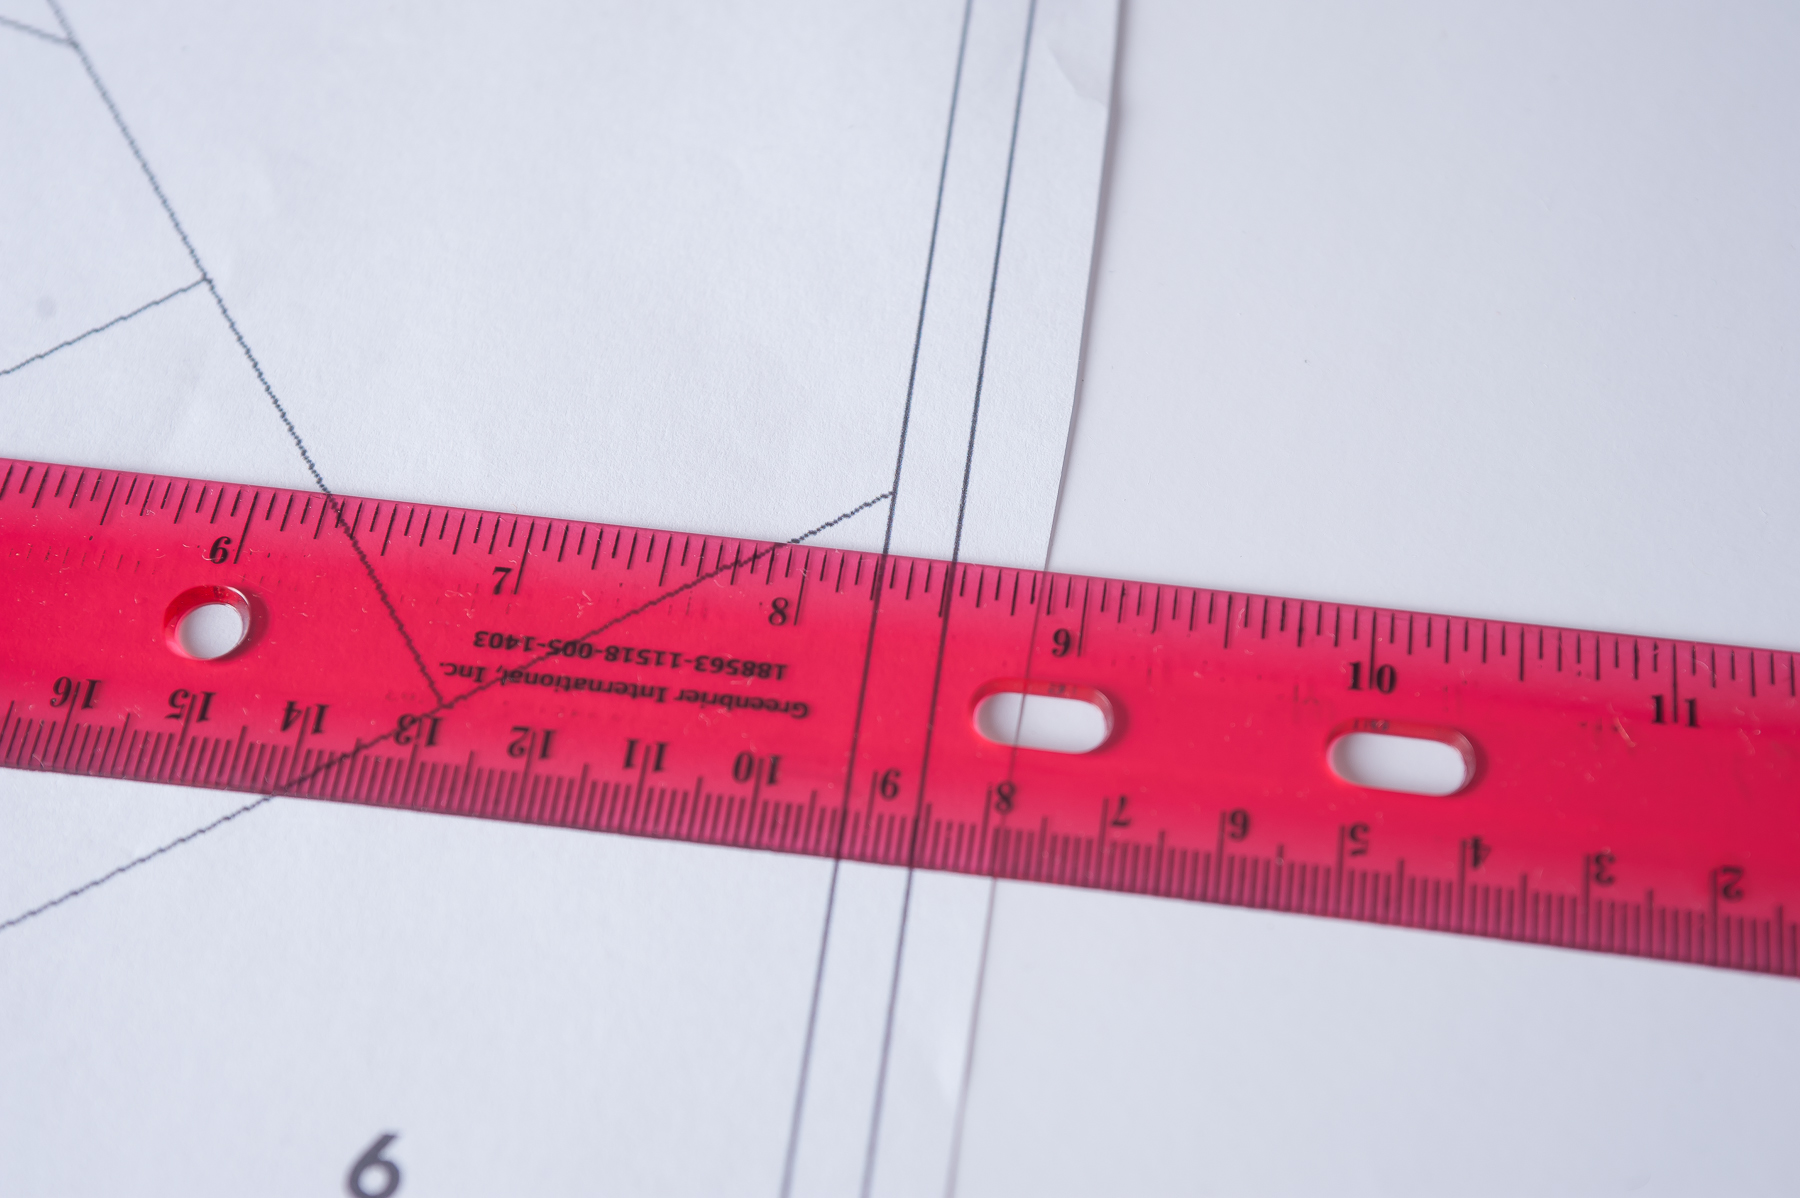
Once you've printed your block, check to make sure the scale block measures 1". Then, using the tape and paper scissors, piece both sides of the block together as shown below.


Check to make sure your block measures 8.5" square (from edge to edge of the outer square).
Please note that you will need to print 20 copies of this to make the entire quilt. If you'd like to save on printer ink, you could do one of two things: 1) Change your printer settings to print at a lower quality, or 2)Use tracing paper (which is typically found in 9 x12 sheets, so you can easily fit the whole block on one sheet), a ruler, and a fine lined pen, and trace your blocks. The benefit of option 2 is that, in addition to saving on costly printer ink, it will be much easier to see that you're placing your fabrics in the correct position.
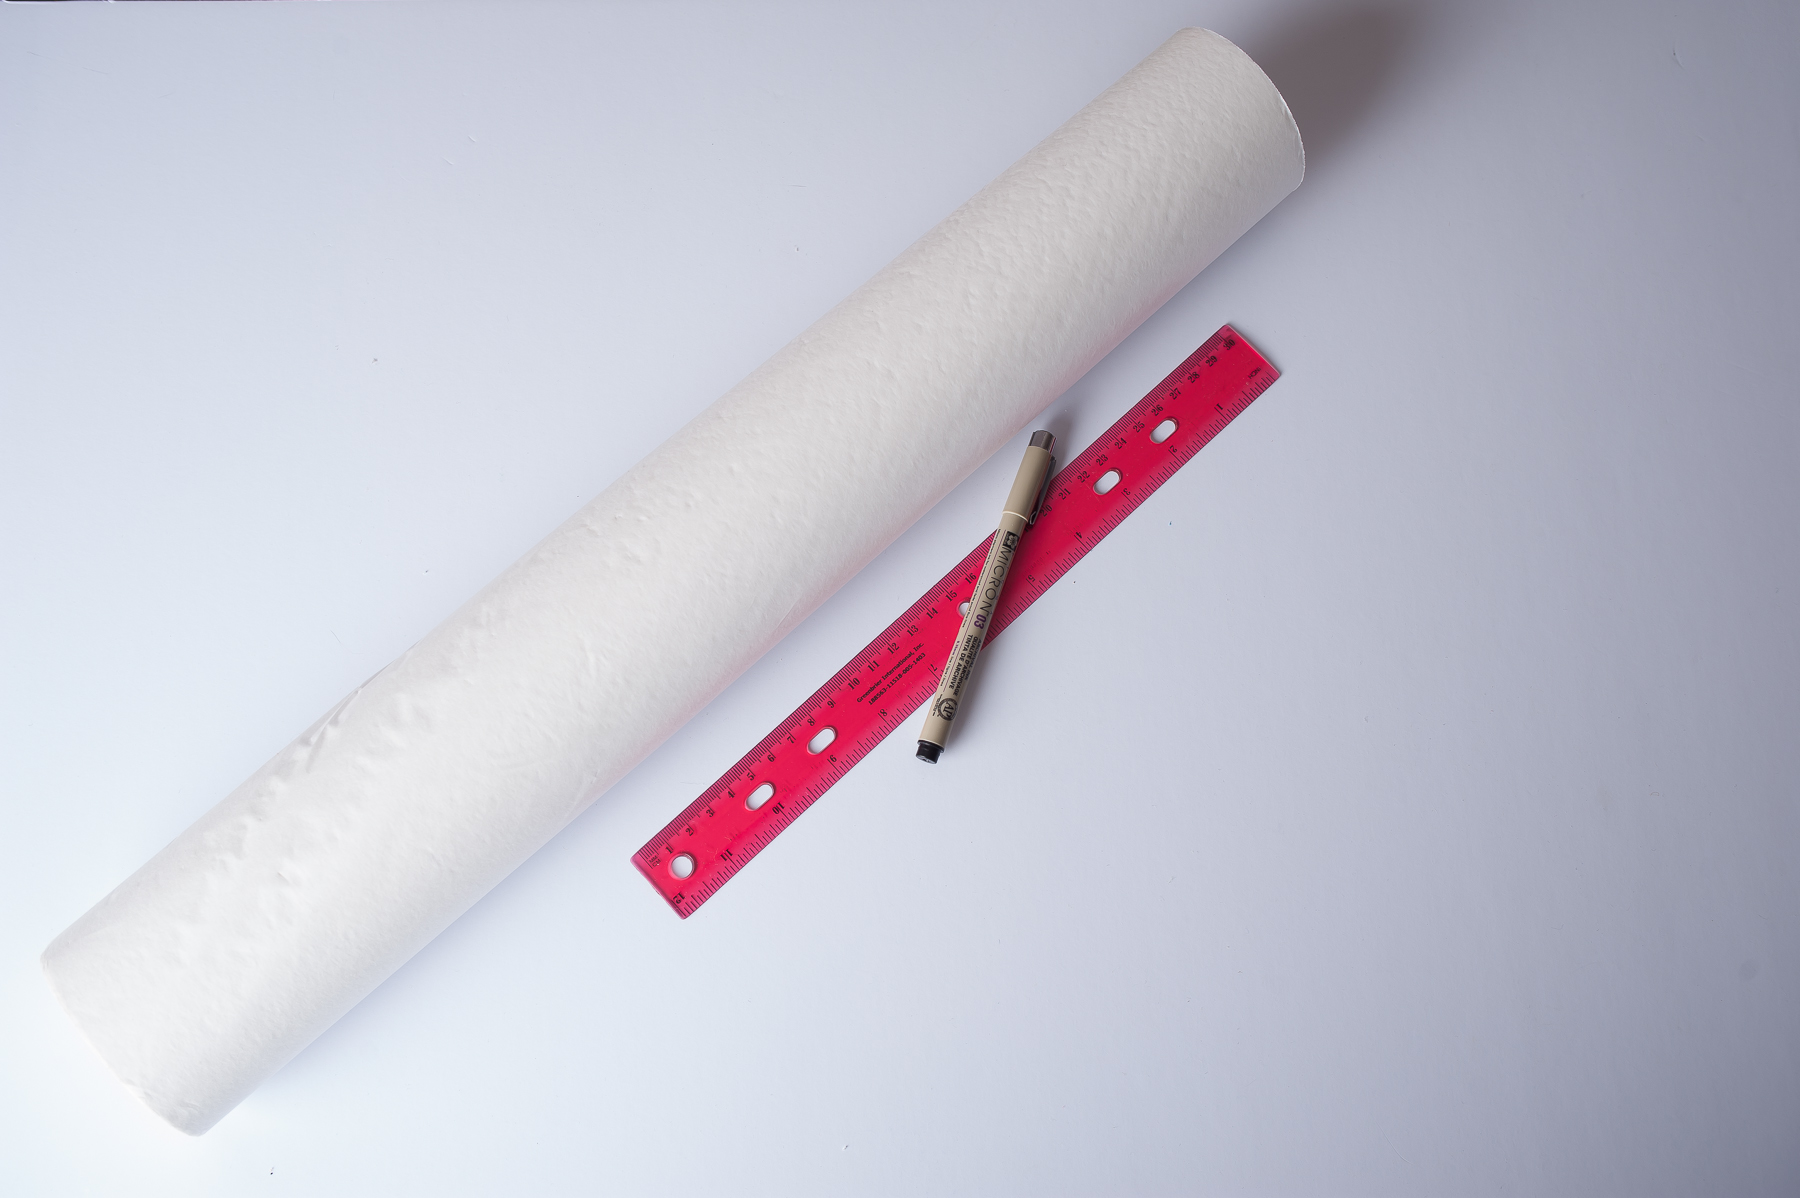 My tracing paper is roll form, but tablets of 9 x 12 inch sheets are available just about everywhere!
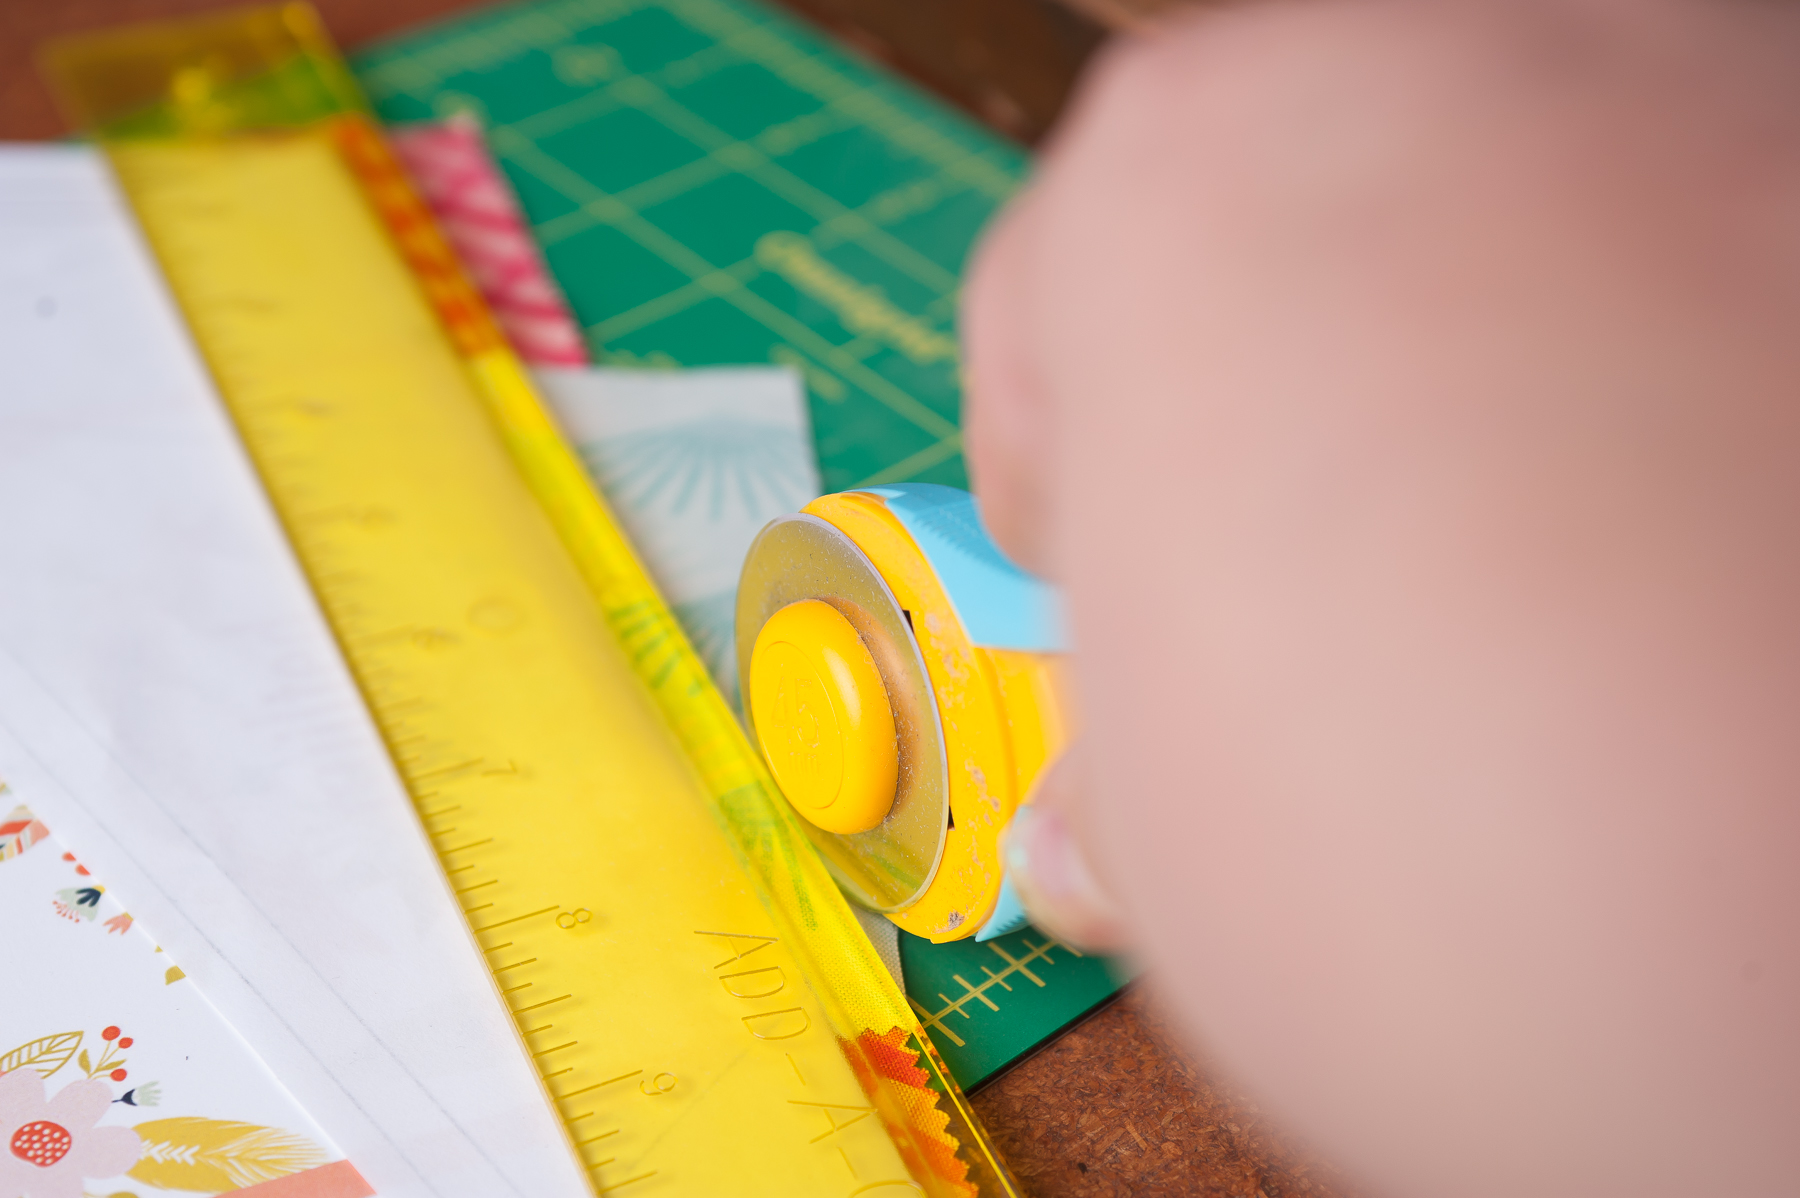
Also, not absolutely necessary, but highly recommended is the Add-a-Quarter ruler. Check your local quilt shop for availability.

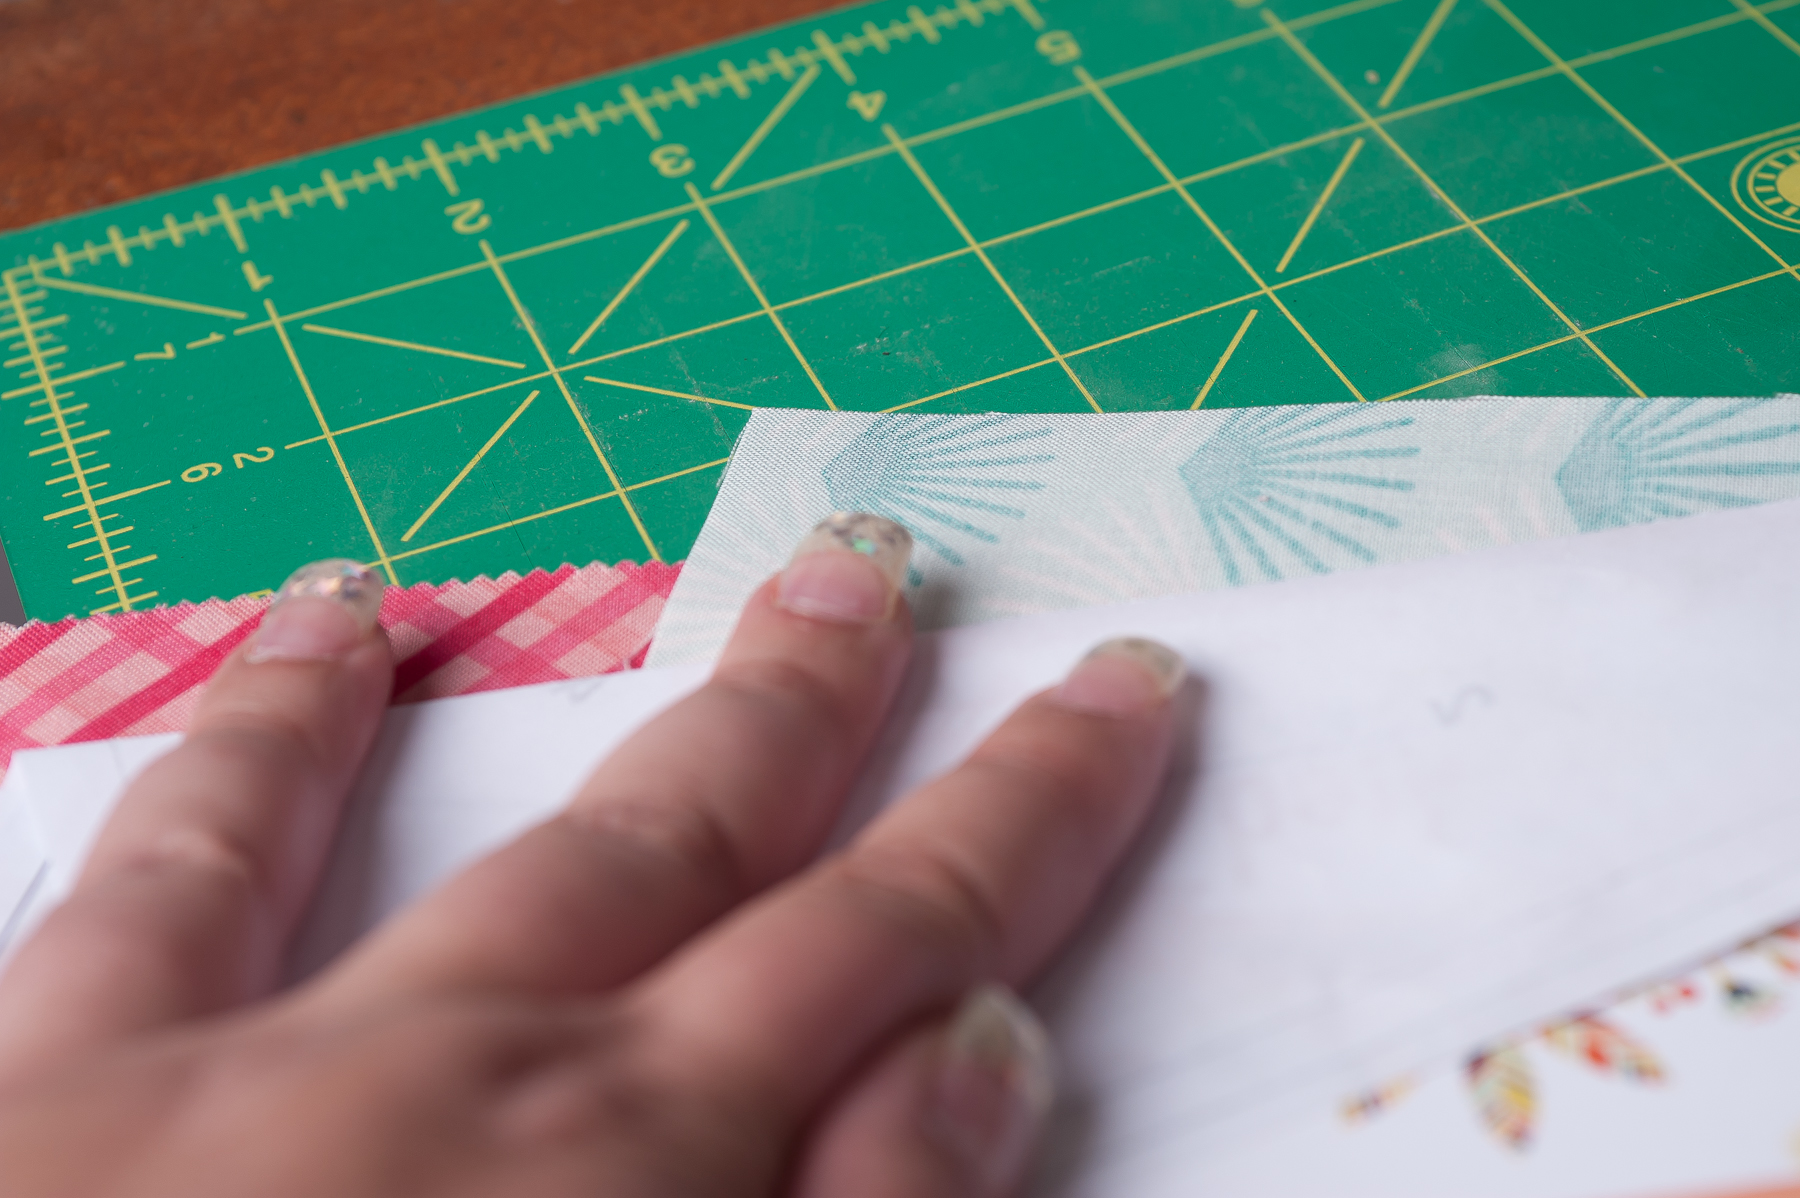
Now, cutting into your pre-cuts. Start with your charm pack. For the sashing, you're going to need to select 4 blocks for the quilt corners. Trim these 4 blocks to 4.5" square. Set aside.
Then, you will need 30 - 2.5" squares for your sashing. Take this from your charm pack, and set these pieces aside also. If you plan on making the label block, you will also need 20 - 2.5" squares.
From your Cross Weave, cut 5 strips, 4.5" x WOF (Width of Fabric). VERY CAREFULLY trim your selvedges from these strips. The selvedge is much smaller, in comparison to other fabrics, leaving you with more usable area. However, you are going to need 42.5" for the top and bottom borders, and I was able to get this piece from one strip by trimming my selvages carefully. For the remaining time, set these strips aside. You will also need to cut 13 strips, 2.5" x WOF. Subcut each strip into 4 - 2.5" x 8.5" rectangles. You will need 49 for your sashing. This will leave you with 3 extra.
Now onto foundation piecing our blocks!
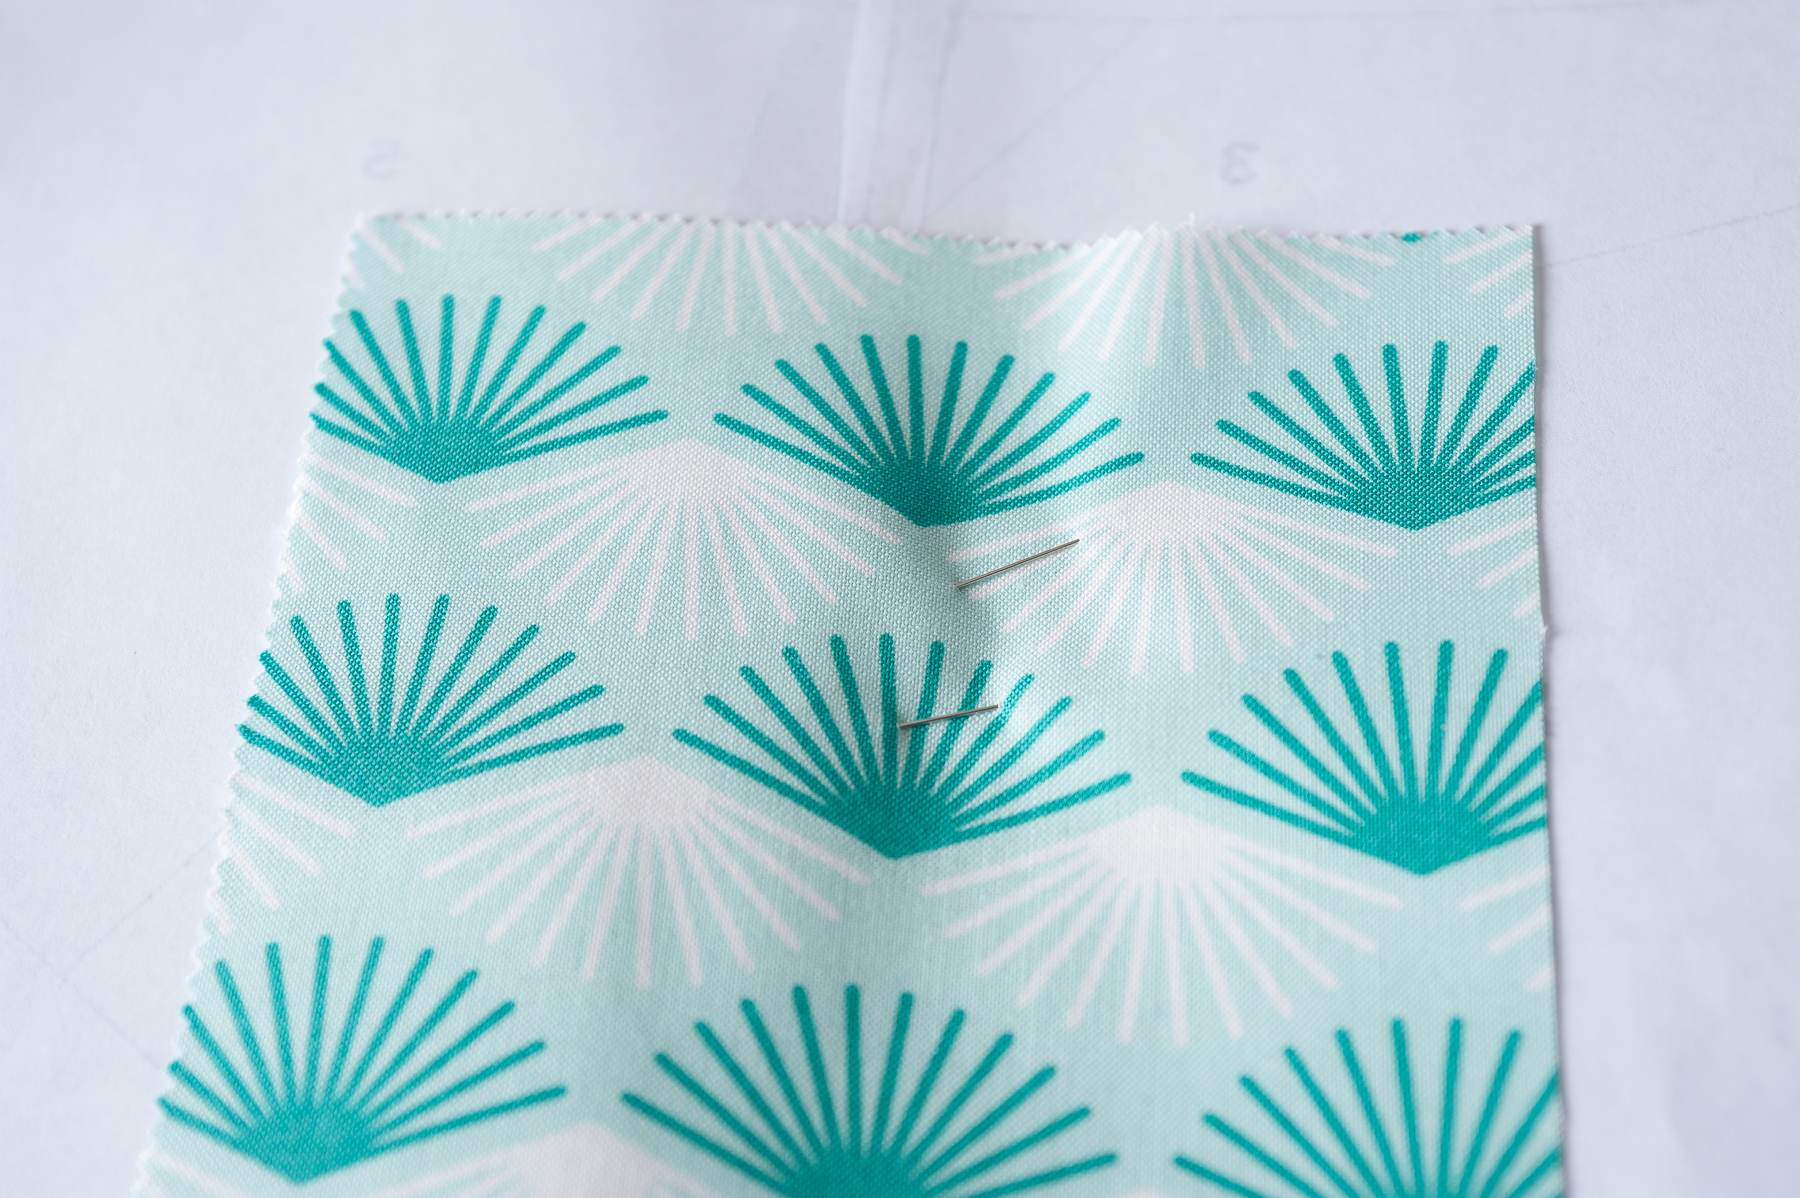
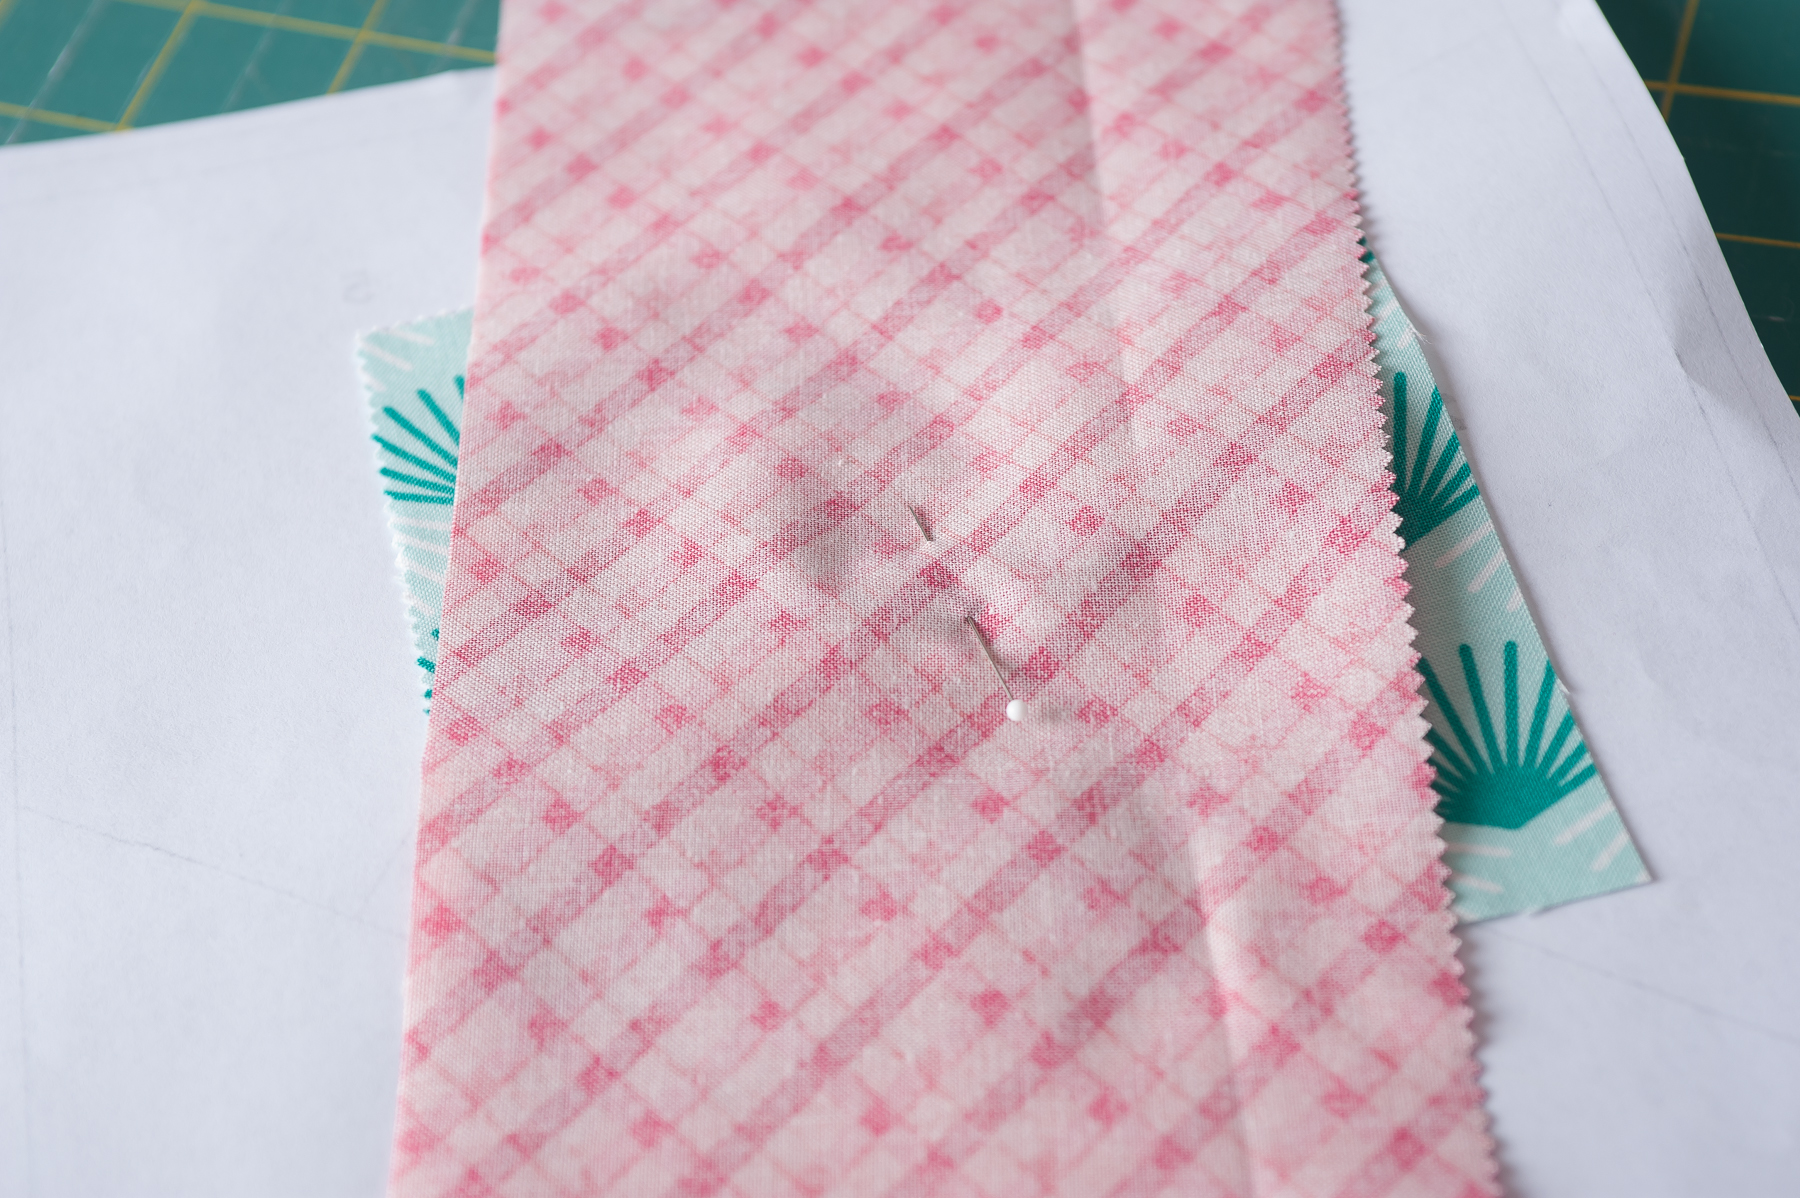
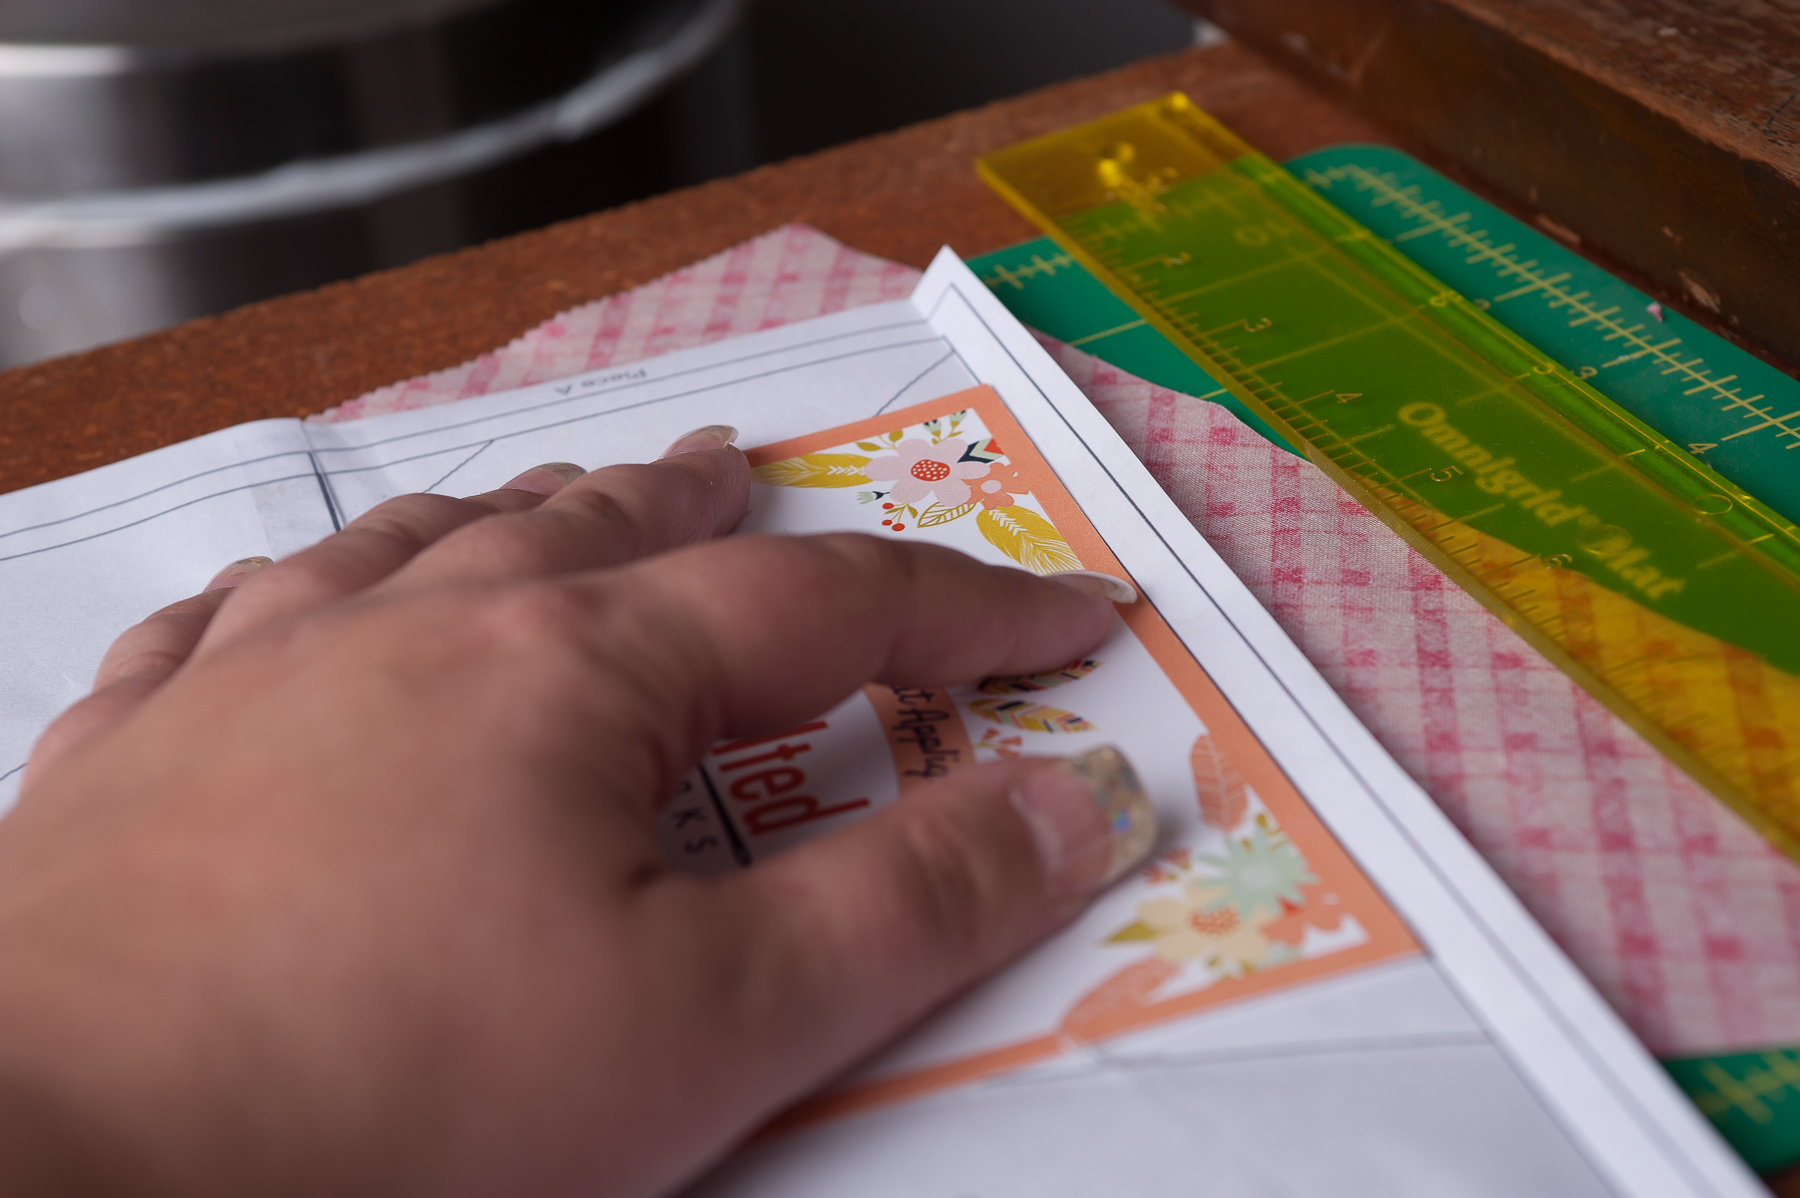
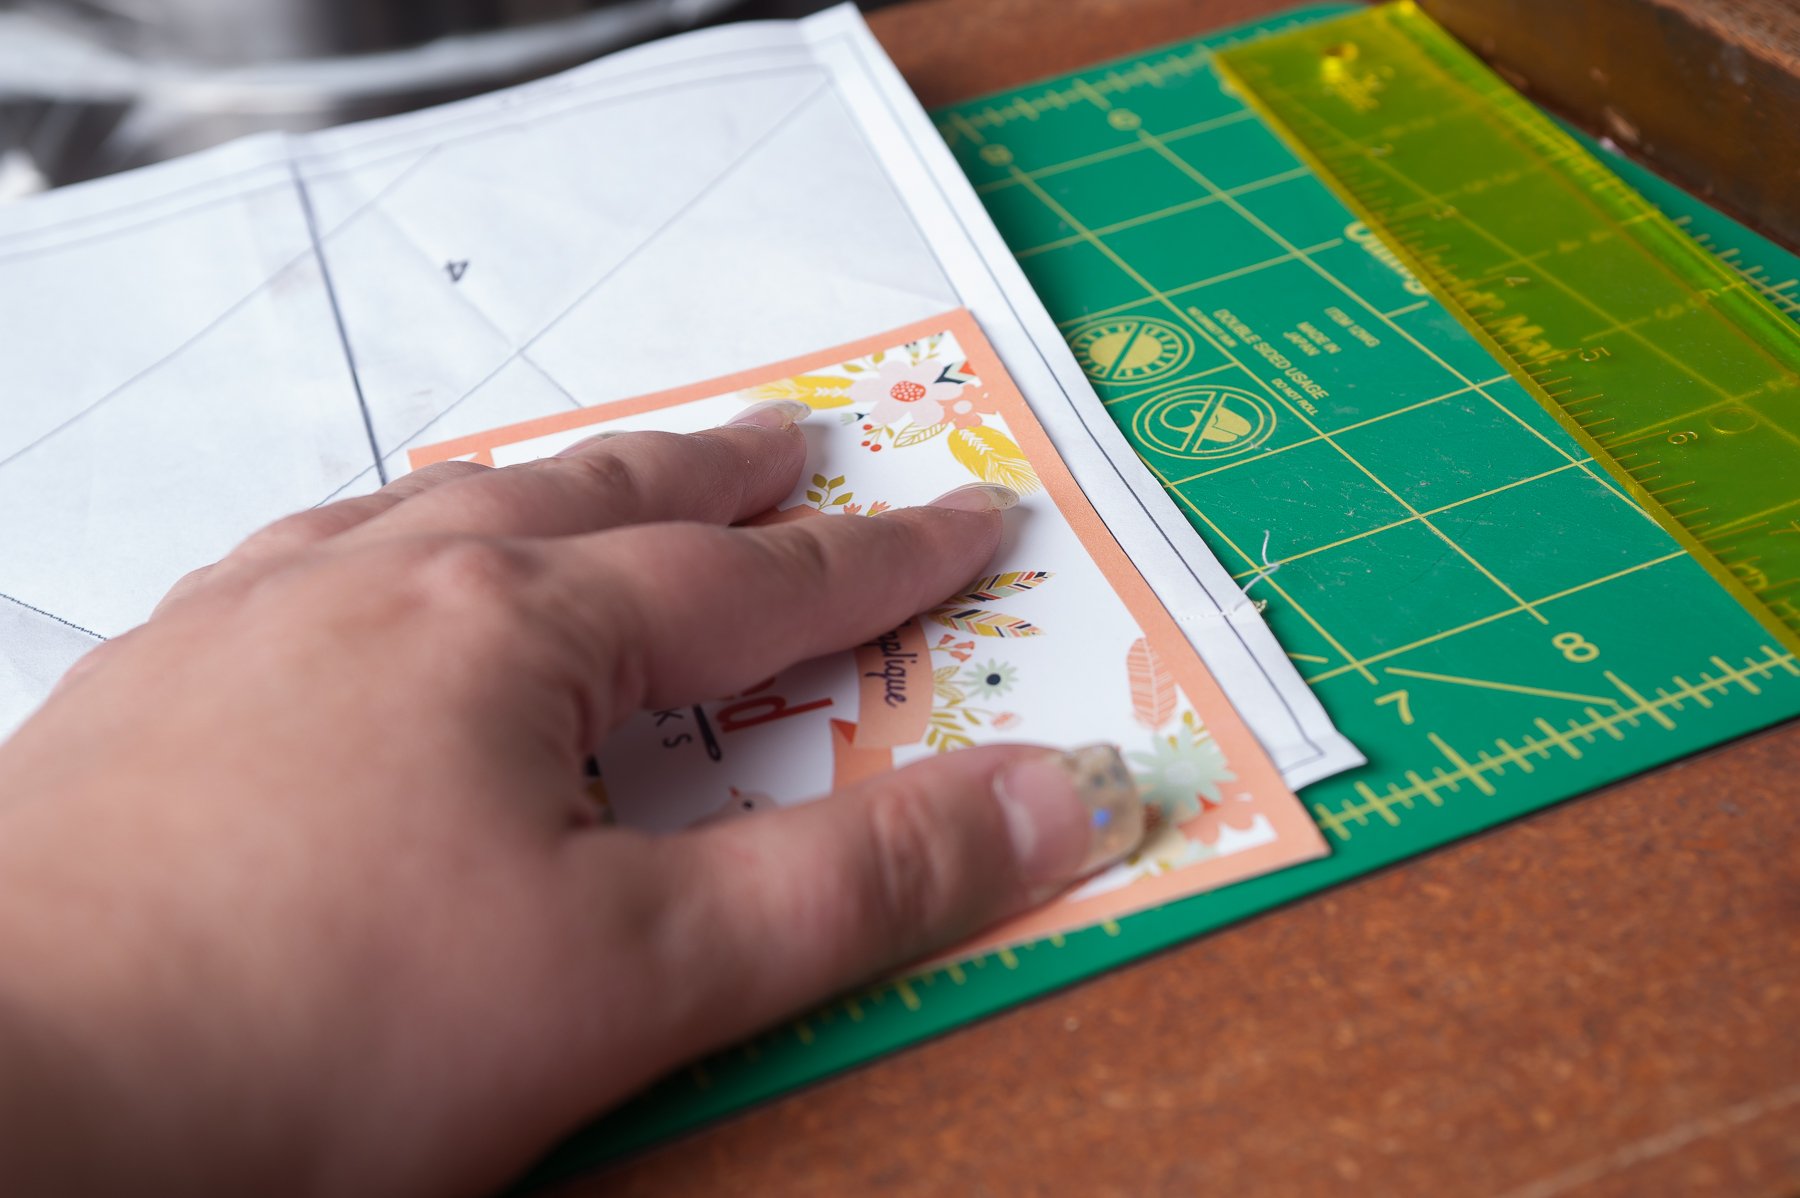
For section 1, you will need a piece of fabric that is roughly 5" square (you can take this from your layer cake, or your remaLay your fabric over the area labeled "1" on the reverse side of the paper, taking care that you have enough fabric over the edges to allow you to trim with a 1/4" seam allowance. Pin into place.
For section 2, you will need to cut piece from your layer cake squares that is a minimum of 4.5" x 7.5." While laying it out, take care to make sure there is enough fabric to cover your 1/4" seam allowances (shown in the picture below).
Once you've figured out the approximate layout of section 2, carefully flip it over onto section 1 RST (right sides together). Pin into place. It should look similar to this:
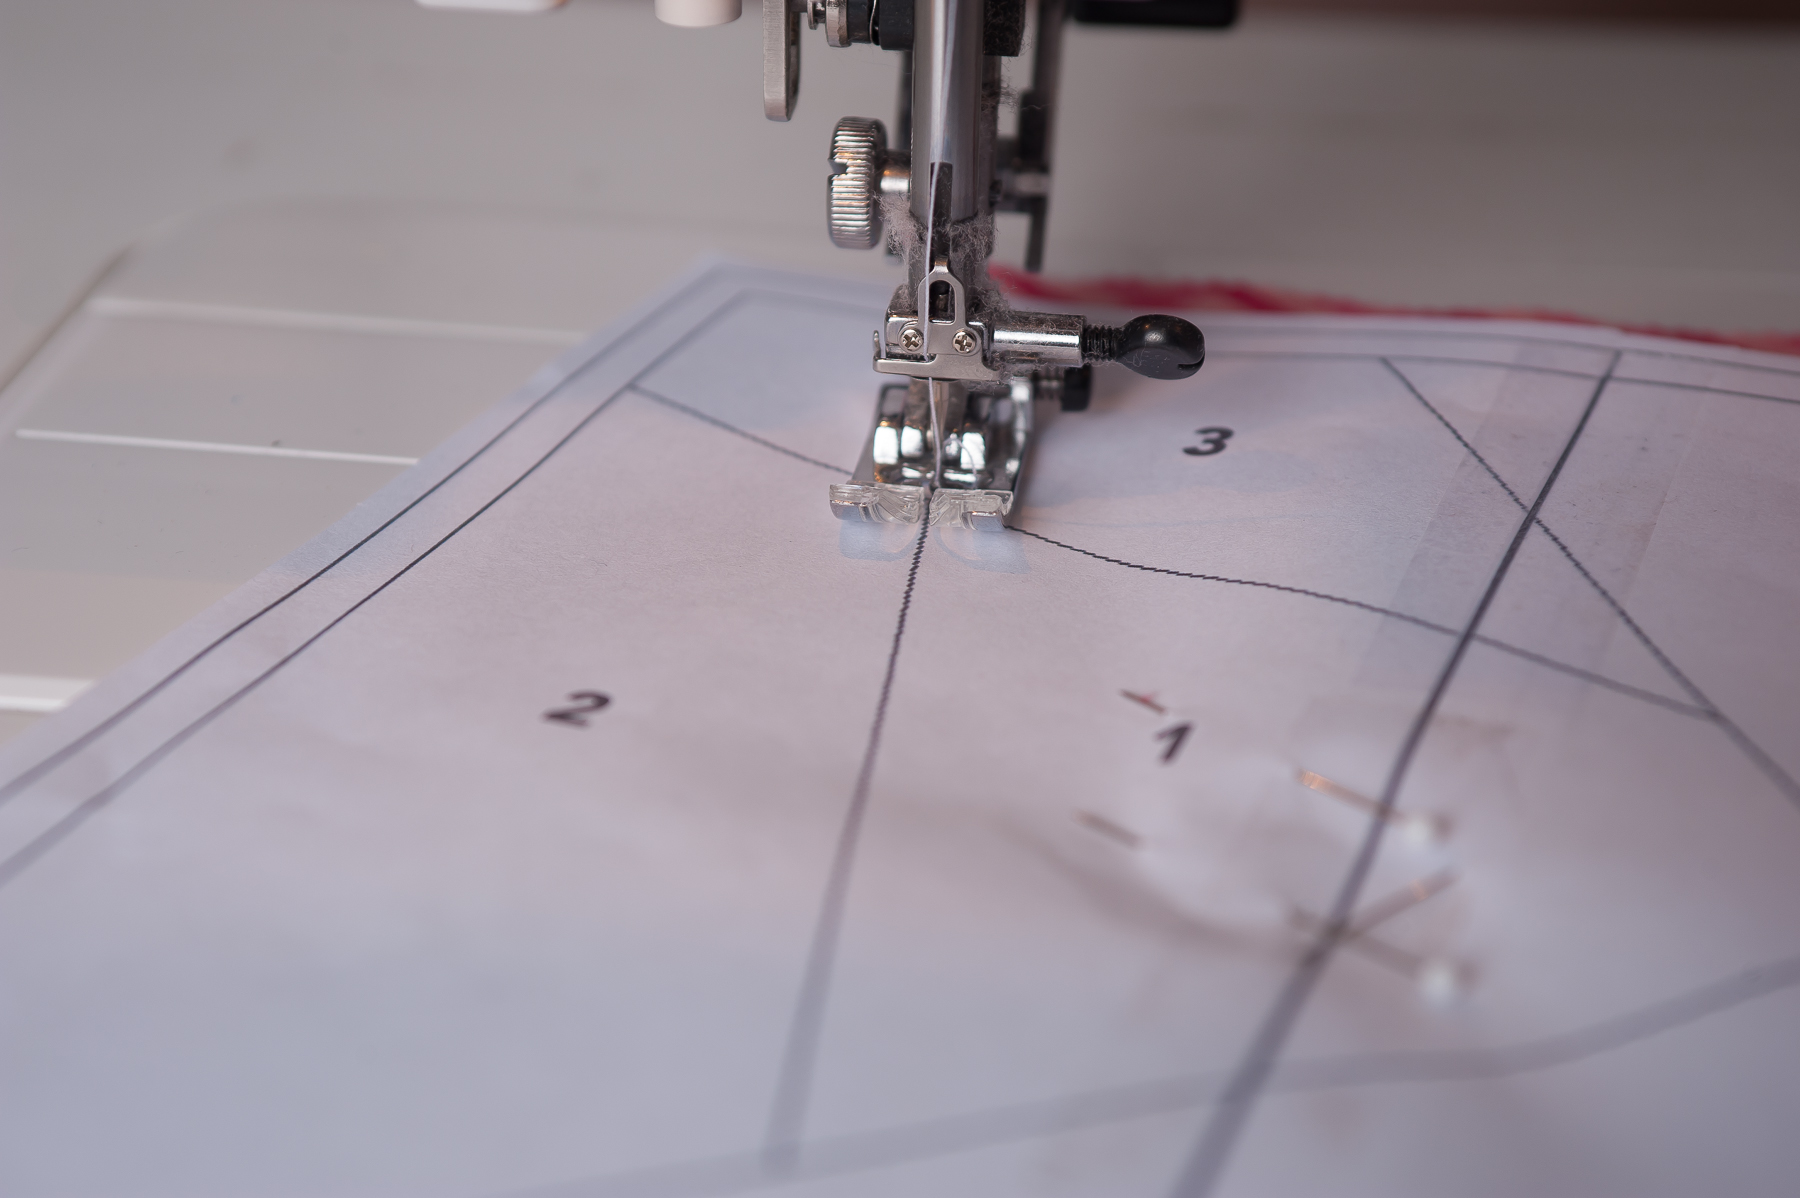
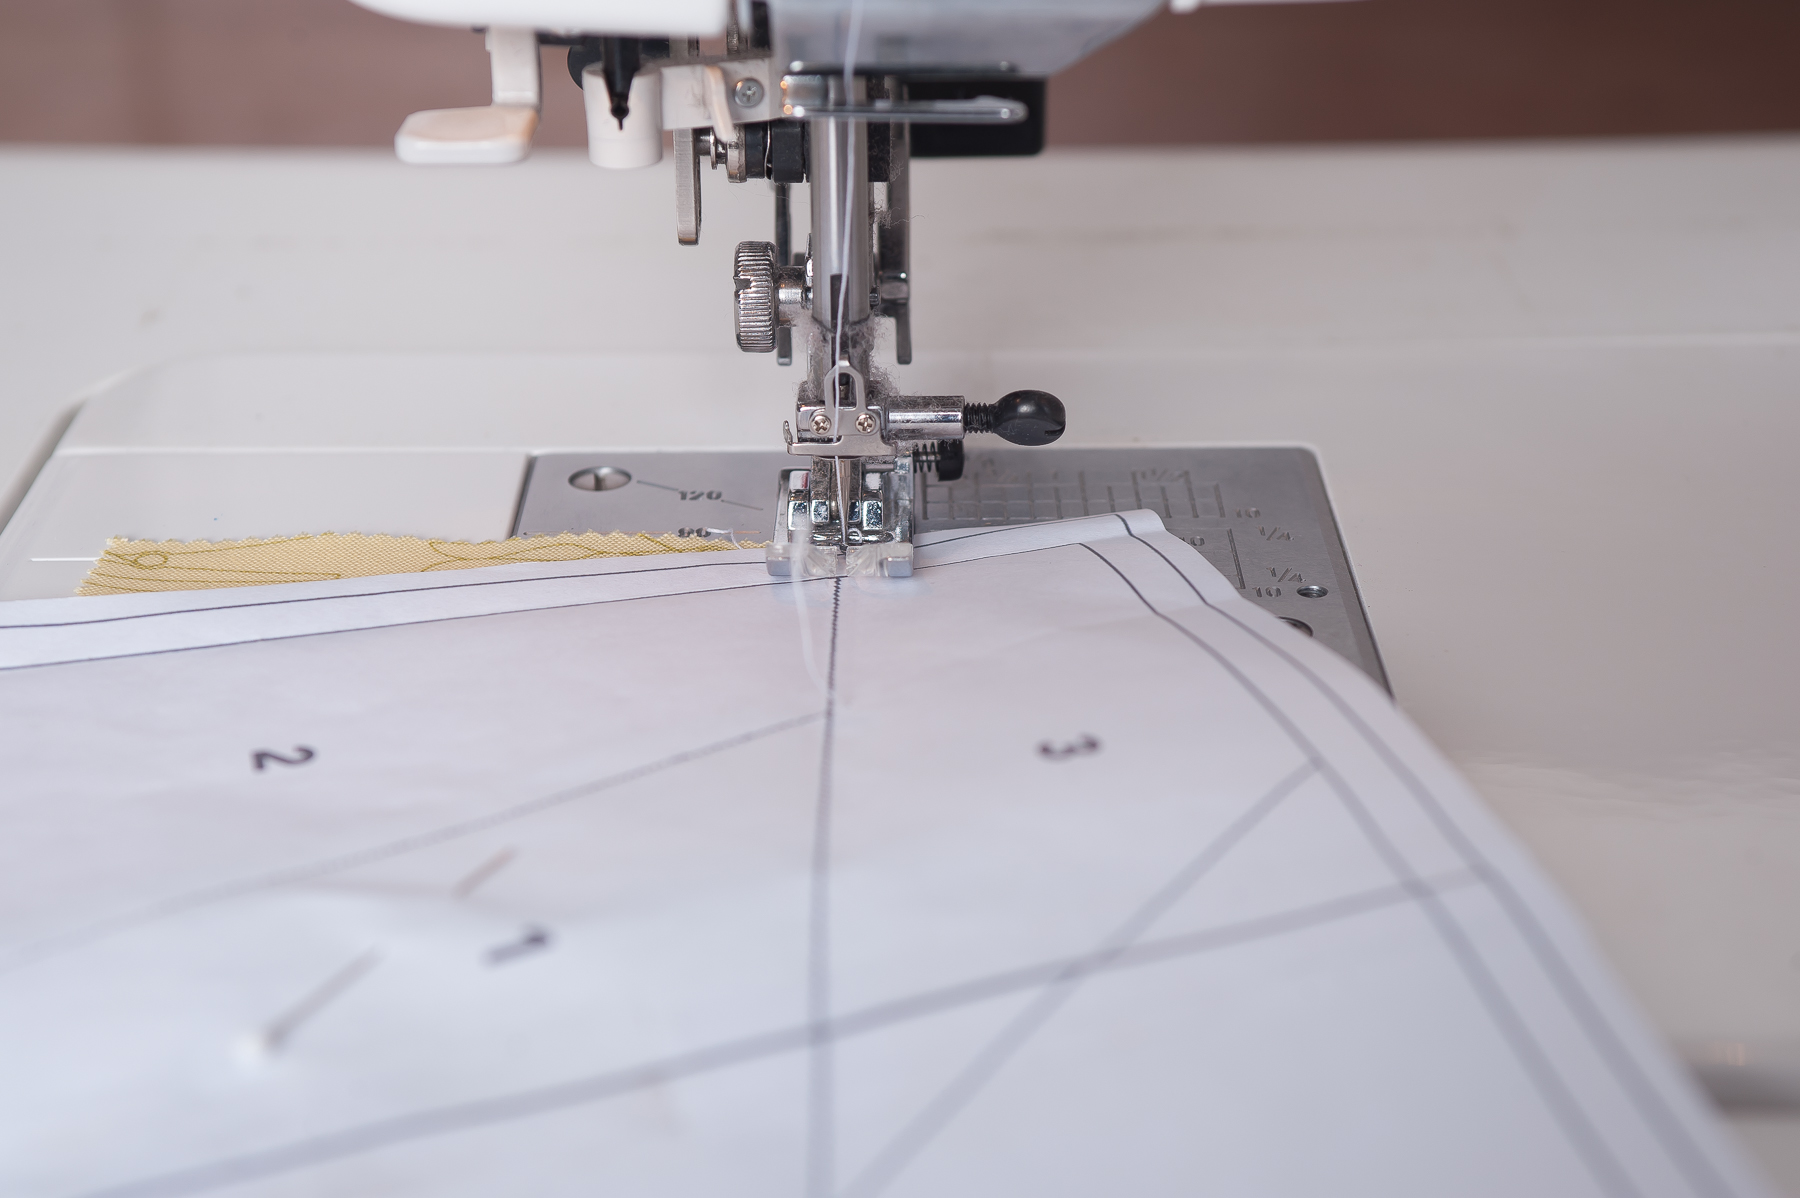
Before you start stitching, it's wise to adjust your machine's stitch length. A nice short stitch will make it easier to remove the paper from the back of your finished block.

On my machine (a Janome), setting my stitch length to 1.2 seems to work well for paper piecing. This could vary, depending on the make and model of your machine, though.

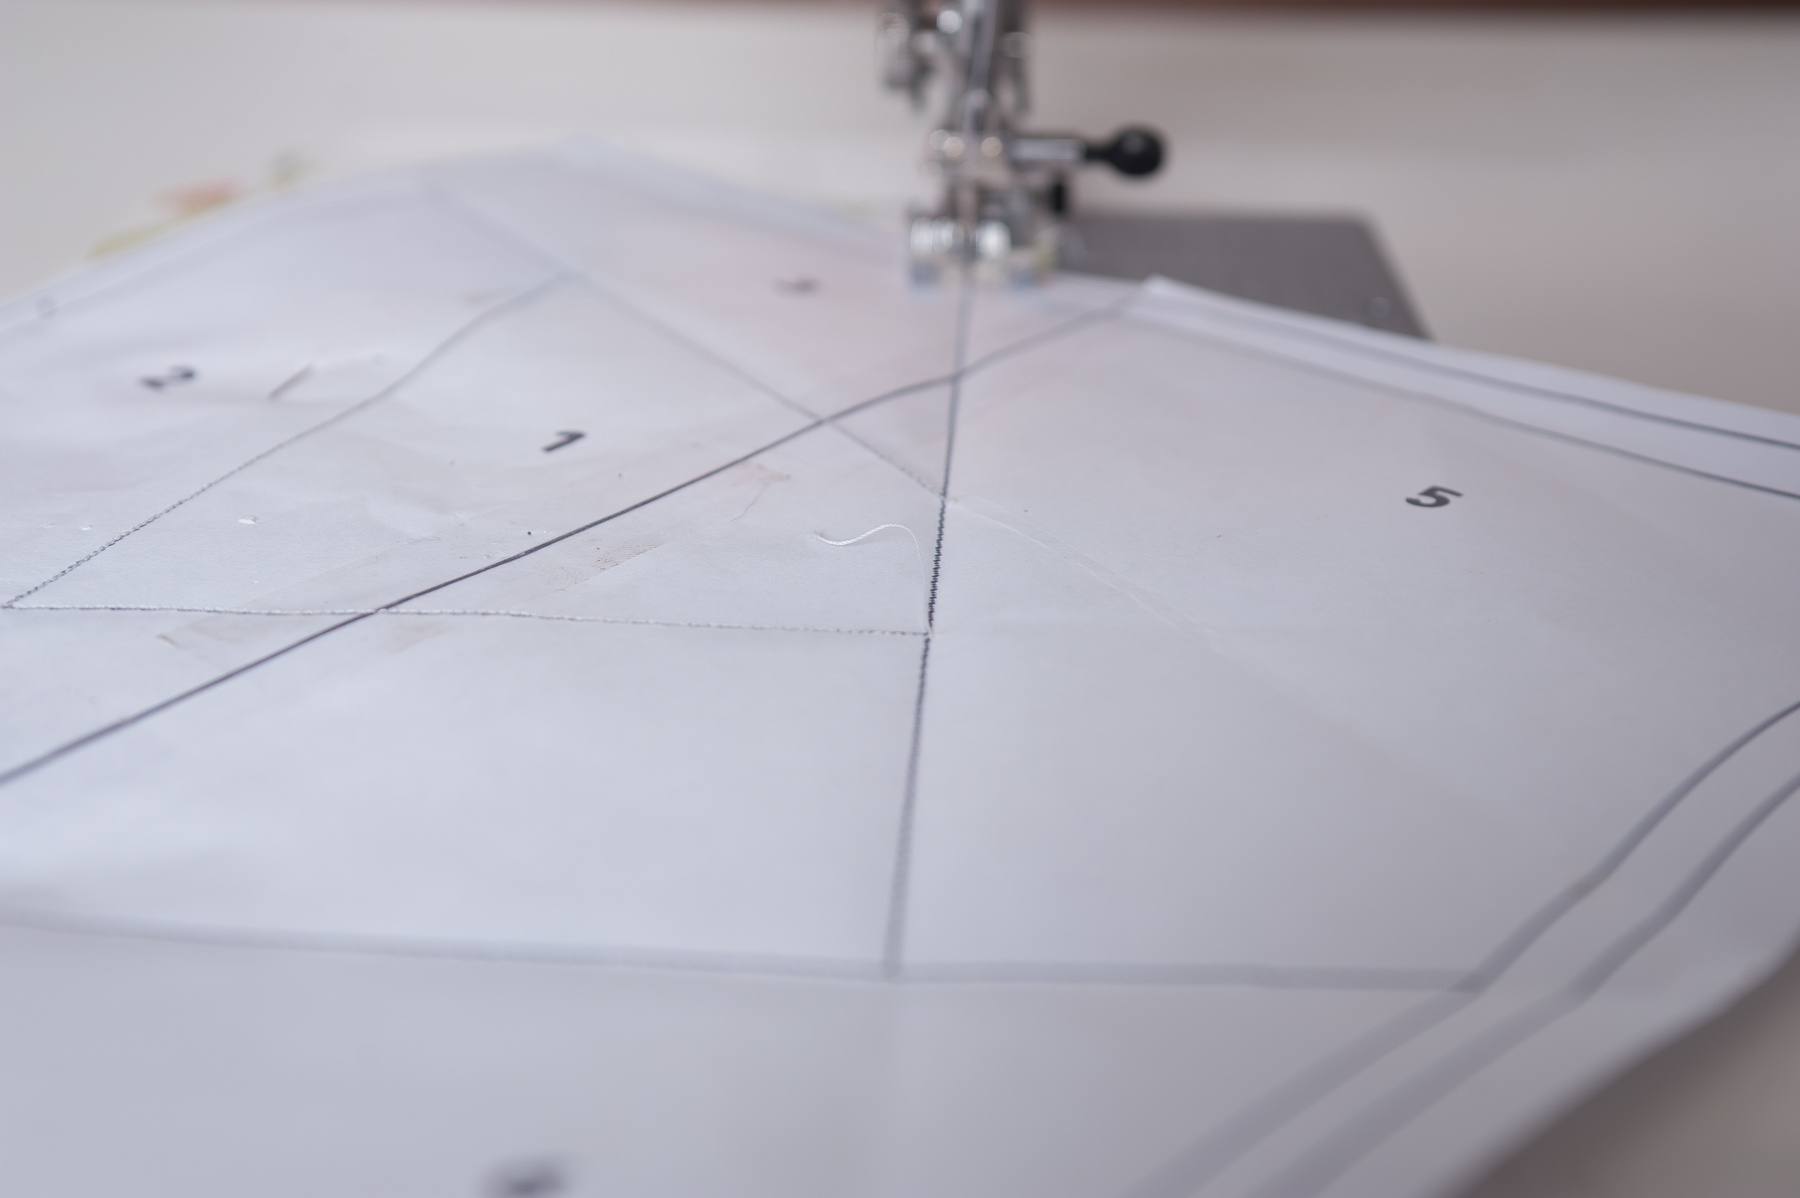
Once you've adjusted your stitch length, you're going to stitch on the line between sections 1 and 2. It's ok to go over the lines a little. It won't hurt a thing.
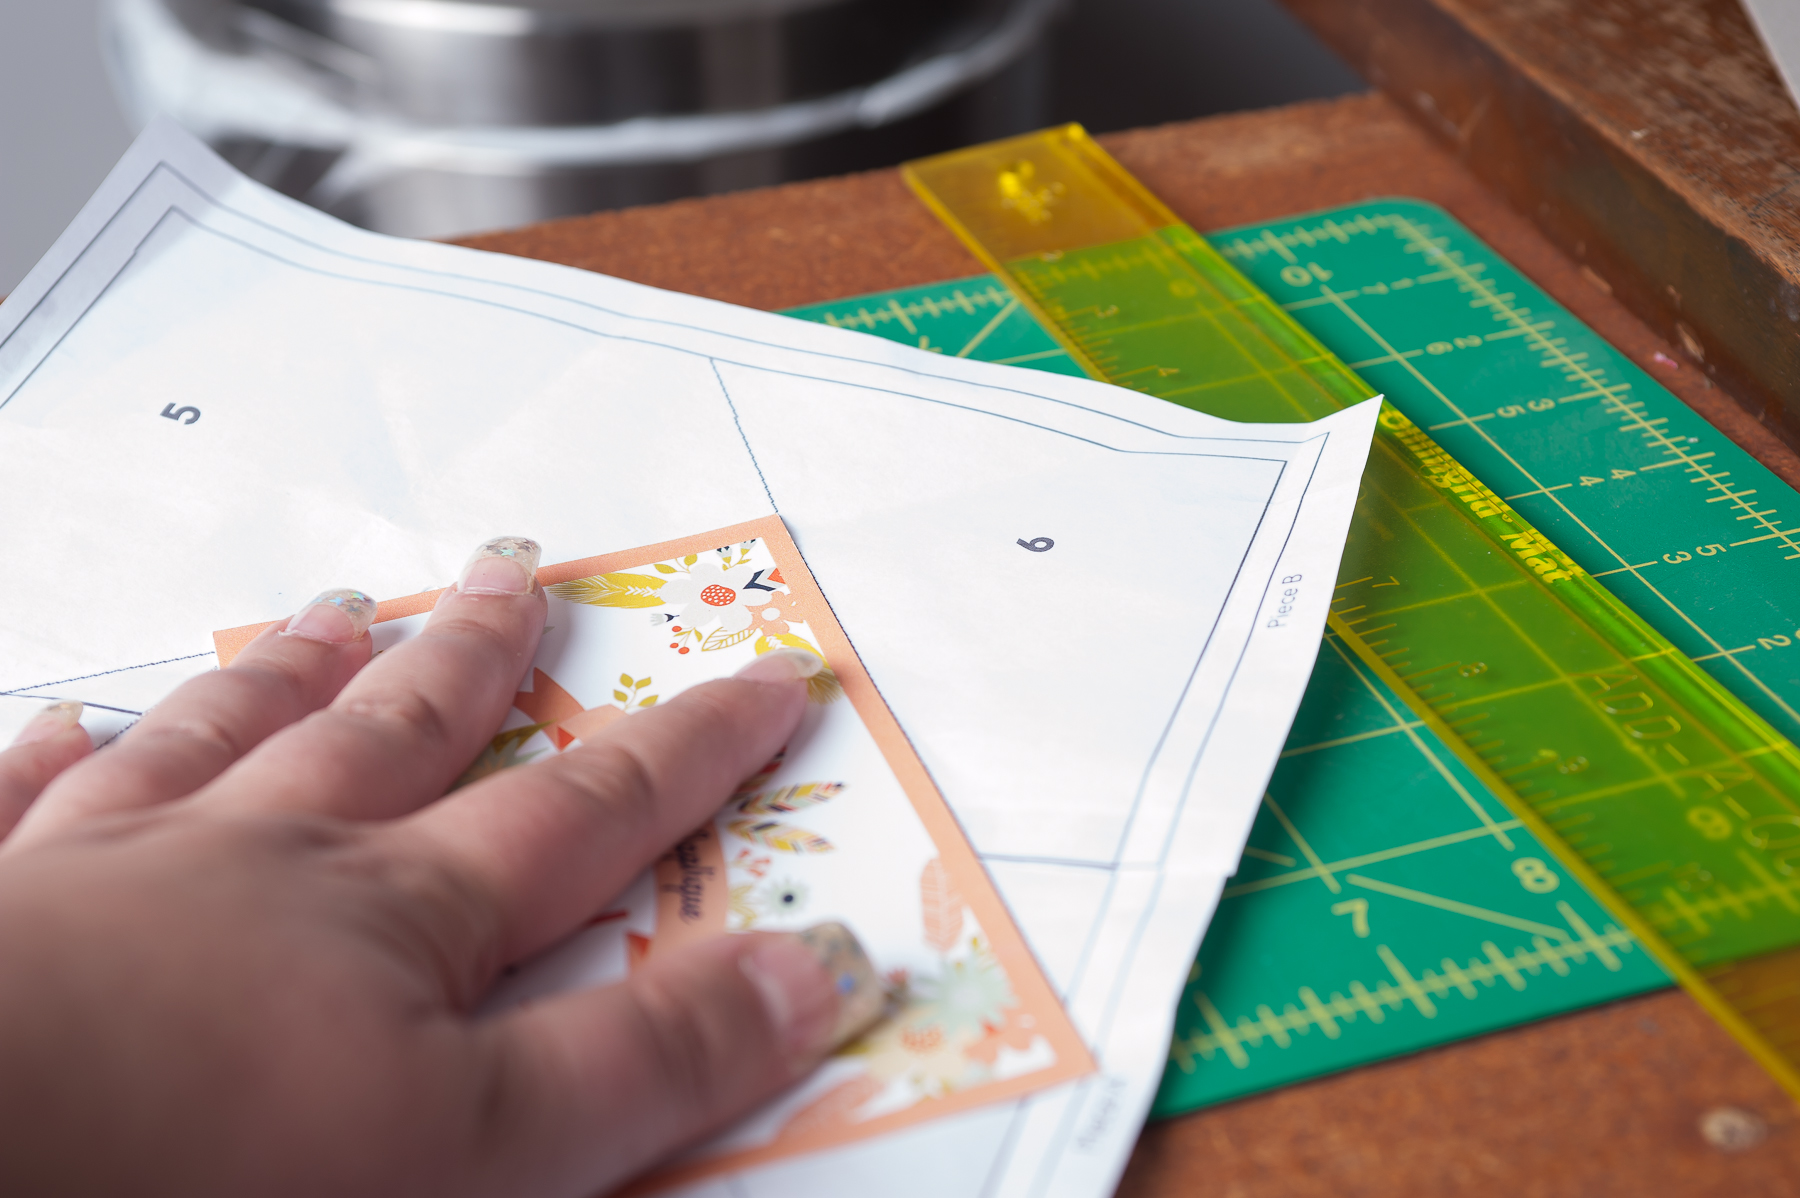
Before you cut anything, it's best to double check your work, and make sure you've placed your fabric so that the entire section is covered with room for seam allowances.

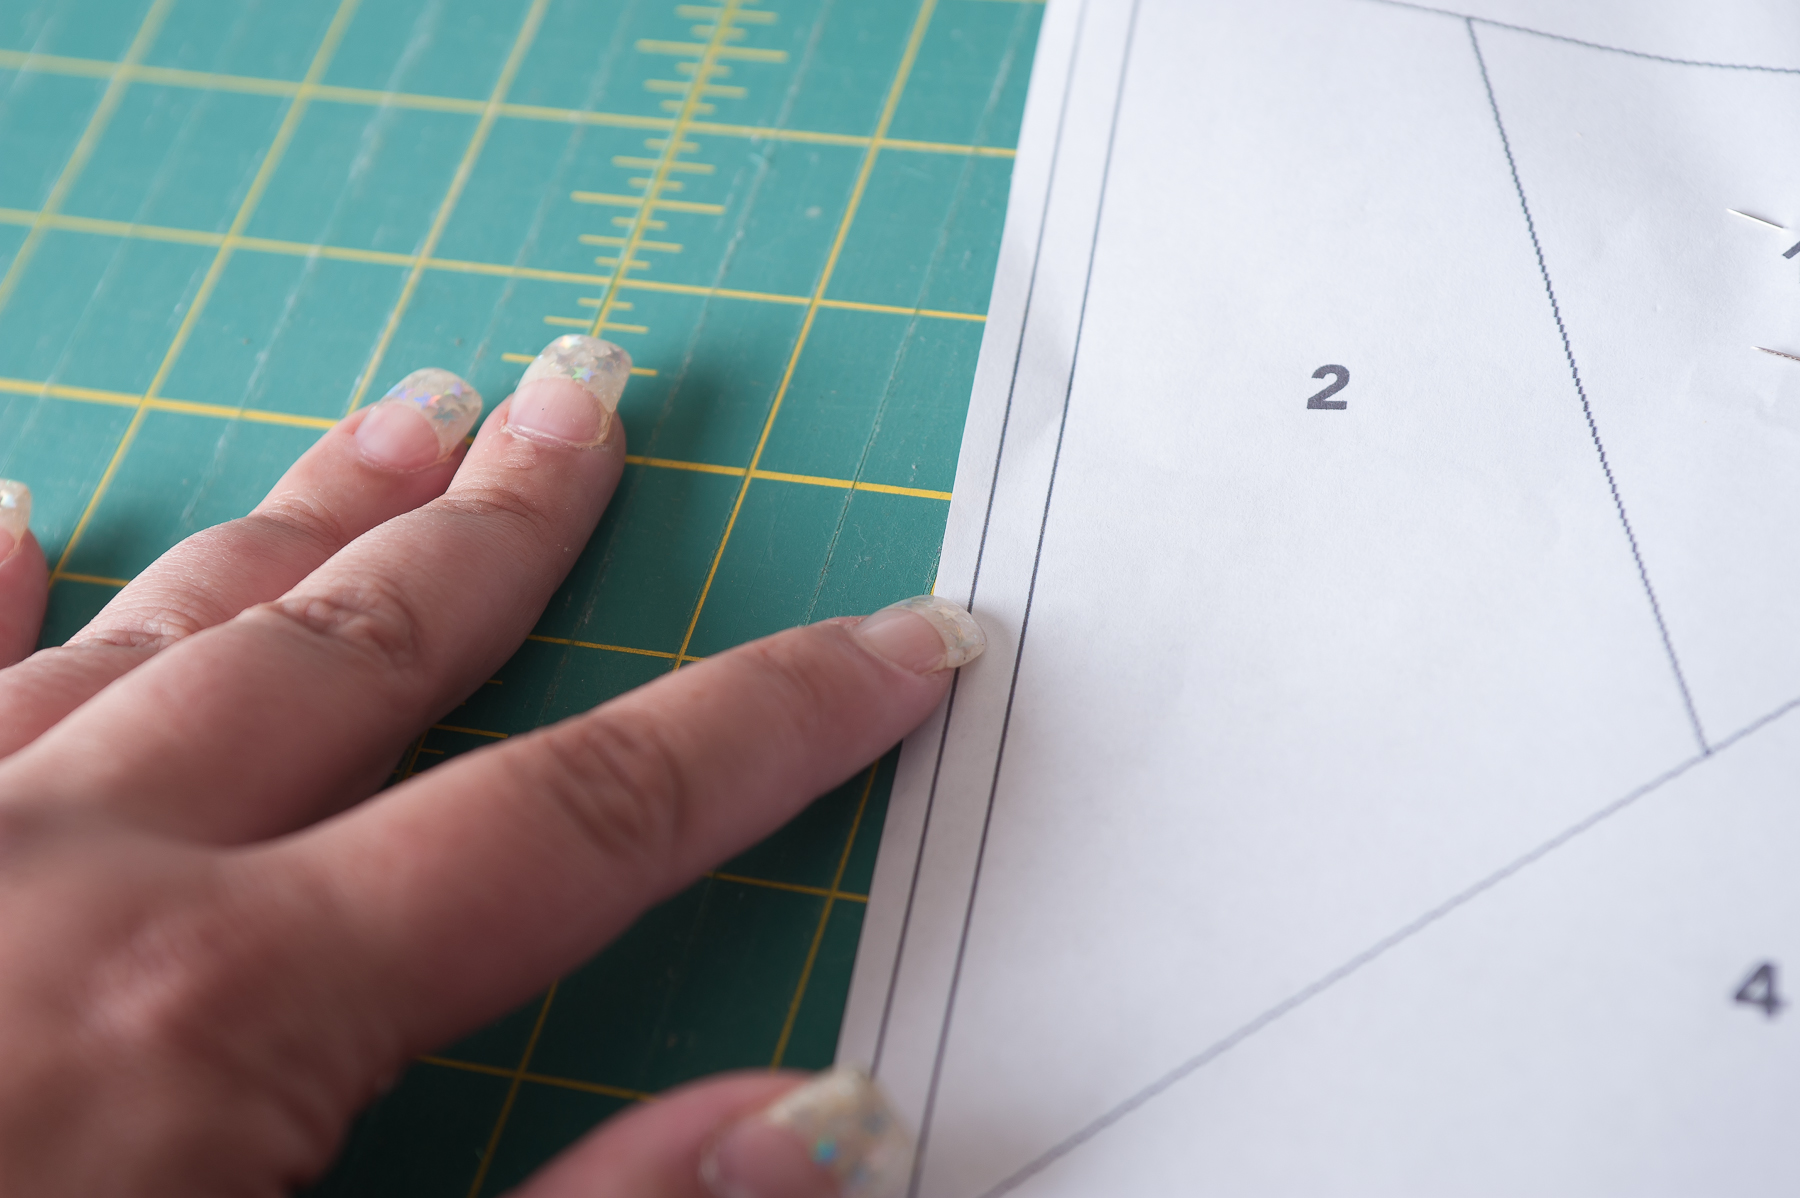
If your section 2 is covered like the photo above, you're good to go! You've finished the hardest part of this process! Congratulations :) Now fold section two back over onto section 1, RST. Then using your handy dandy Add-A-Quarter ruler and an index card, magazine subscription insert, postcard, or something along those lines, fold your paper back and trim your seam allowance.
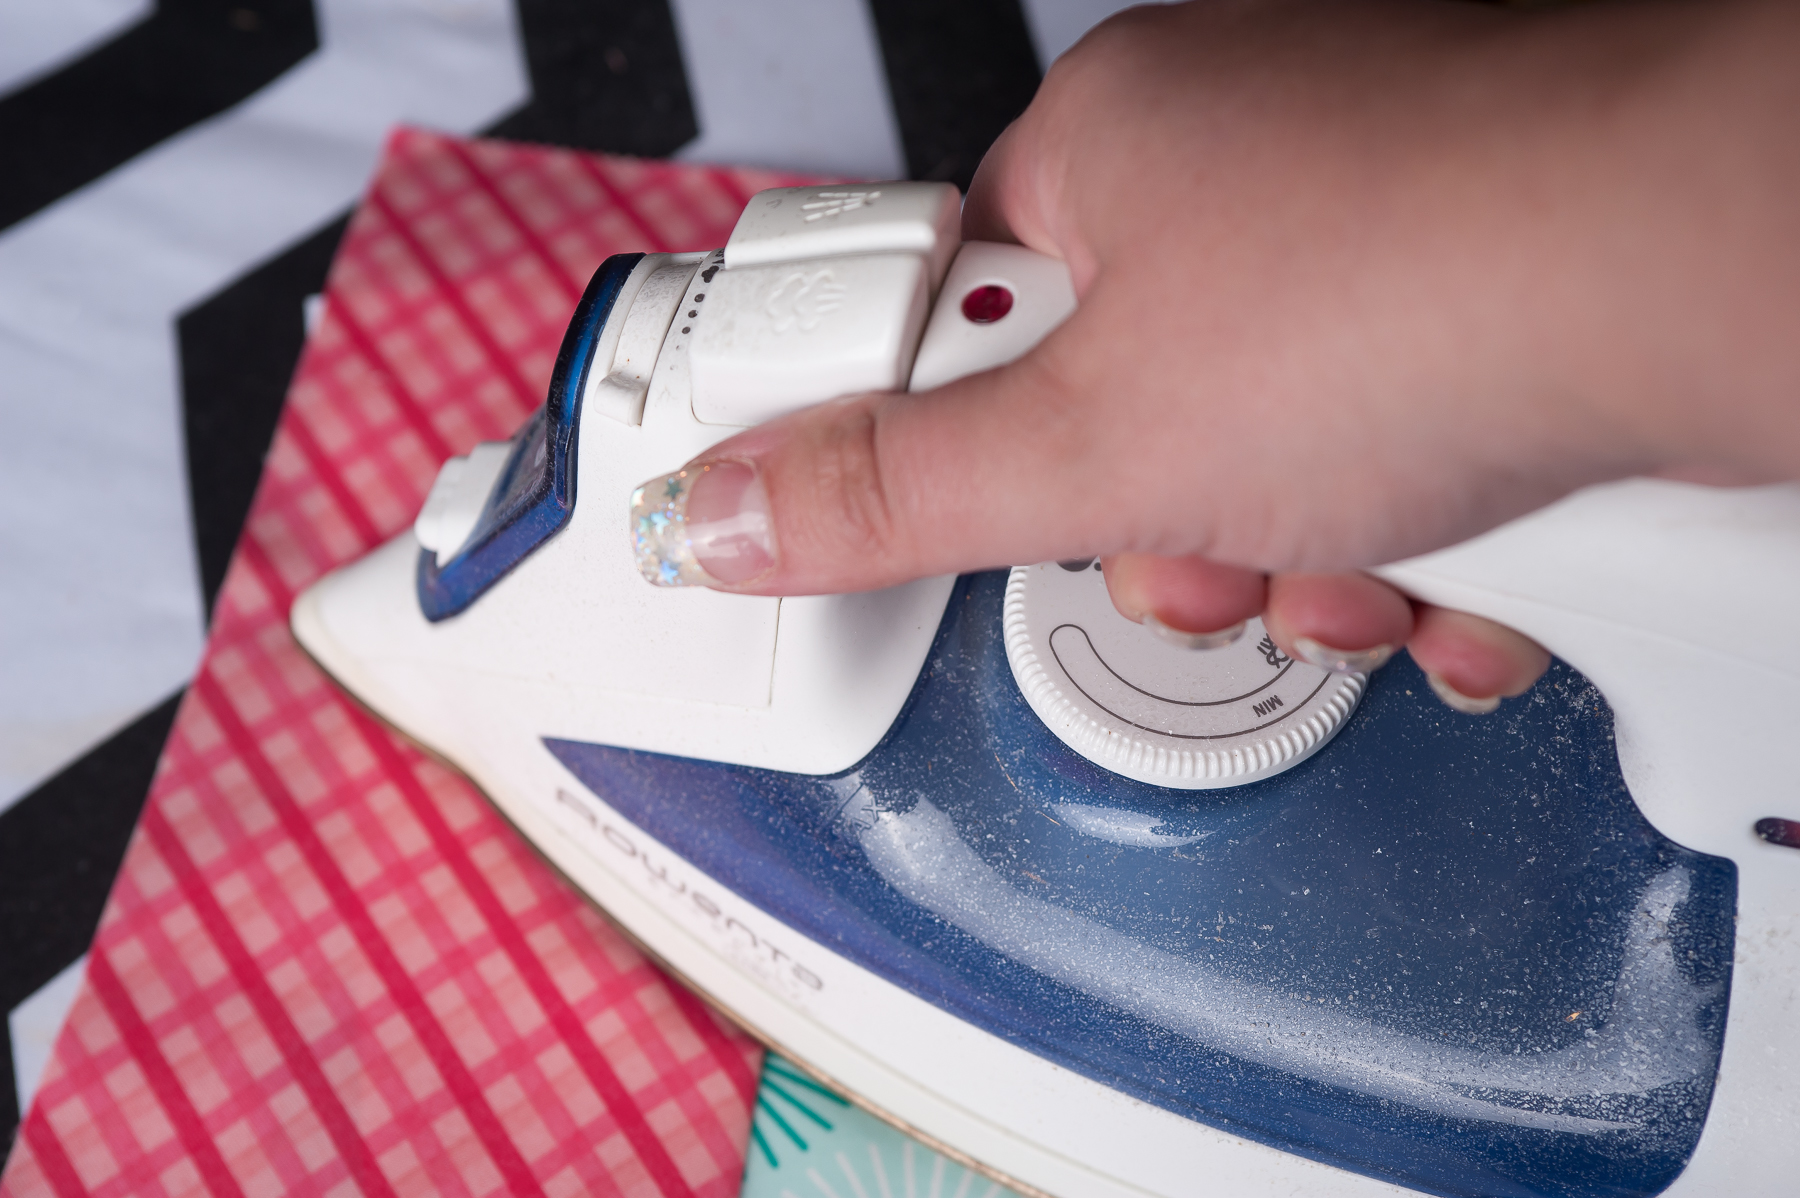
Now that you've actually got some stitching holding your fabric in place, press with a hot, DRY iron.
Now you can go ahead and trim the seam allowances (same as above) all around sections 1 and 2. It's best to wait until you have stitches in place to trim around section one, but once you've got your first two pieces in place, it's MUCH easier to continue with the seam allowances trimmed. It eliminates a lot of "guesswork" as to where to place your fabric, if that makes sense. If it doesn't now, it will here shortly.

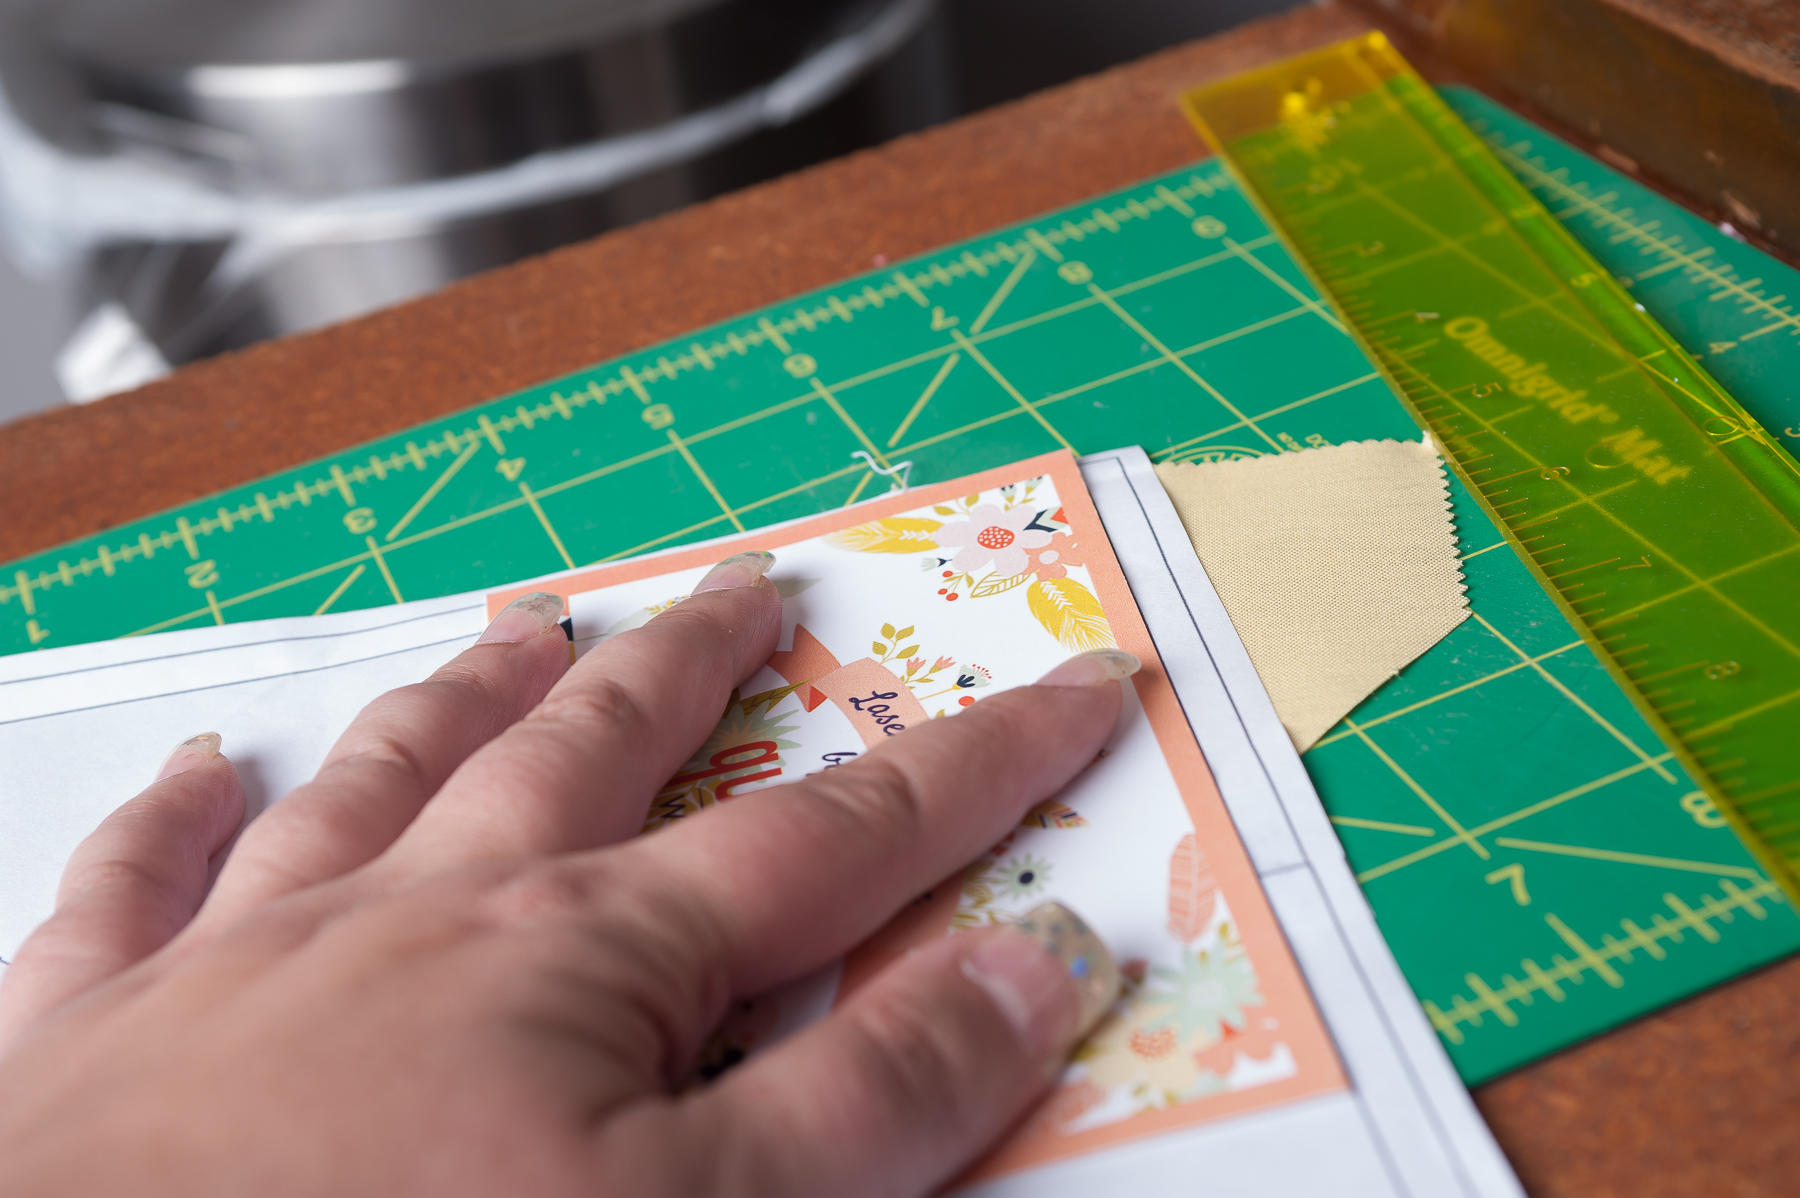
On to section 3. You will need a piece of fabric that is roughly 3.5" x 5.5." Line up one of the 5.5" edges with the seam allowance that abuts section 2, RST. Fold it over to double check that the whole section is covered, and then pin into place, RST. Stitch along the line between sections 2 and 3.

You shouldn't need to trim the seam allowance between sections 2 and 3, because of how we lined them up beforehand (See what I meant about it making sense to trim around sections 1 and 2?). So unfold, and press. Then trim around section 3 and section 4 with your ruler, same as with the other sections.

For section 4, you will need a piece of fabric that is approximately 3" x 8." Line it up, RST, with the seam allowance where sections 1 and 2 meet section 4, as always, checking first to make sure your whole section is covered when you flip your fabric over. Stitch on the line that separates sections 1 and 2 from section 4.


Now unfold, press, and trim the surrounding seam allowances.


Section 5 requires the largest piece of fabric, at 5" x 7." Line up the 5" edge with the seam allowance along sections 3 and 4, RST. Pin, and stitch along this line. If you're wondering why I always double check before I stitch into place, it's because it's a real pain to have to rip out those itty bitty stitches. Don't ask me how I know ;)


Unfold, press, and trim.


Section 6 - the last section! Cut yourself a piece of fabric that's at least 4" x 7.5." Lay fabric along the remaining seam allowance, RST. Stitch into place.

Unfold, press, and trim your remaining seam allowances. Now to remove your paper! It should peel away easily.

With all the paper removed, give the backside of your block a good spritz of heavy starch and press with a hot iron. Because there are so many bias seams, starching your finished blocks helps eliminate wonky, stretched out blocks when you piece your quilt together.
And there you have it -- a beautiful, foundation pieced block!
 Make 20.
Once you've got the first block figured out, the others come together VERY quickly. Then it's time to lay out the rest of your quilt.
Piece the sashing together with the pieces you cut earlier, then put together in the layout shown below. As for the borders, sew three of the 4.5" strips together end to end. Cut into two strips 52.5" long (be sure to measure your quilt for a more exact measurement; ideally, your top to this point should measure 42.5" x 52.5," but hey, none of us is perfect ;) ). Attach to either side of quilt top, and press seams away from quilt center. Then take your remaining border strips and cut to 42.5" (again, check for precision). Attach one of your 4.5" squares to either side of each strip, and then attach to top and bottom of quilt.
Add batting and backing, then quilt and bind as desired. Voila!
![]()
A gorgeous, foundation pieced work of art!
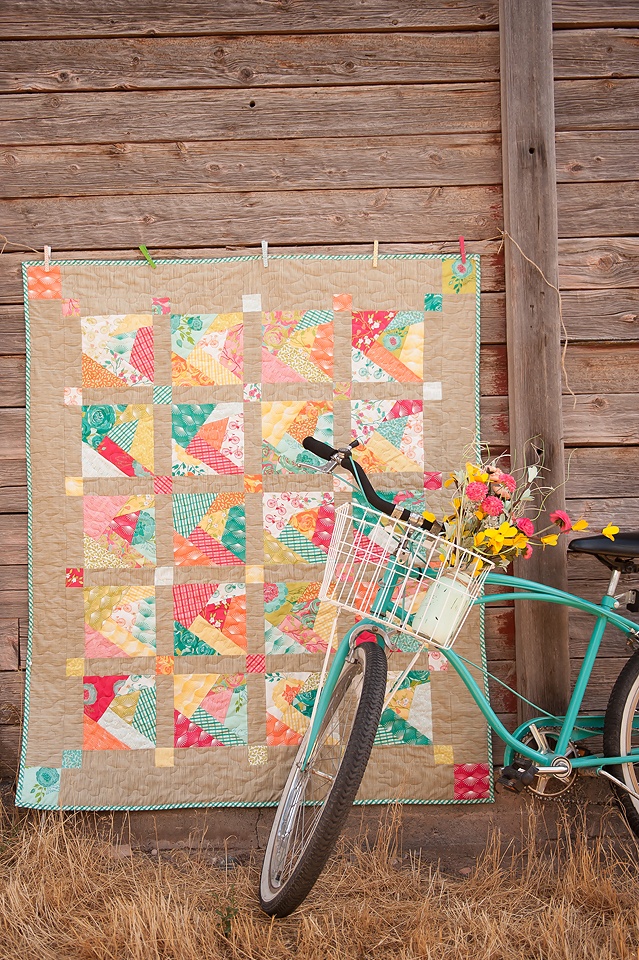
This quilt finishes at 51" x 61".
If you'd like to make a label like mine, be sure to hop over to my blog for the full tutorial! And if you'd like to join others making my patterns, be sure to join my Facebook group (link below). Thanks for quilting with me, friends!
Pamela
{Sweet Little Stitches}
![]()
Posted in: