Welcome to Moda Fabrics!
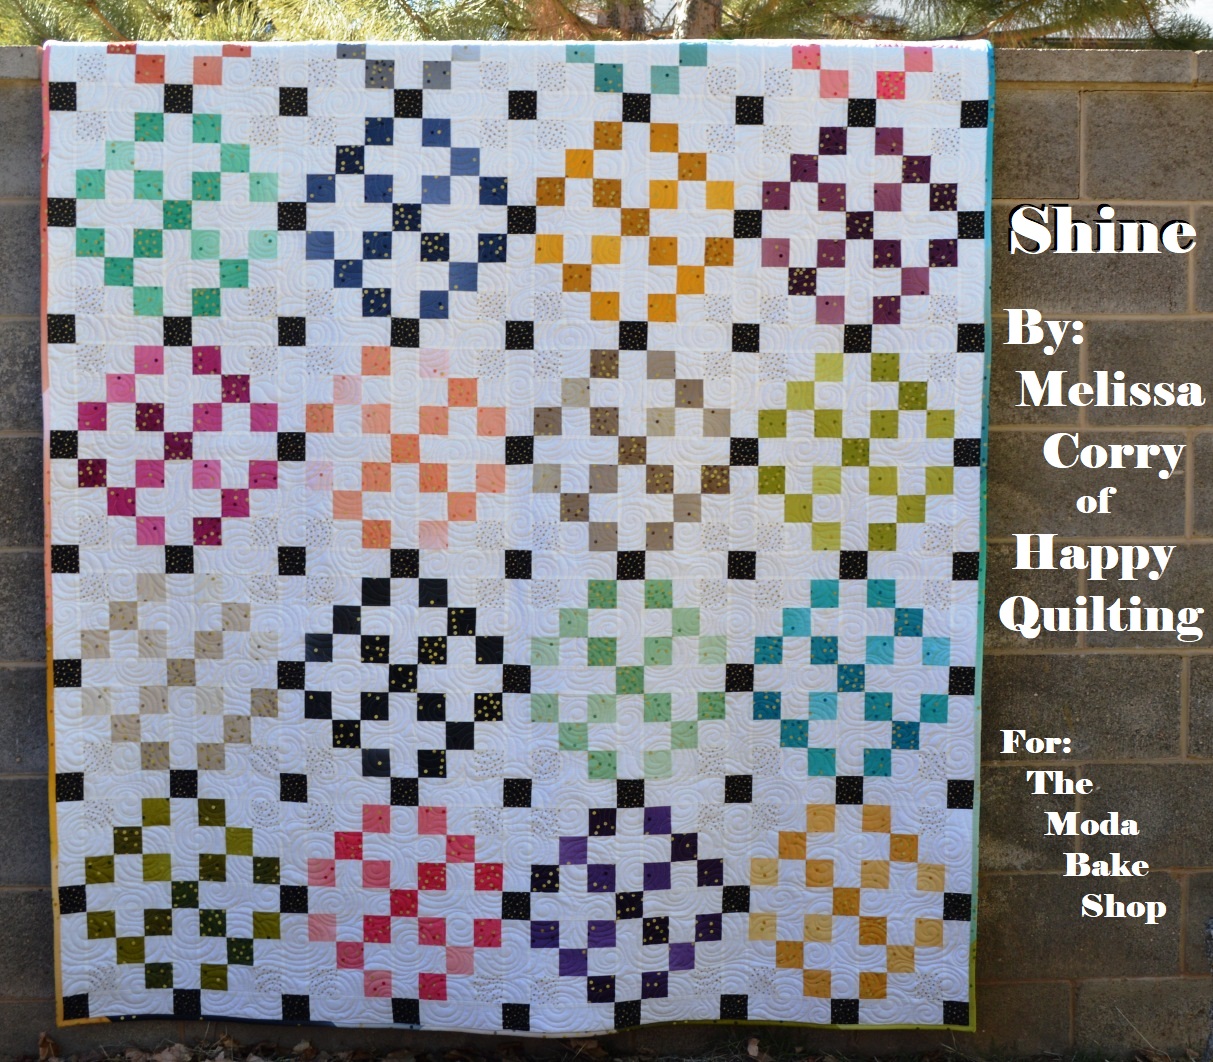
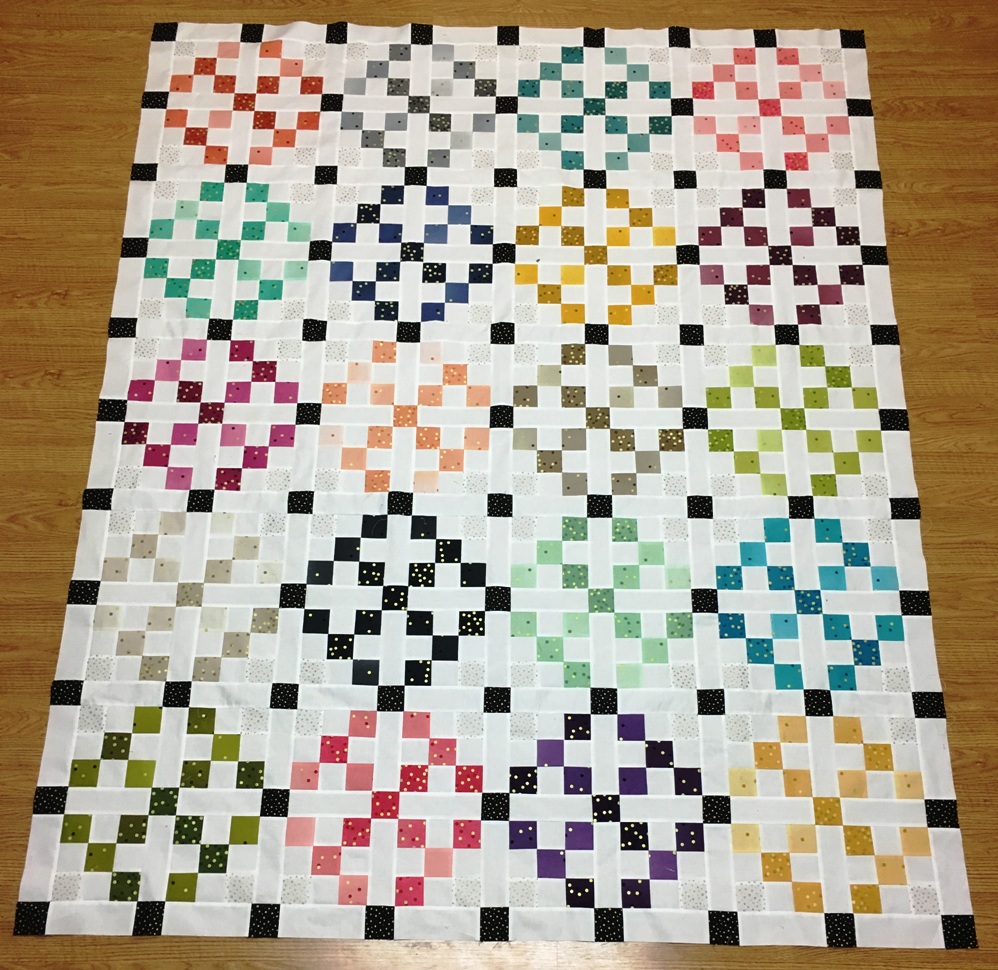
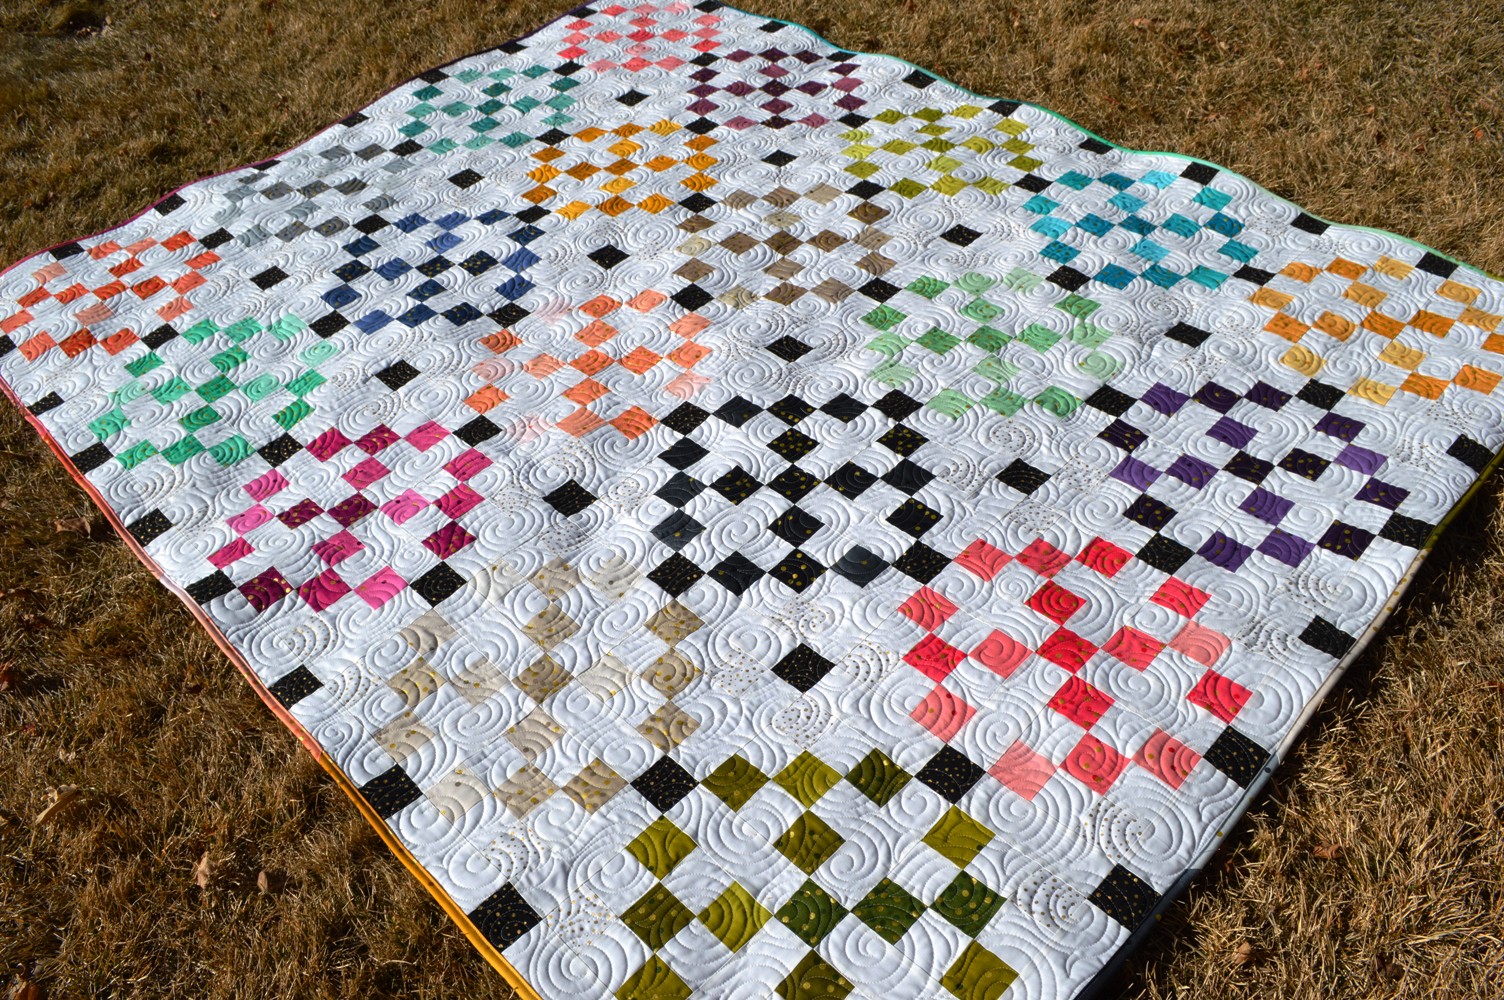
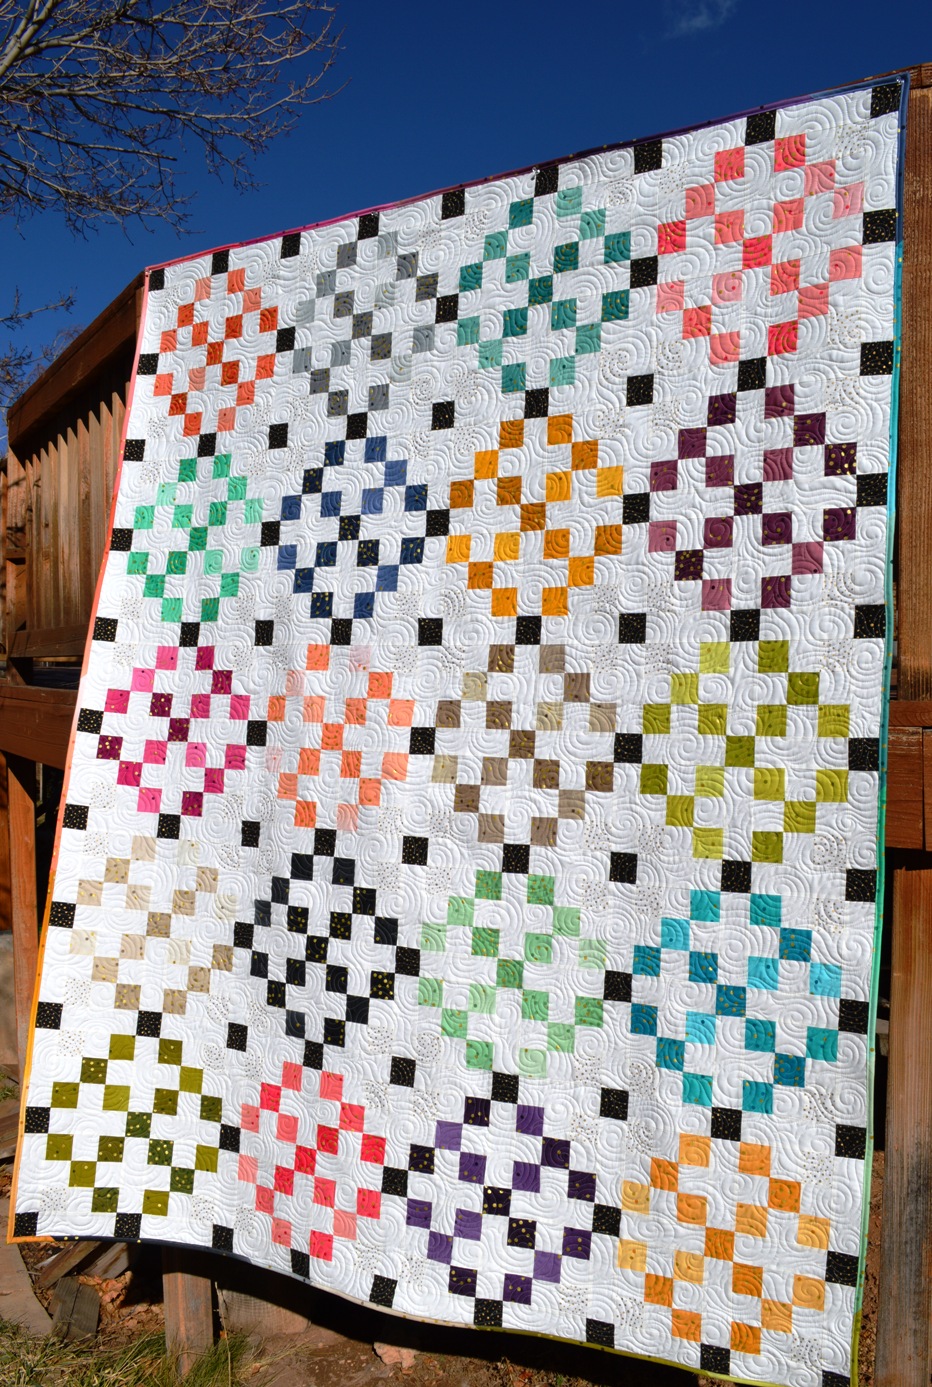
Shine Quilt
Shine Quilt
Published:
Feb 8 2018 - 23:00
![]()
Hi Moda Bake Shoppers!!! It's me, Melissa Corry from Happy Quilting and I am thrilled to be bringing you another fun and happy quilt tutorial today ;) I have been a huge fan of Vanessa Christenson's Ombre prints since they first came out, and when she added Metallic Confetti to the mix, I just knew I had to make something Shine with those prints!!! This simplistic geometric design in the fantastic V & Co. color scheme mixed with some equally shinny Modafications in black and white create an overall dynamite statement!! All in all, this is sure to Shine!!!
This quilt finishes at 66" x 82".
So let's get right to what you need to do to make your own ;)
![]()

1 Ombre Confetti Metallic Jelly Roll® by Vanessa Christenson for Moda
1/2 Yard Modafications Metallic White - 9884 11M
1/2 Yard Modafications Metallic Jet - 9884 26M
3 3/4 Yards Moda Bella Solid White - 9900 98 - background fabric
4 Yards of your Favorite Confetti Metallic Print 10807 - backing fabric
![]()
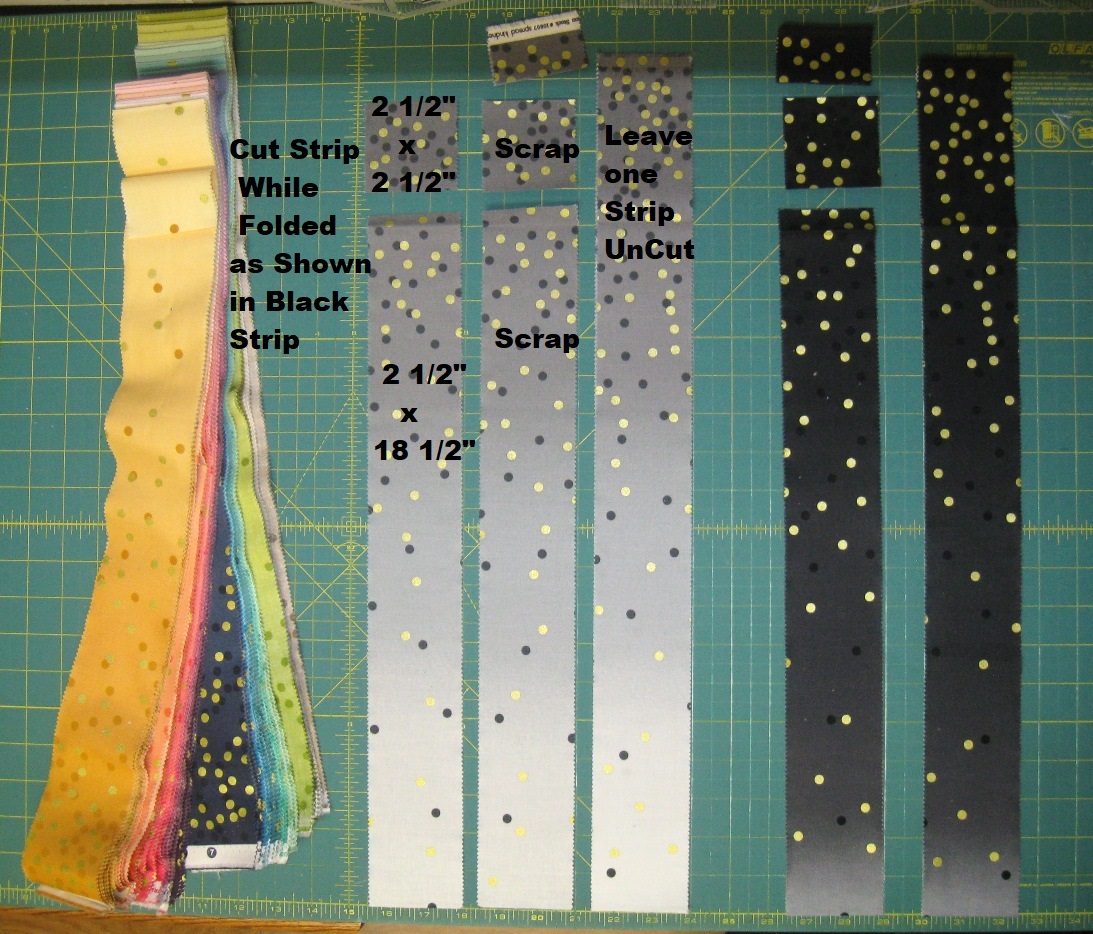
STEP 1 - CUTTING
Start out with your Jelly Roll. There are two strips of each of the 20 colors in the roll. You will be leaving one strip uncut, and the second strip, place on your cutting mat folded in half. Cut a 2 1/2" x 2 1/2" square and an 2 1/2" x 18 1/2" strip from the strip. You will have two of each cut and the second set can be put in your scrap drawer. The 2 1/2" square will be used in your quilt top and the 2 1/2" x 18 1/2" strip can be set aside for the moment as it will be used to make a scrappy binding.
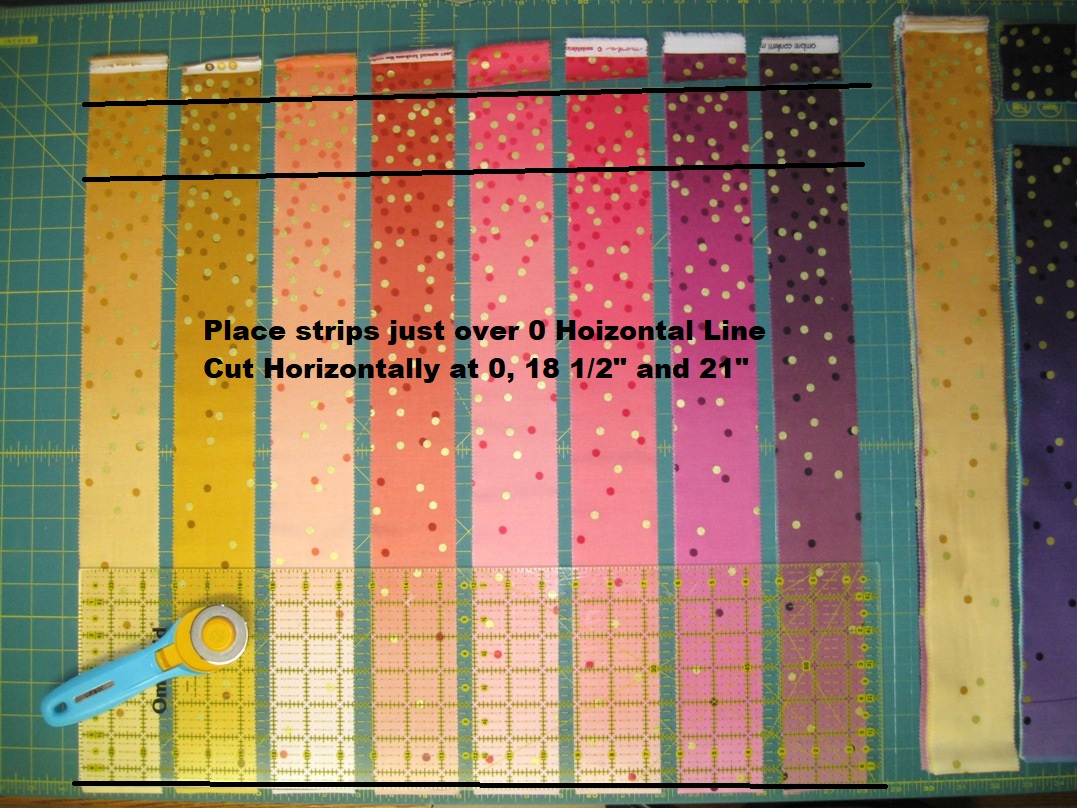
Repeat this cutting for all 20 strips. To Speed things up, you can place several folded strips out at once and have them hang just over the 0 Horizontal line on your mat as shown. Then simply cut along the Horizontal line, followed by the 18 1/2" Horizontal Line finally the 21" Horiztonal Line.
This concludes the cutting from the Print strips and you should have:
(20) 2 1/2" x Width of Fabric Strips - One of each color
(20) 2 1/2" x 2 1/2" Squares - One of each color
(20) 2 1/2" x 18 1/2" strips to be used for binding.
From the Background Fabric (White Bella Solid) cut:
(6) 6 1/2" x Width of Fabric Strips
(20) 2 1/2" x Width of Fabric Strips
(82) 2 1/2" x 6 1/2" rectangles
From the Modifications Metallic White fabric cut:
(80) 2 1/2" x 2 1/2" squares
And finally, from the Modifications Metallic Black fabric cut:
(3) 2 1/2" x Width of Fabric Strips
(31) 2 1/2" x 2 1/2" squares

STEP 2 - STRIP PIECING 2 PATCH UNITS
We will start with some Strip Piecing. Whenever I strip piece I always turn my stitch length down slightly as you will be coming back and cutting through your stitches. Grab the pile of 2 1/2" x WOF Print fabric strips and the 2 1/2" x WOF Background fabric strips. Place a Background strip on a Print strip and stitch a 1/4" seam along the long edge. I just align the raw edges as I am stitching.

It will save time and thread to chain stitch all 20 of your strip pairs. This simply means when you come to the end of one strip, don't cut our threads. Simply start feeding the next strip set through your machine to make a super long chain of strips. And if the ends of your strips don't line up at the end of each strip, don't worry, you are just going to cut it off anyway :)

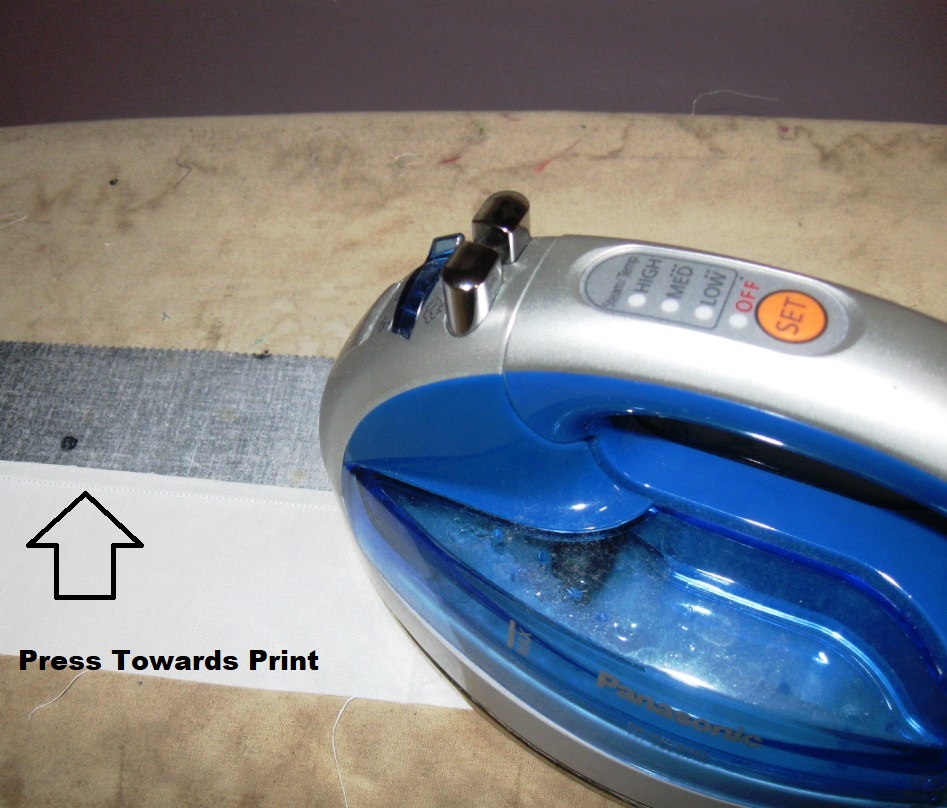
Once all 20 of your strip sets are stitched, clip your threads between strip sets and move to your ironing board. Press the seam allowance of your strip sets towards the Print strip. I actually like to press from the front of the strip to assure I don't get any little bubbles in the seam allowance.
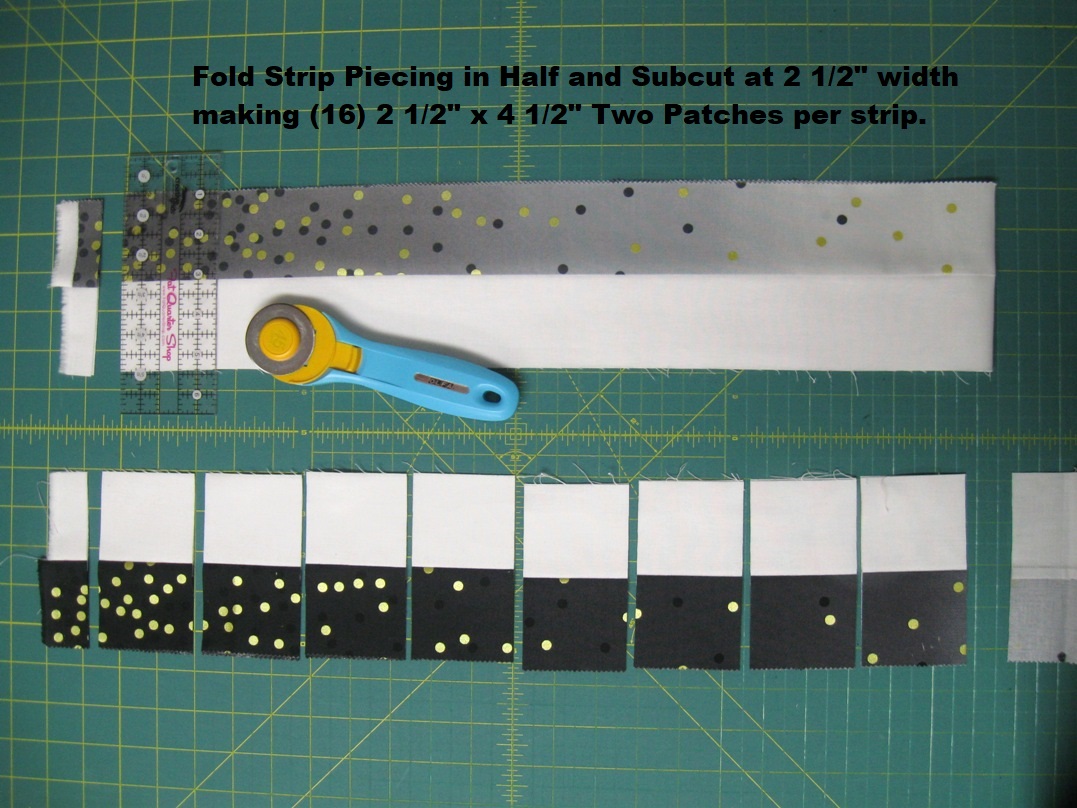
Now, you can move back to your cutting mat. Fold your nicely pressed strip in half and lay it on your mat, aligning the top of the strip with a horizontal line on your mat. Using the vertical line on your mat just that is just past the selvage of your strip set, cut a straight edge. Now measure in 2 1/2" and subcut (2) Two Patches. Continue subcutting 2 1/2" width in until you have cut (16) 2 1/2" x 4 1/2" Two Patch Units.
You will repeat this subcutting for each of the 20 strip sets you have sewn. To speed things up, you can Stagger Stack your strip sets and cut a whole bunch at once. If you are not familiar with this technique, I have a tutorial here, that walks you through the process step by step :)

When you are done Sub-Cutting you will have (16) Two Patch Units of each of the 20 Prints for a total of 320 Two Patch Units. Keep the units stacked in their own individual Print piles.

STEP 3 - SEWING THE BLOCK
So now with all of your Two Patches cut, you are ready to make the blocks. I will be showing how to make one block at a time, but if you are good at keeping track of your stacked pieces, you can choose to chain piece several or all of the blocks at once. Or you can make them 1 block at a time as it shows. Whichever is your preference ;)
Start by laying out 4 Two Patch Units of 1 Print color and 1 Modifications White 2 1/2" square as shown below. Stack 4 Sets total on this layout. Be sure and mix up the ombre in your stacks so you don't have one set of 4 that it is all light or all dark ;)

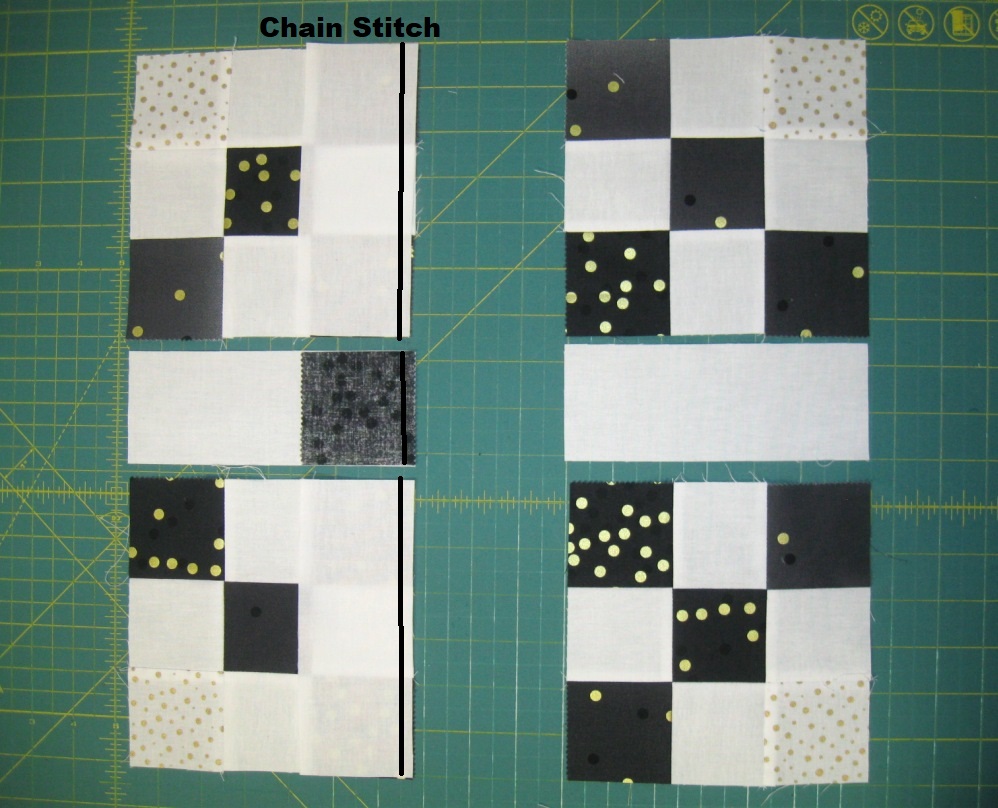
Place the Second Two Patch unit in the Top Row onto the First Two Patch unit with right sides together. Align and Pin or Nest the center seam. Chain Stitch a 1/4" seam along the pinned edge of all 4 sets. Then place the Modifications White square onto the Background square in the Bottom Row with right sides together. Chain stitch a 1/4" seam along the edge of all 4 sets. Clip your threads of the first set and lay them back out again. Finally, place the Third Two Patch unit in the Top Row onto the Second Two Patch unit with right sides together. Align and Pin or Nest the center seam. Chain stitch a 1/4" seam along the pinned edge of all 4 sets.

Press the Seam in the Top Row Open. Press the seam in the bottom row towards the Modifications White Square and lay the units back out again in stack of 4. Finally, Place the Bottom Row onto the Top Row with right sides together. Align and Pin or Nest the seams. Chain stitch a 1/4" seam along the pinned edge of all 4 sets.

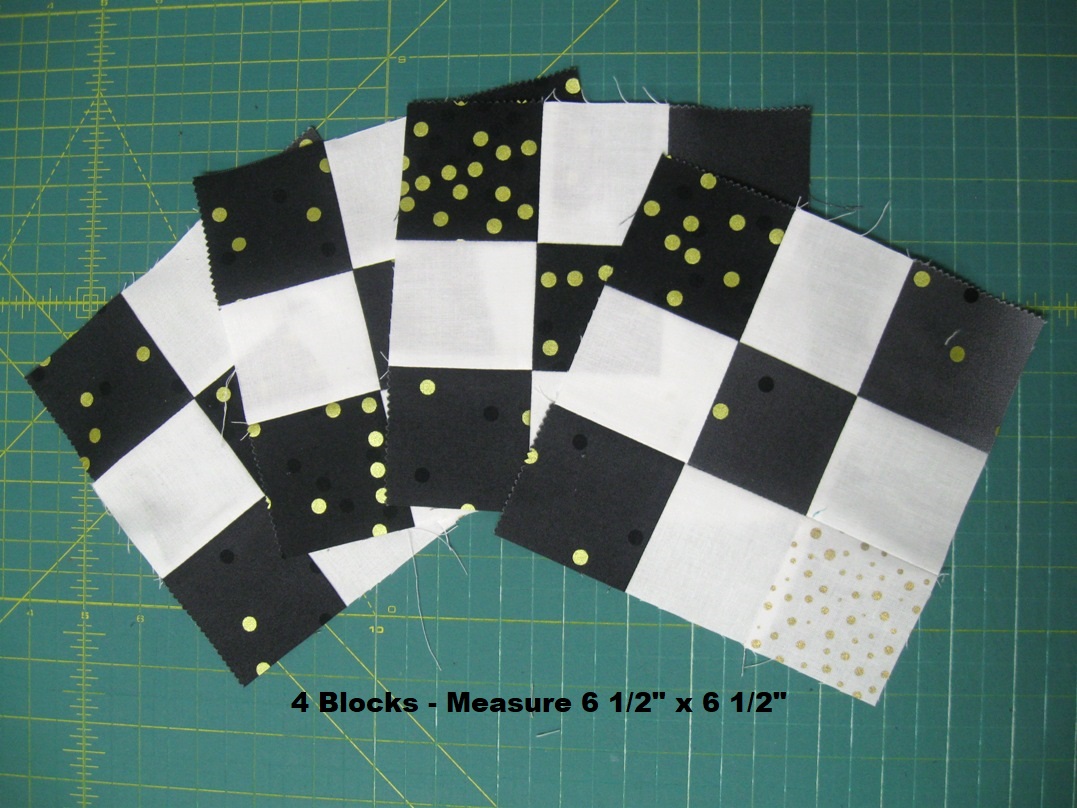
Press the seam allowance open. You will now have (4) 9 patch blocks that should each measure 6 1/2" x 6 1/2".
Layout the (4) 9 Patch Blocks, (4) Background 2 1/2" x 6 1/2" rectangles, and the (1) 2 1/2" x 2 1/2" square of the same print fabric as shown below. Take care to note the placement of the Modifications white squares :)

Place the Second Column units on the First Column units with right sides together. Chain Stitch a 1/4" seam along the edge of all three rows units. Clip your threads and lay the pieces back out again.
Place the Third Column units onto the Second Column units with right sides together. Chain Stitch a 1/4" seam along the edge of all three rows units. Clip your threads.

Press the seam allowances towards the Background rectangles. So for Row 1 and Row 3 you will be pressing the seam allowance inwards, for Row 2 you will be pressing the seam allowance outwards.

Place the Second Row onto the First Row with right sides together. Align and Pin or Nest the center seams. Stitch a 1/4" seam along the pinned edge .

Then place the Third Row onto the Second Row with right sides together. Align and Pin or Nest the center seams. Stitch a 1/4" seam along the pinned edge .

Again, Press the seam allowances towards the Background Rectangles. You will now have a finished block that will measure 14 1/2" x 14 1/2". Now simply repeat this process for all 20 Print Fabrics so you have a total of (20) Blocks. (Which I somehow forgot to take a picture of, sorry about that ;)

STEP 4 - STRIP PIECING THE SASHING UNITS
With your blocks made, we are going to go back to some Strip Piecing to make the Sashing Units. Again, you will want to lower your stitch length a bit of this ;) Grab the (6) 6 1/2" x WOF Background Strips and the (3) 2 1/2" x WOF Modifications Black Strips and lay them out as shown in three stacks, only not folded.
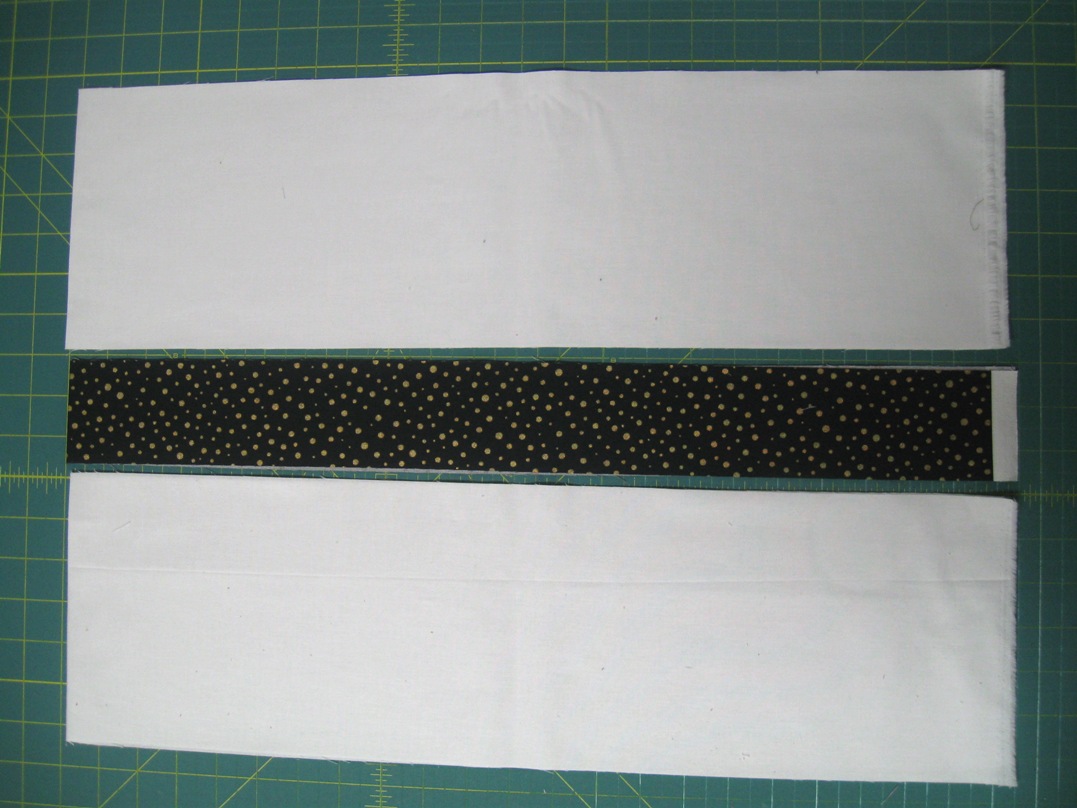
Place the Black Strip onto the Top Background Strip with right sides together. Chain Stitch a 1/4" seam along all three sets aligning as you go. Clip your threads between sets.

Now place the Bottom Background Strip onto the Black Strip with right sides together. Chain Stitch a 1/4" seam along all three sets aligning as you go. Clip your threads between sets.

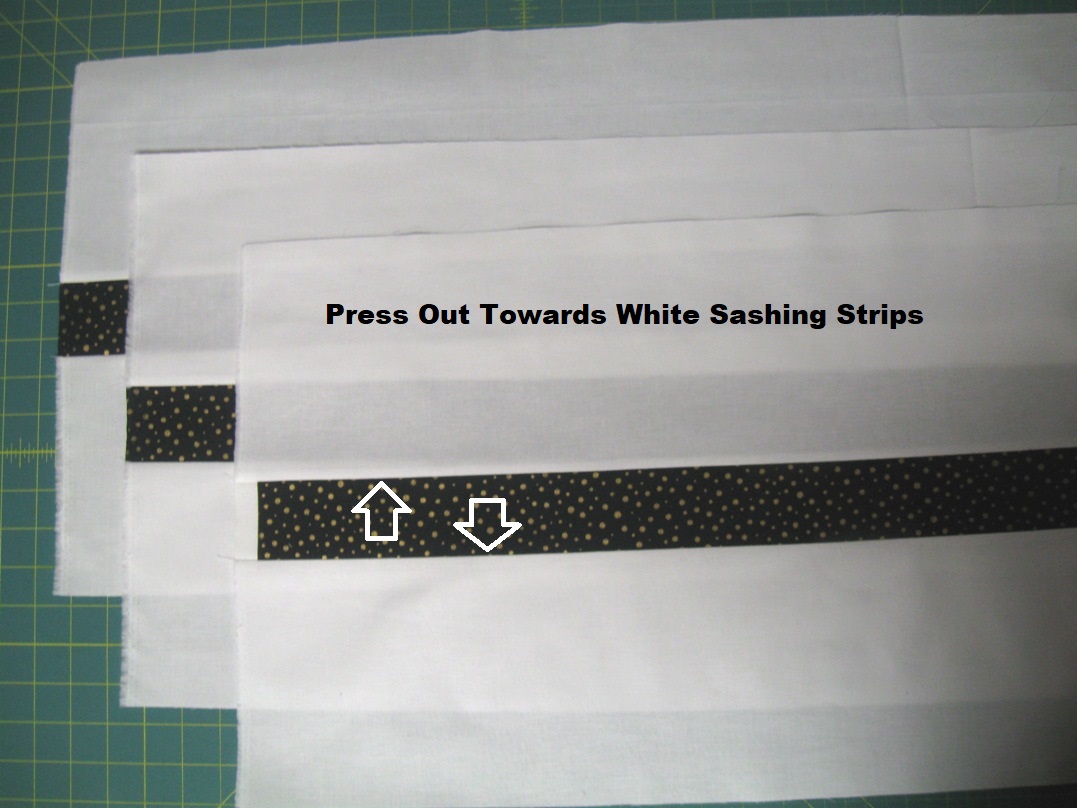
Press the seam allowance of your strip sets towards the Background strips. This is pressing outwards towards the light, but it allows you to nest later on ;) And again, I like to press from the front of the strip to assure I don't get any little bubbles in the seam allowance.
Now, once more, you can move back to your cutting mat. Fold your pressed strips in half and stagger lay them on mat, aligning the top of the strip with a horizontal line on your mat. Using the vertical line on your mat to cut a straight edge. Then Subcut in 2 1/2" widths to create (16) 2 1/2" x 14 1/2" Sashing Units per strip for a total of (48) 2 1/2" x 14 1/2" Sashing Units.

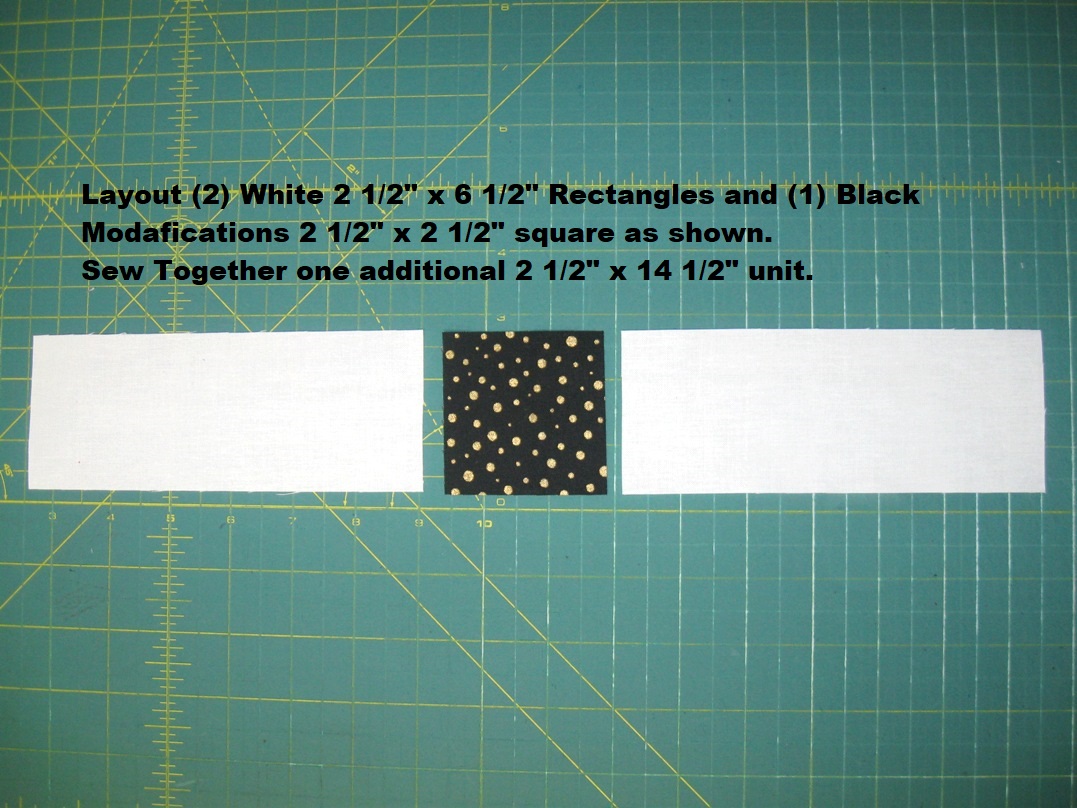
And we actually need 49 Sashing Units for this project, but it wasn't efficient to do an entire strip set for 1 more. So layout your remaining (2) Background 2 1/2" x 6 1/2" Rectangles and (1) Modifications Black 2 1/2" x 2 1/2" square as shown. Sew the units into a row and press the seam allowances outwards towards the Background rectangles.
You will now have 49 Sashing Units that each measure 2 1/2" x 14 1/2" and with that, you are ready to sew your quilt top together!!! Sew exciting!!!!

STEP 5 - SEWING THE QUILT TOP
We will start by sewing the Sashing Rows together. Layout (5) Modificiations Black 2 1/2" x 2 1/2" squares and (4) Sashing Units as shown in the first row. Place the Black Squares onto the ends of the Sashing Units as shown in the second row. Chain Stitch a 1/4" seam along the edges. Clip the threads and lay the units back out again as shown in the third row. Now you can sew the row together. Place the second unit onto the first unit as shown in the fourth row and stitch a 1/4" seam along the edge. Then Place the third unit onto the second unit as shown in the fifth row and stitch a 1/4" seam along the edge. Continue in this manner until the entire row is sewn. Repeat (or chain stitch) to make 6 Row Total. Press the seam allowances towards the Background Rectangles.

And now the fun part ;) Layout your 20 Blocks, 25 Sashing Units, and 6 Sashing Rows as shown below. You can place your blocks in any order you like. You can do more of a rainbow order, or keep it random like I did. Just switch them around until you get a look that you like ;) Once you get them where you like, I recommend taking a picture of them so you can refer back to it for your layout.

And now you can get sewing it together. Start by Placing your Sashing Units onto the Blocks with right sides together. Align and Pin or Nest the center seam. Chain stitch a 1/4" seam along the pinned edge of all 20 blocks, and you will be sewing 2 Sashing Units on the first block in each row.

Press the seam allowances towards the Sashing Units. Lay your block back out in your preferred layout, this is where you can refer to the picture you took if needed :)

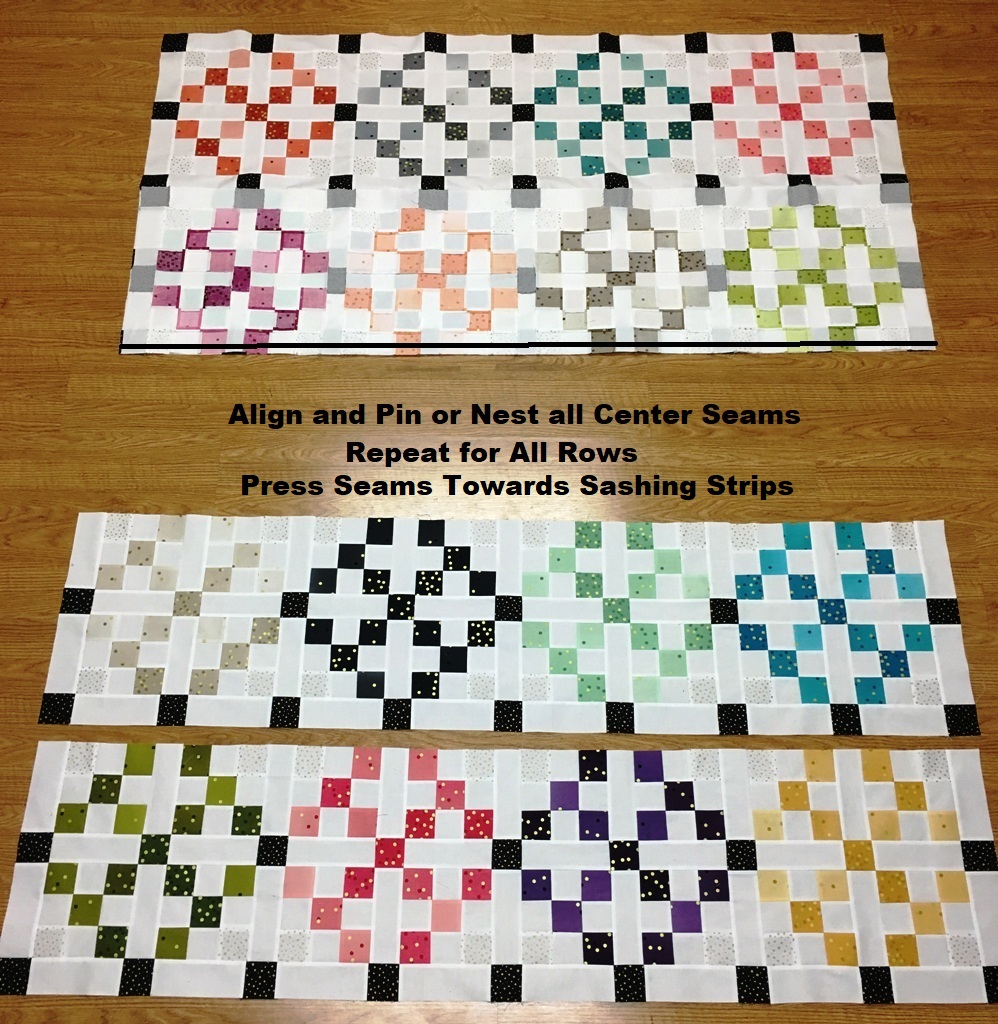
Now you can sew the rows together, this is just like sewing the Sashing Rows together only on a larger scale. Place the second block onto the first block as shown in the first row. Align and Pin or Nest the center seam and then stitch a 1/4" seam along the edge. Then Place the third block onto the second block as shown in the second row. Align and Pin or Nest the center seam and then stitch a 1/4" seam along the edge. Then again repeat for the last block as shown in the third row. Repeat (or chain stitch) to sew together all 5 Block Rows. Press the seam allowances towards the Sashing Units.

Almost done!!! Now just to sew all of the rows together ;) Place the Sashing Rows onto the Block Rows with right sides together. Align and Pin or Nest the seams and then stitch a 1/4" seam along the pinned edges. Again, the first Block Row will have 2 Sashing Rows stitched to it.

Press the seam allowances towards the Sashing Rows.

Only 4 seams left!!! Place the Second Row onto the First Row with right sides together. Align and Pin or Nest the seams and then stitch a 1/4" seam along the pinned edge.

Then place the Third Row onto the Second Row with right sides together. Align and Pin or Nest the seams and then stitch a 1/4" seam along the pinned edge. Continue in this fashion until you have sewn all the rows together. Press the seam allowances towards the Sashing Rows.
And just like that, your quilt top is done and isn't it just so fun!!!! Way to go!!!!
STEP 6 - FINISHING THE QUILT TOP
So . . . Let's finish it up ;) Time to Baste It, Quilt It, and Bind It!!! Which is a whole lot in one little sentence. If you are new to quilting, you can see my Finishing Your Quilt Series of video tutorials that will walk you through Basting, Quilting, and Binding step by step ;)
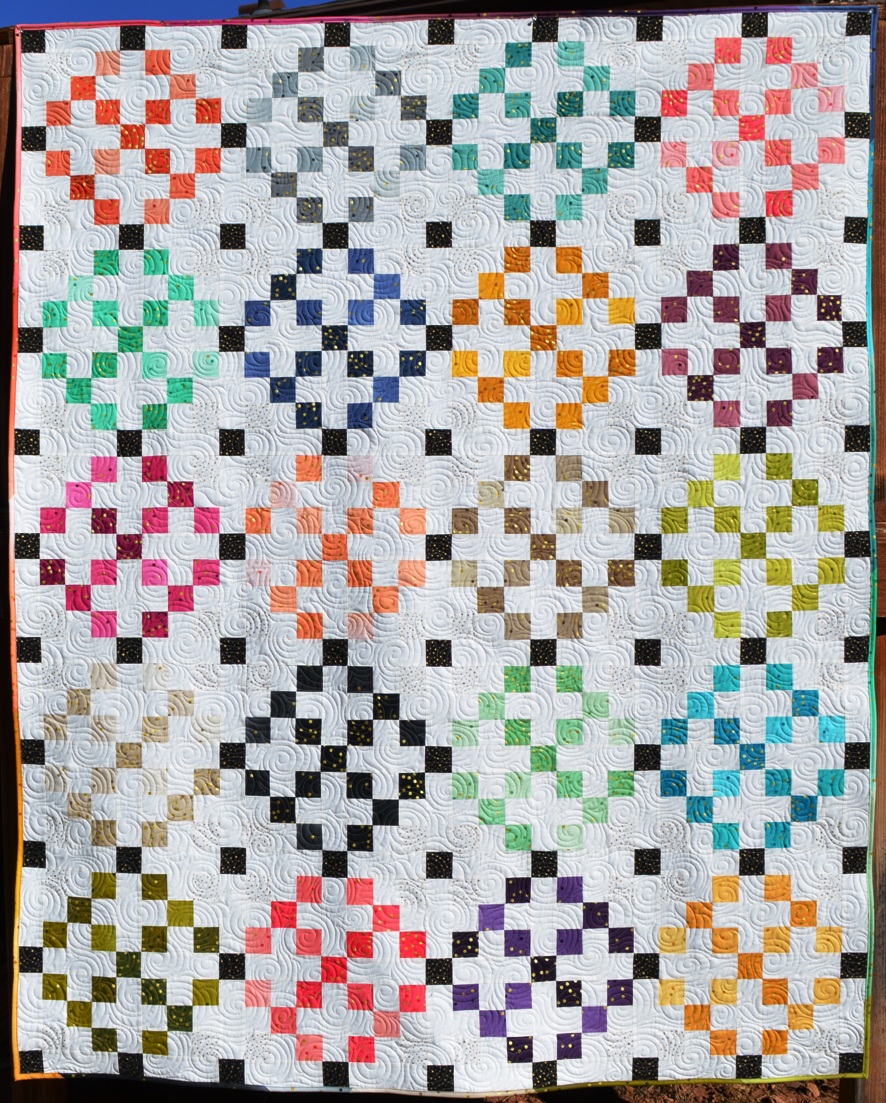
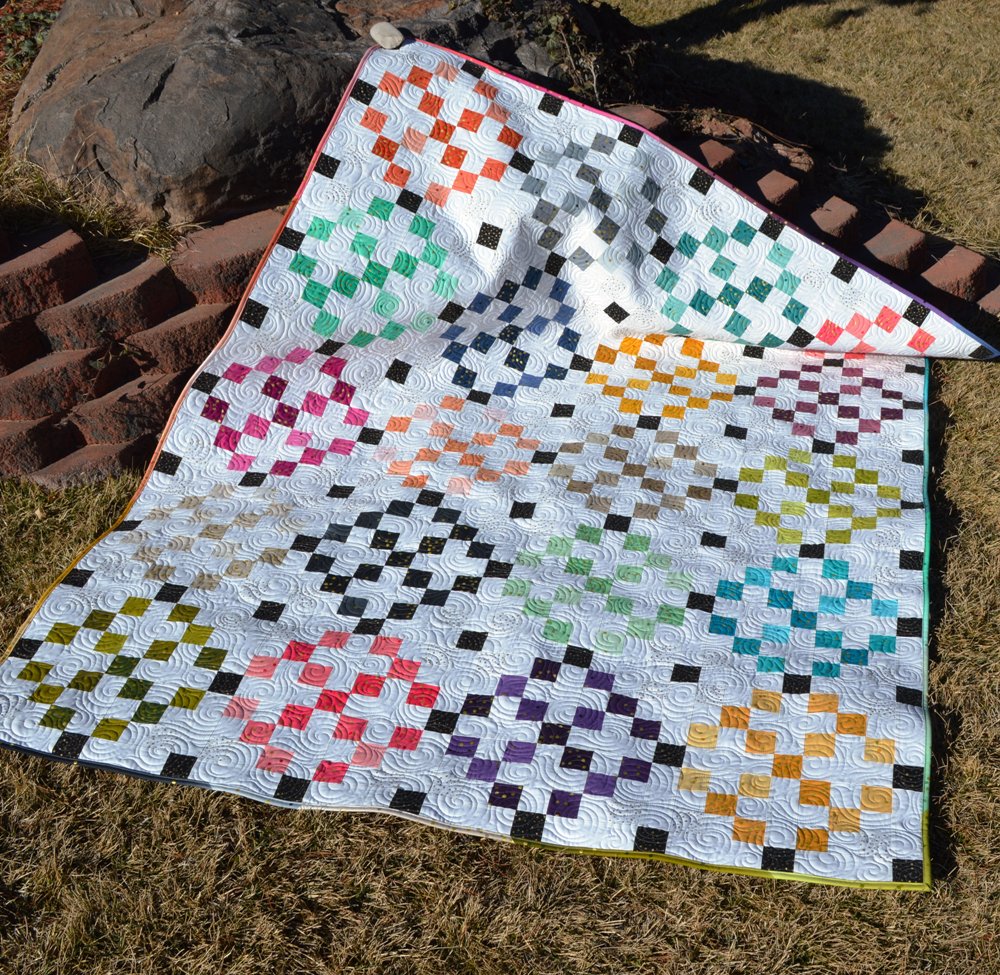
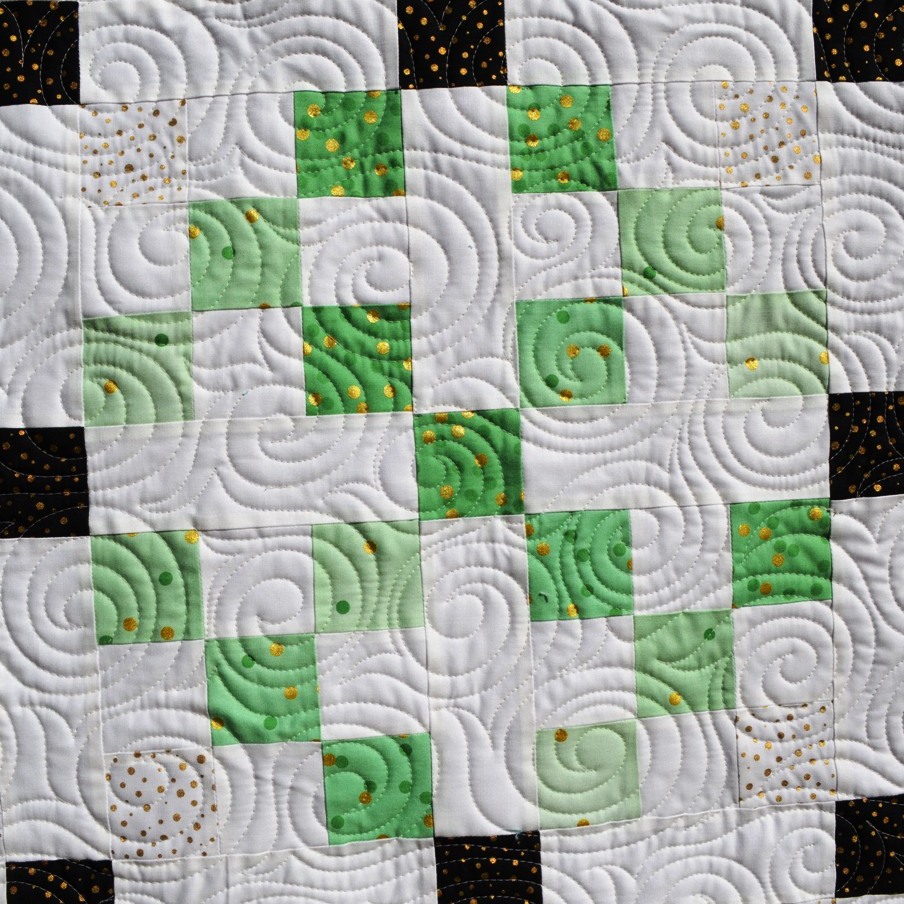
When it came time to quilt mine, I decided to do a free motion swirl in varying sizes all over the quilt top. I just love the added movement it gives the quilt ;) And it is super fun to quilt and fast!!! I used 402 Pearl So Fine thread which blended perfectly with all of the colors in this quilt ;)
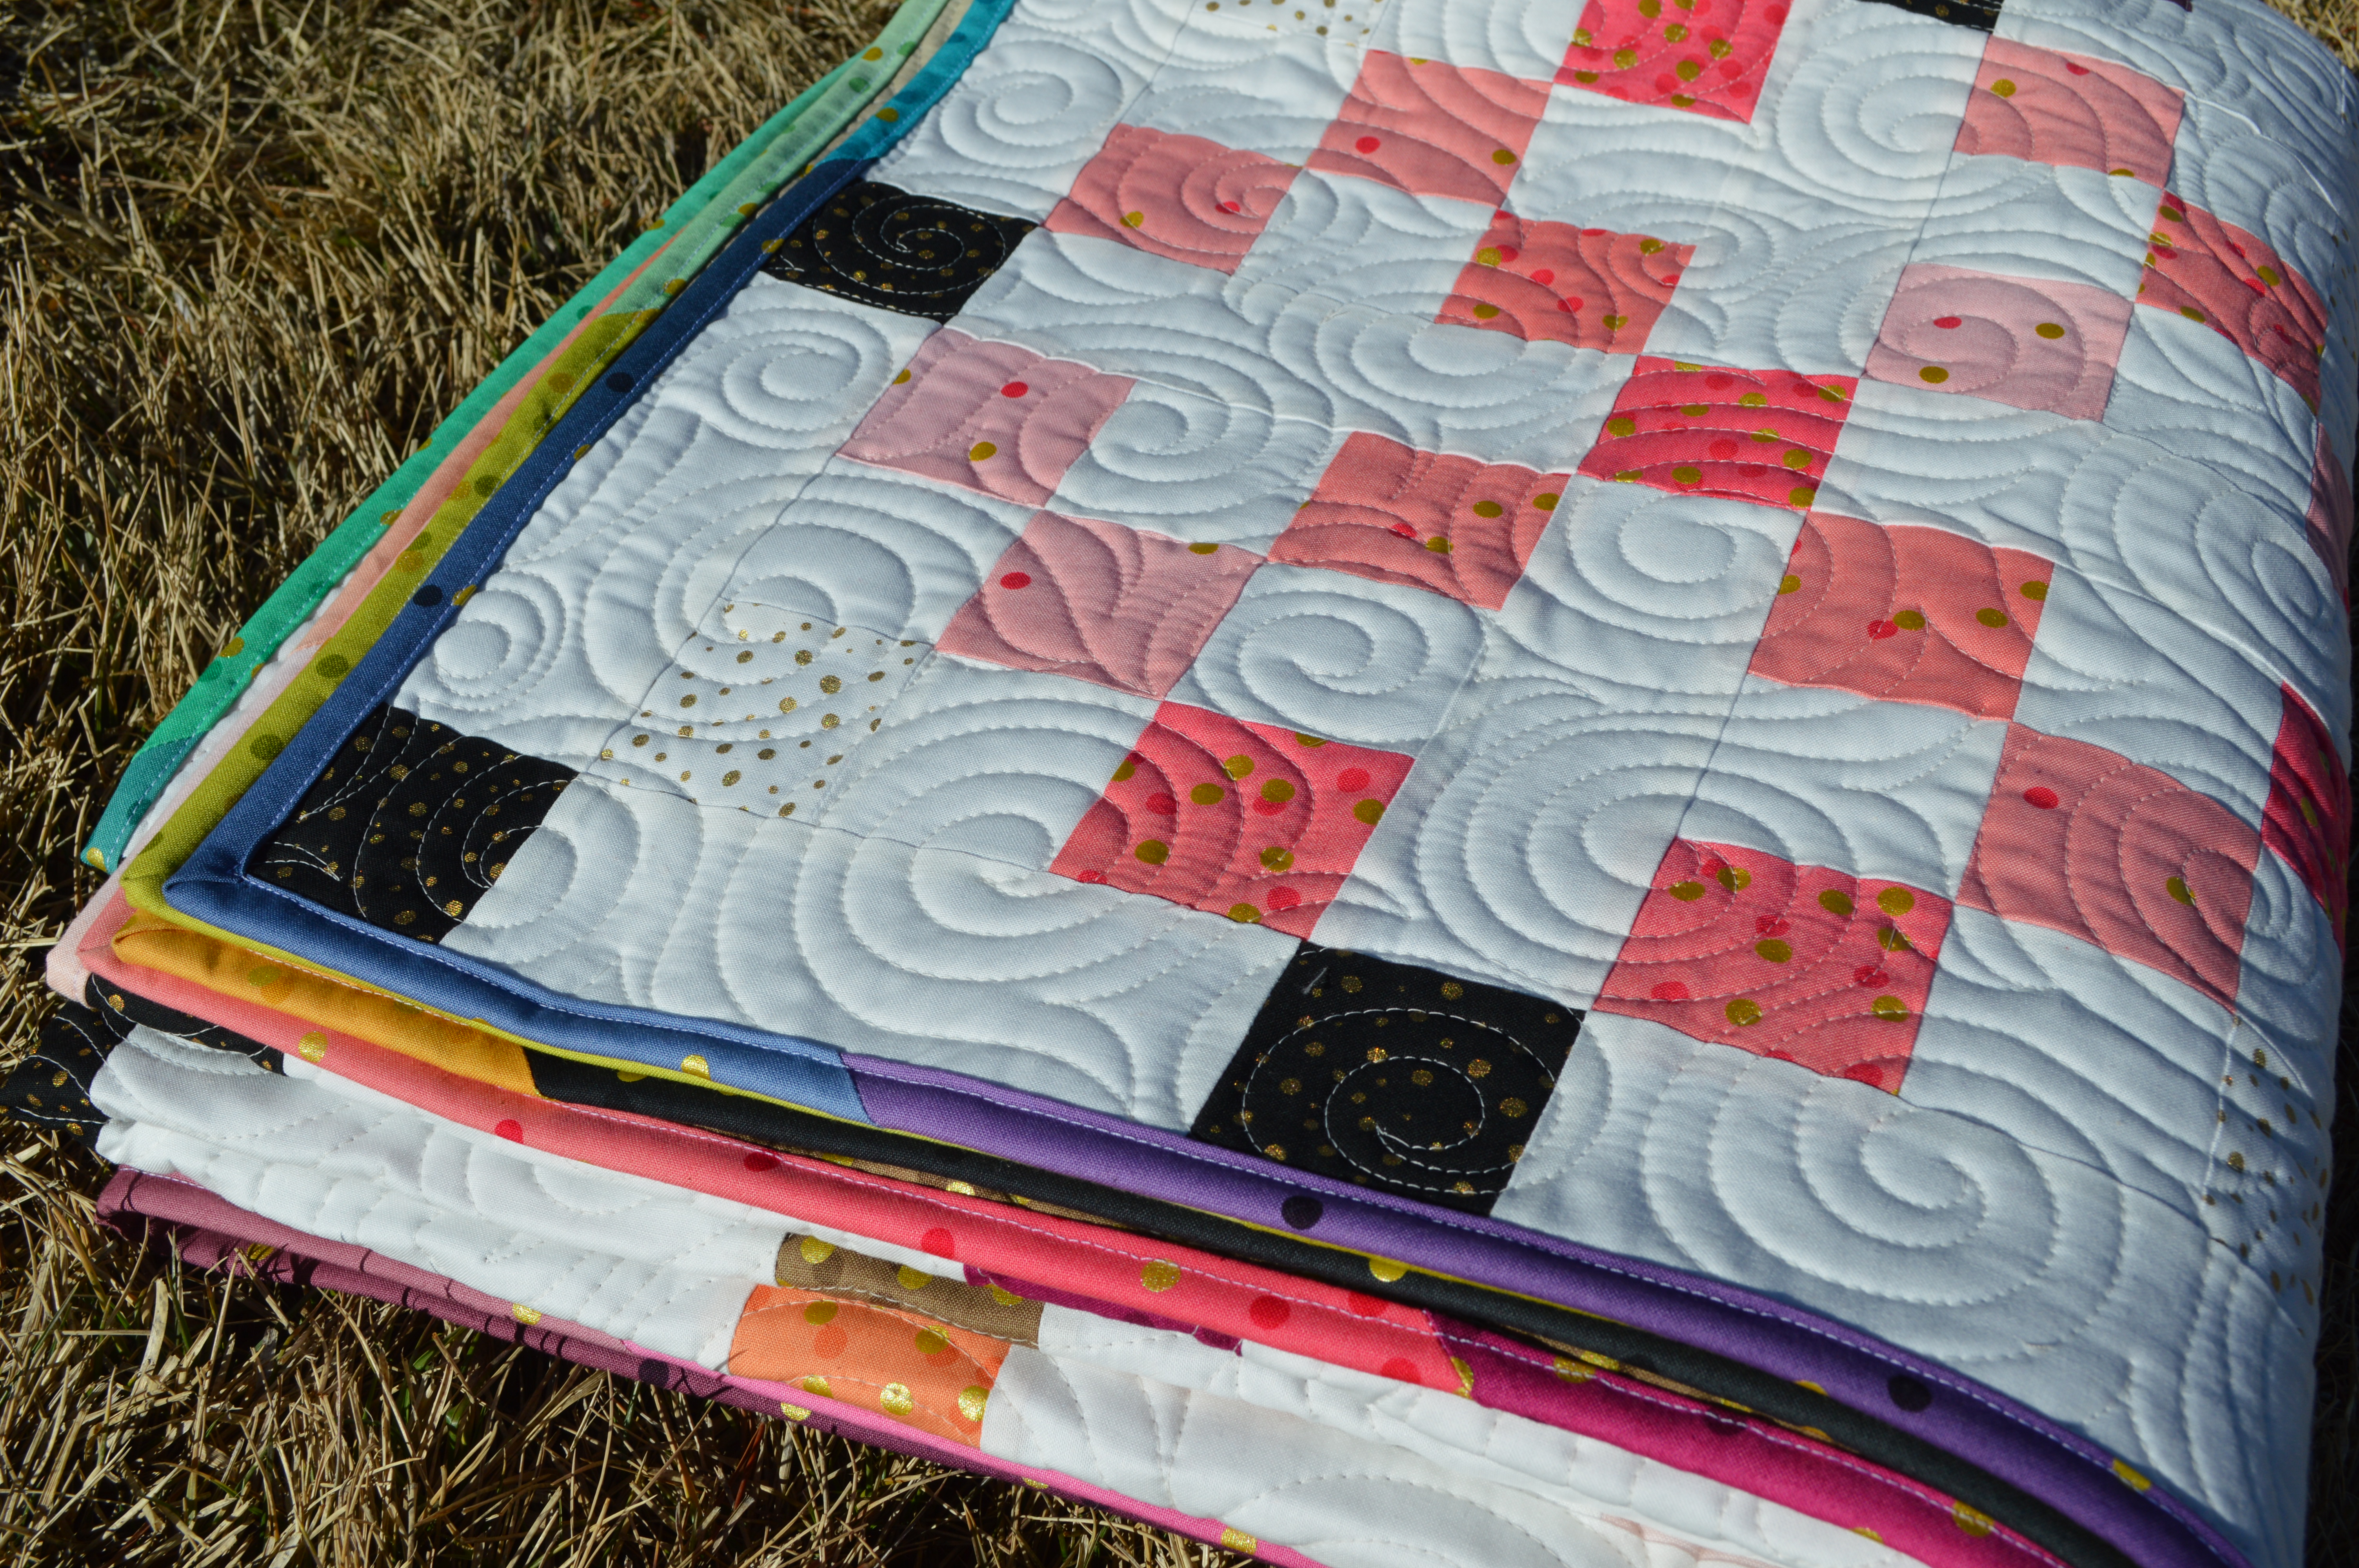
And then you can bind. Remember those (20) 2 1/2" x 18 1/2" strips you cut at the beginning. sew those into your binding strip. You can do them in color order like I did or just mix them up, whichever you prefer. Either way, it will make a super scrappy binding that will be the perfect finish to your quilt!!
![]()
Shine finishes at 66" x 82" making it the perfect size to snuggle up with as a large lap quilt or it would also work great as a twin size bedspread. And with all that Confetti Metallic Goodness, it is sure to make you smile each time you see it ;)
I hope you have enjoyed this tutorial and find it easy to follow. If you make your own Shine Quilt I would love to see it!! You can email me a picture at [email protected] or add it to my flickr group here or post it to social media with the hashtag #happyquiltingwithmc ;) I can't wait to see your Shine Quilts!!!
And I would love to have you stop by Happy Quilting sometime for a visit ;) I just love being able to share lots of quilting goodness on a daily basis ;) Wishing you a very Happy Quilting Day!!!
**Note - It has been brought to my attention that finding the Modifications Metallic White and Black can be difficult to find. If you can't find them, I have recommendations for substitute fabrics at my blog here ;)
Melissa Corry
www.happyquiltingmelissa.com
![]()
Posted in:
Comments