Welcome to Moda Fabrics!
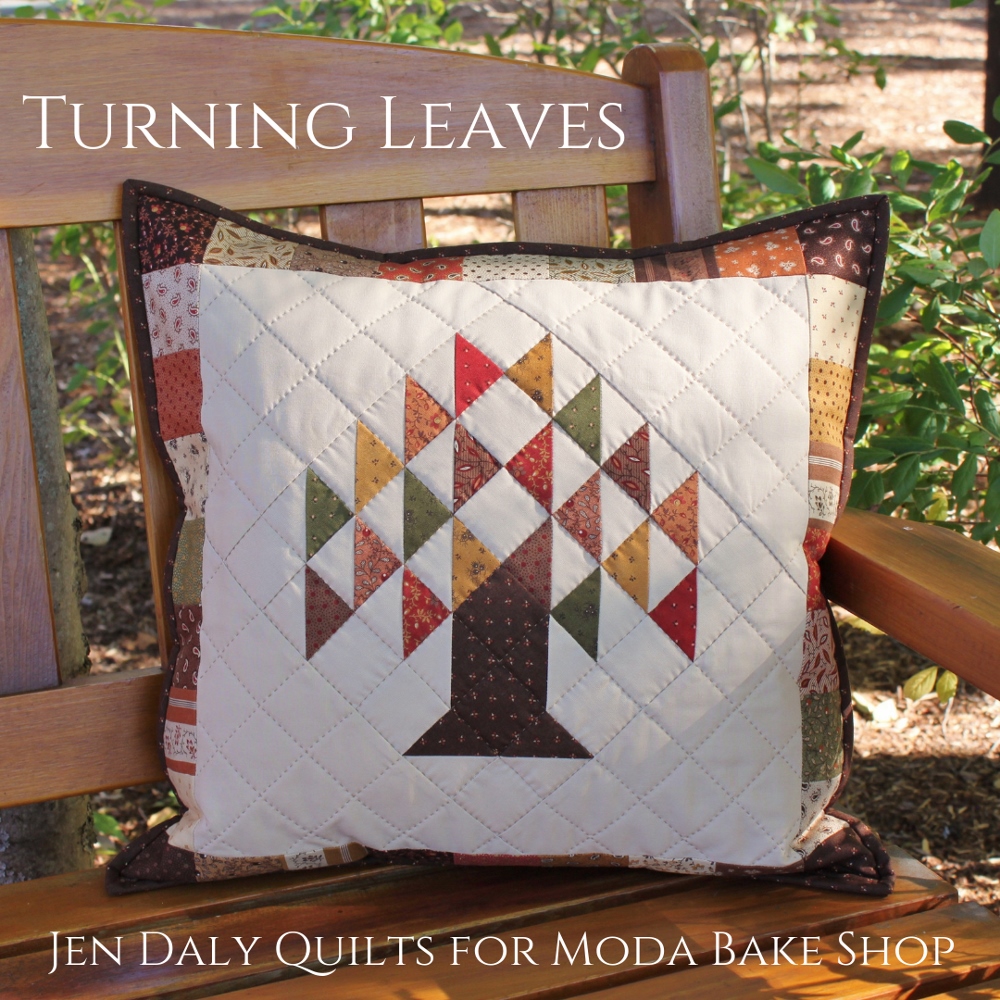
Turning Leaves Pillow
Turning Leaves Pillow
Published:
Oct 11 2018 - 23:00
![]()
Hey there! I'm Jen Daly and I'm thrilled to be back at the Moda Bake Shop today with a new Moda Candy project for fall. Turning Leaves features a variation of a Tree of Life block set on point and surrounded by a pieced border. And at 18½" square, it's a great size to finish either as a mini quilt or as a fun pillow like mine. I made my project with Jo Morton's "Spice It Up" collection—her beautiful and colorful prints are just perfect for fall!
Now let's get started!
![]()

- 1 Moda Candy/Mini Charm Pack (shown in Spice it Up by Jo Morton—38050 MC)
- 1/3 yard background fabric (shown in Bella Solids Tan—9900 13)
- 2/3 yard backing fabric (shown in Spice it Up Dark Brown—38058 18)
- 1/4 yard fabric for binding and for tree trunk (shown in Spice it Up Dark Brown—38057 18)
- batting measuring 22" x 22"
![]()
- pillow form measuring 18" x 18" (optional)
- panel of lining fabric such as muslin measuring 22" x 22" (for pillow option)
![]()
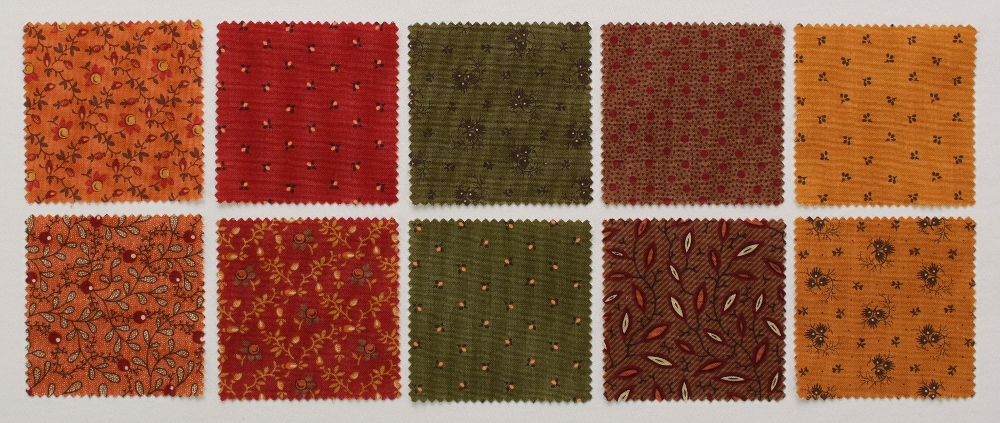
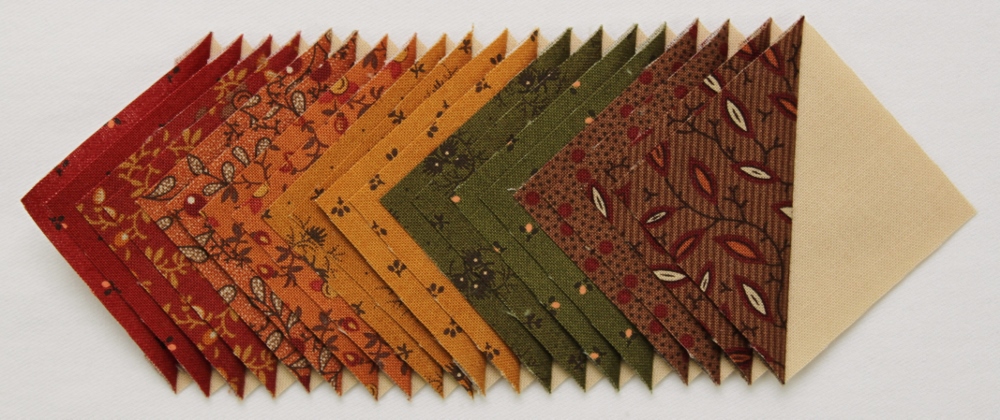
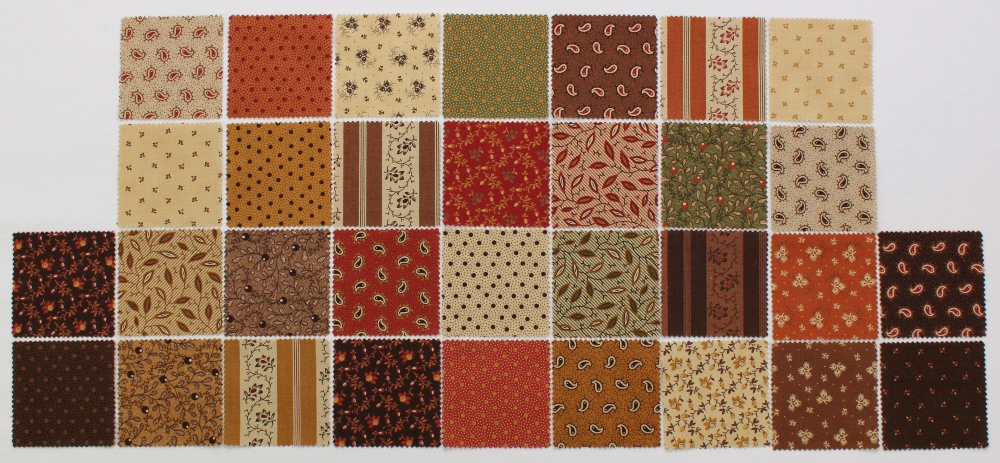
Before you begin, take a few minutes to decide which mini charm squares you'd like to use for the tree leaves and which you'd like to use for the pieced border. You'll need 10 mini charm squares for the leaves and 32 for the border.
Here are the charm squares that I chose for my leaves (gorgeous, aren't they?!):
Cutting:
From the background fabric, cut:
- 2 squares, 9" x 9"—further cut in half diagonally to yield 4 setting triangles
- 11 squares, 2½" x 2½"
- 12 squares, 2" x 2"
From the binding/tree trunk fabric, cut:
- 2 binding strips, 2¼" x 42" (Width of Fabric)
- 1 square, 3½" x 3½"
- 1 square, 2½" x 2½"

Making the half-square triangle units:
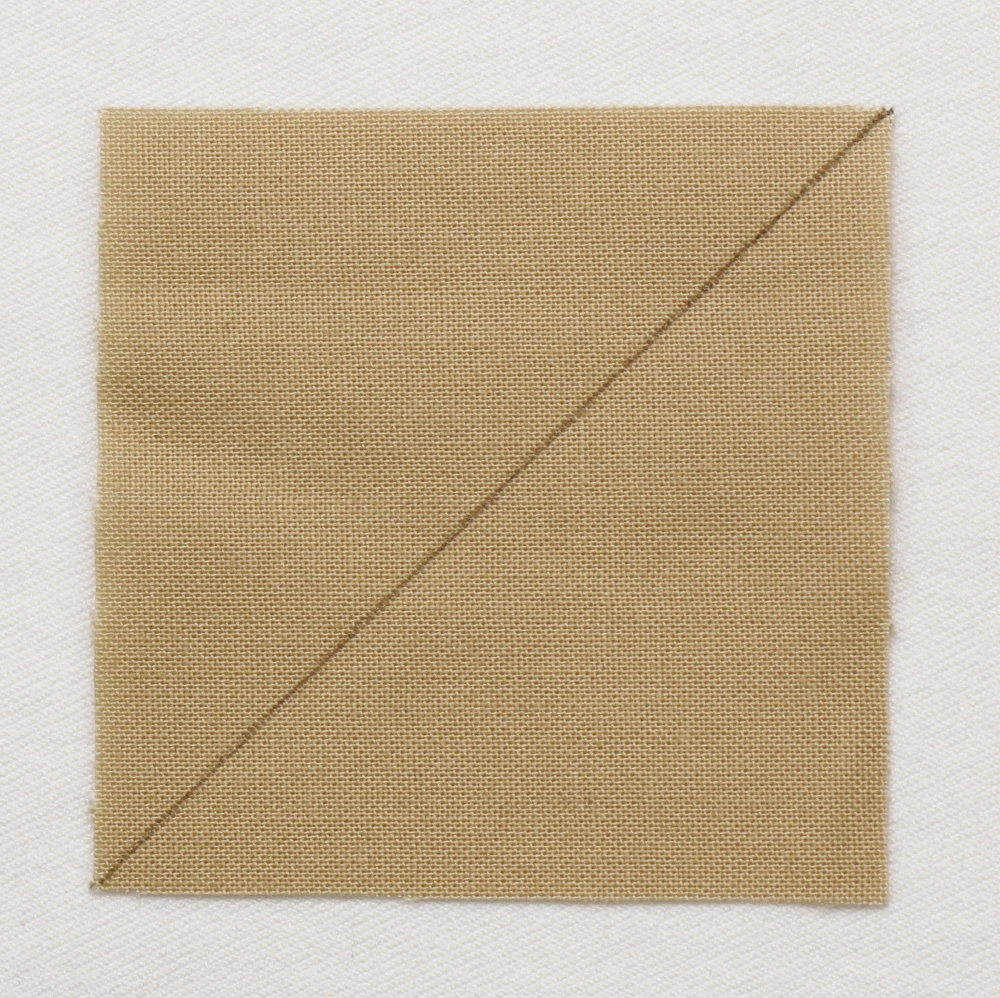
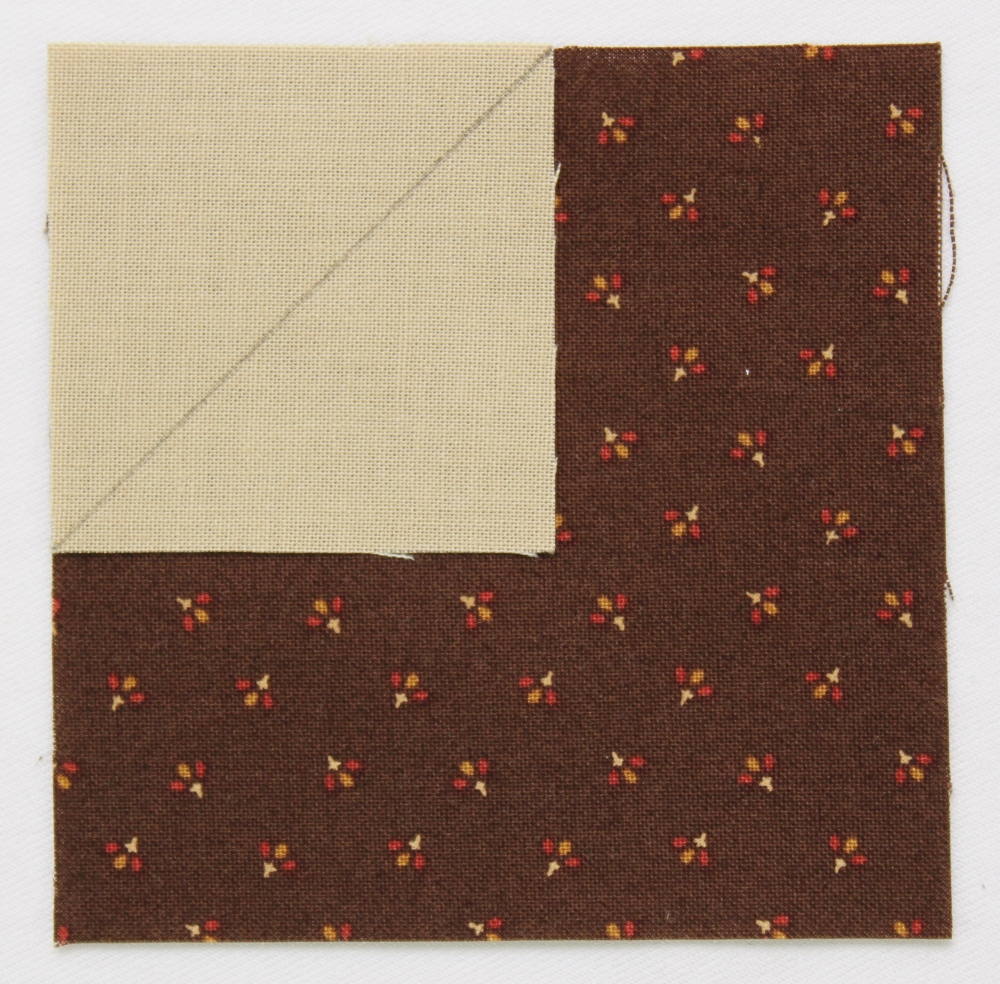
- On the wrong side of each of the 11 background fabric 2½" squares, lightly draw a diagonal line from corner to corner.
2. Layer a marked background fabric 2½" square atop one of the mini charm squares that you chose for the leaves with right sides together.
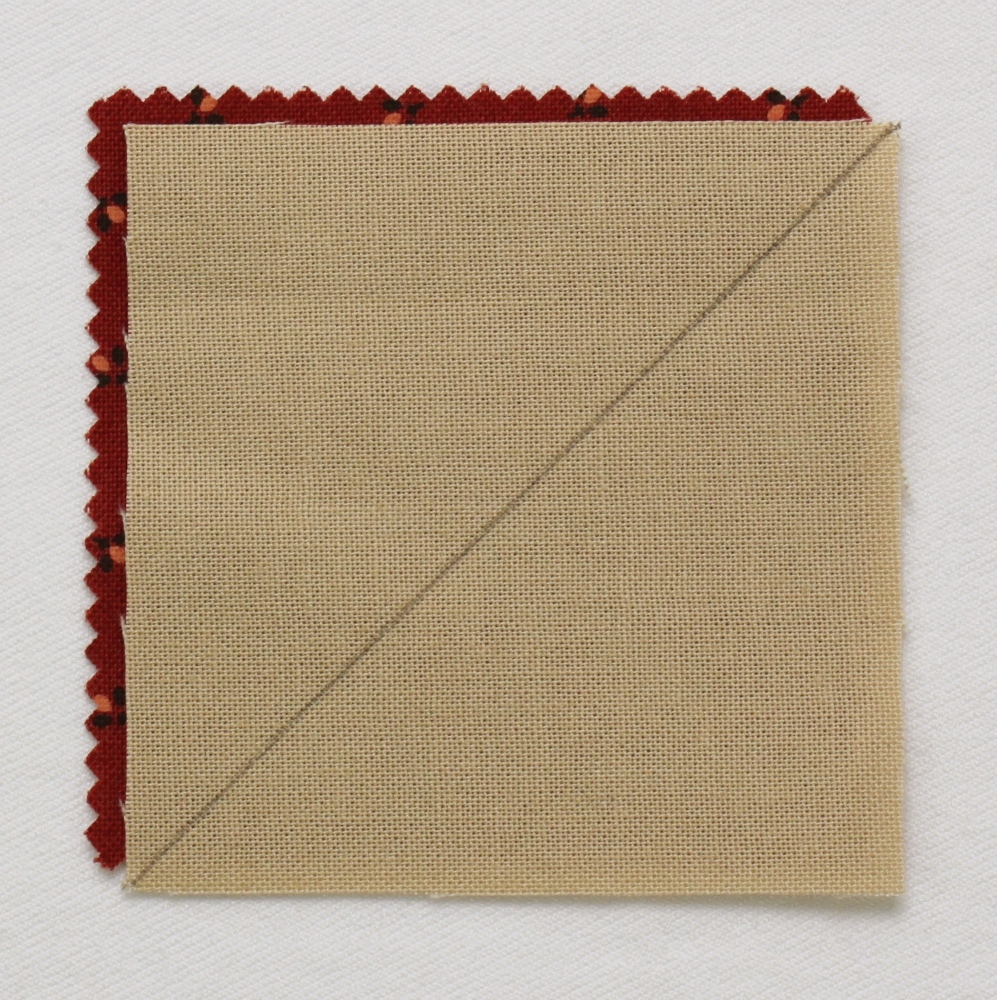
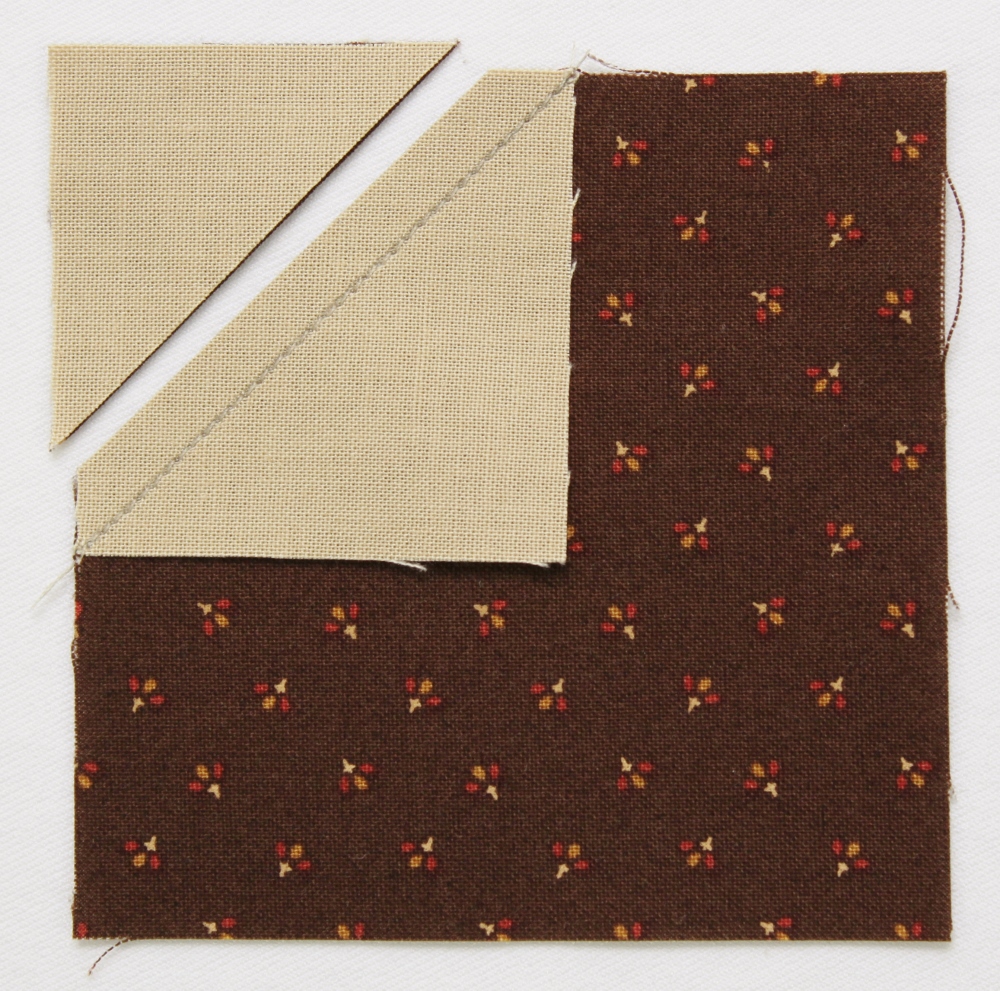
3. Stitch the pair together a scant ¼" from either side of the drawn line. Press to set seams. Cut the pair apart on the drawn line to make 2 half-square triangle units.

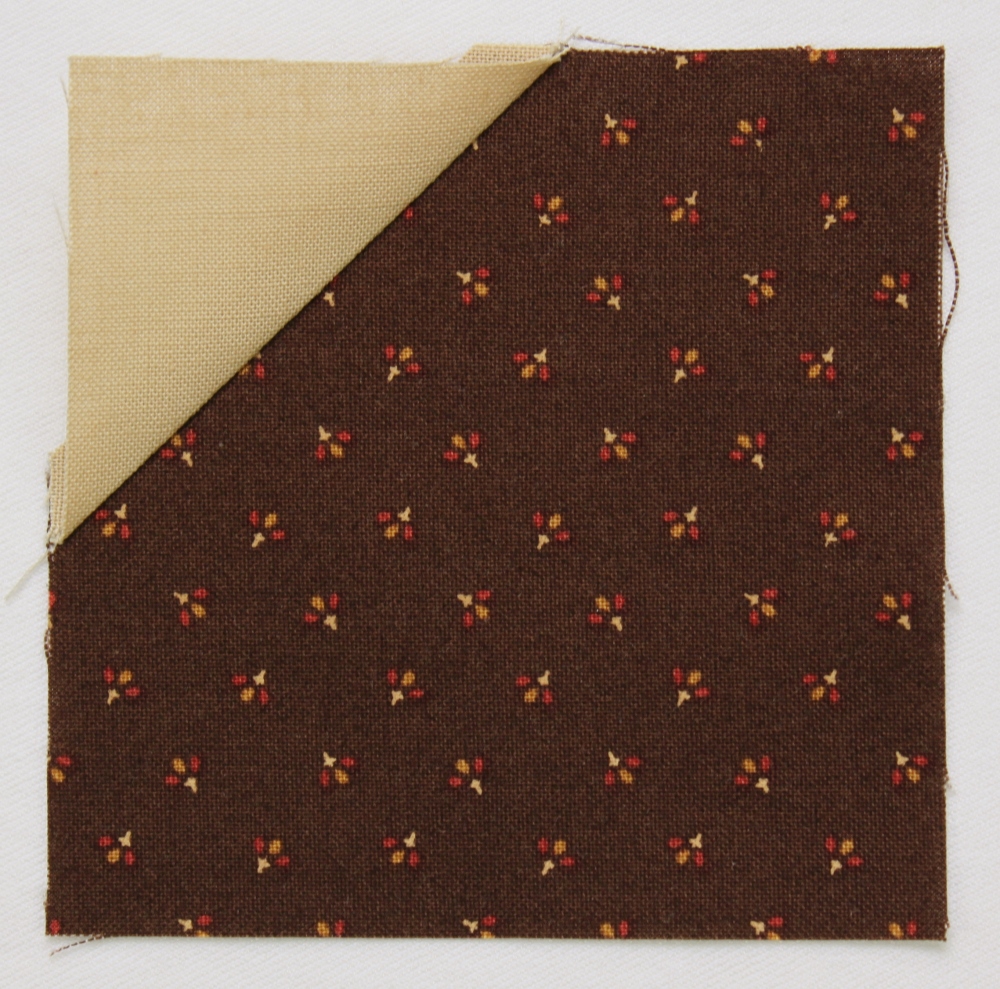
4. Press the seam allowances away from the background fabric and trim the half-square triangles to measure 2" x 2". It helps to use a ruler with a 45° line on it. Before trimming, make sure that the 45° line runs along the diagonal seam of the half-square triangle unit. Trim the right and top edges of the unit, then flip 180° and trim the two remaining edges in the same manner.

5. Repeat with the remaining mini charm squares chosen for leaves to make 20—2" x 2" half-square triangles ("HSTs".
6. Repeat steps 2-4 with the remaining 2½" background square and the tree trunk print 2½" square to yield 2 tree trunk print 2" x 2" HSTs.

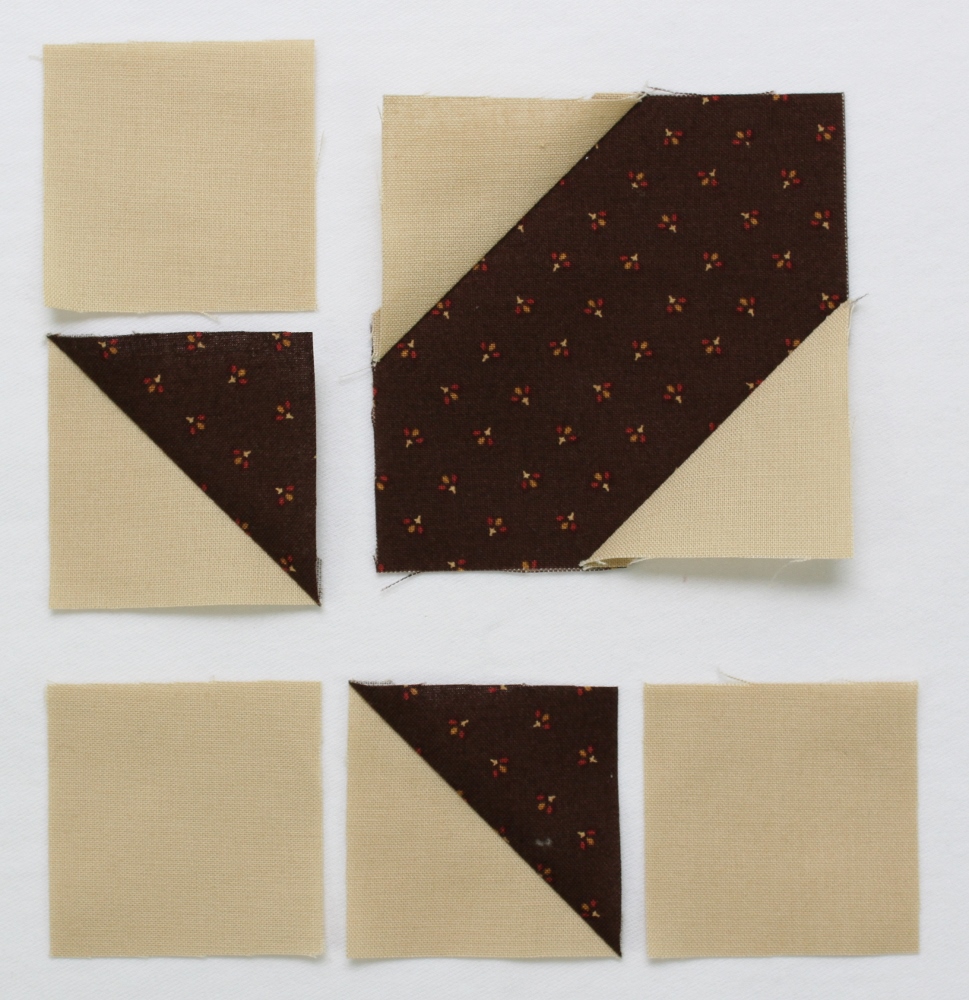
Making the tree trunk:
- On the wrong side of 2 background 2" squares, lightly draw a diagonal line from corner to corner.

2. Layer a marked 2" square atop one corner of the tree trunk print 3½" square with right sides together.
3. Stitch the pair together on the drawn line. Trim the seam allowance to ¼".
4. Press toward the background square.
5. Repeat steps 2-4 with the opposite corner to make the main trunk unit.

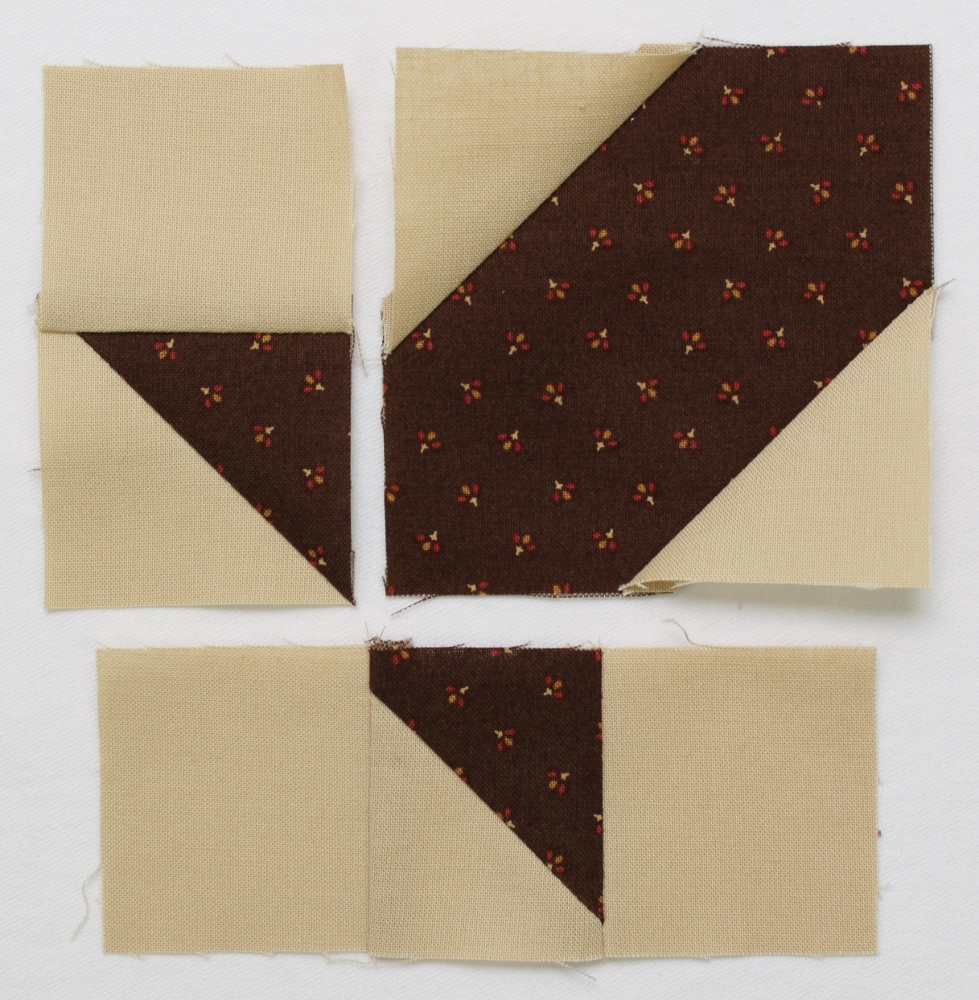
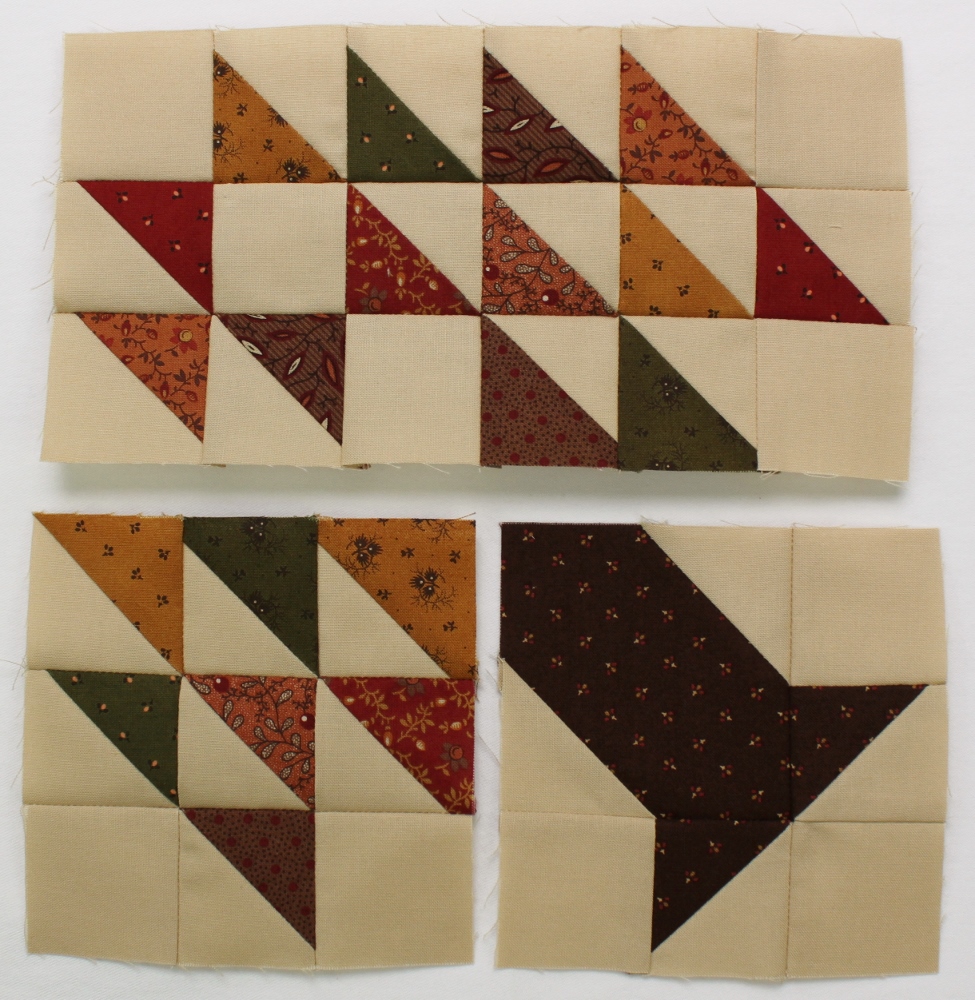
6. Gather the main trunk unit (step 5), 2 tree trunk print HSTs, and 3 background 2" squares. Lay out in rows as shown below.
7. Join together the background square and HST to the left of the main trunk unit. Press seam allowances away from the HST. Sew a background square to the left and right sides of the HST below the unit from step 5. Press seam allowances toward the HST.
8. Join together the pieces in the top row. Press seam allowances away from the main trunk unit.
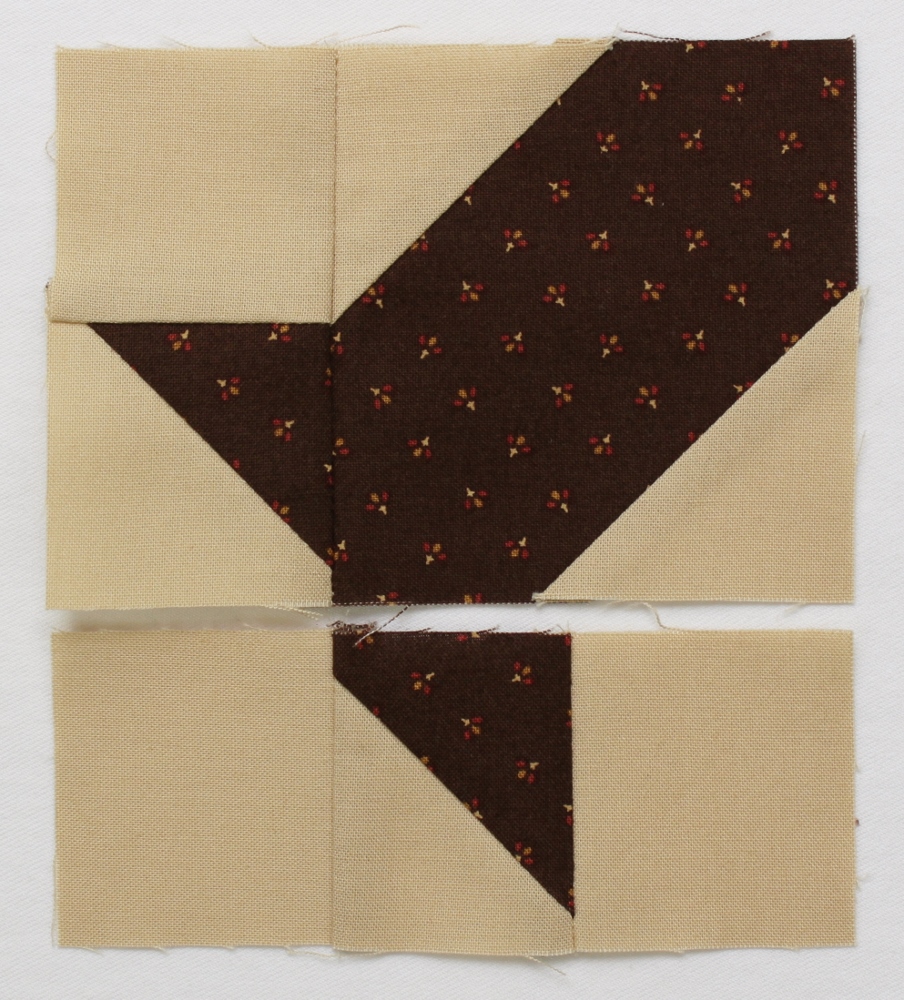
9. Join the bottom row to the bottom edge of the unit from step 8. Press the seam allowances open.

Making the Tree of Life block:
- Lay out 20 half-square triangles, 7 background 2" squares and tree trunk unit in 6 rows as follows:
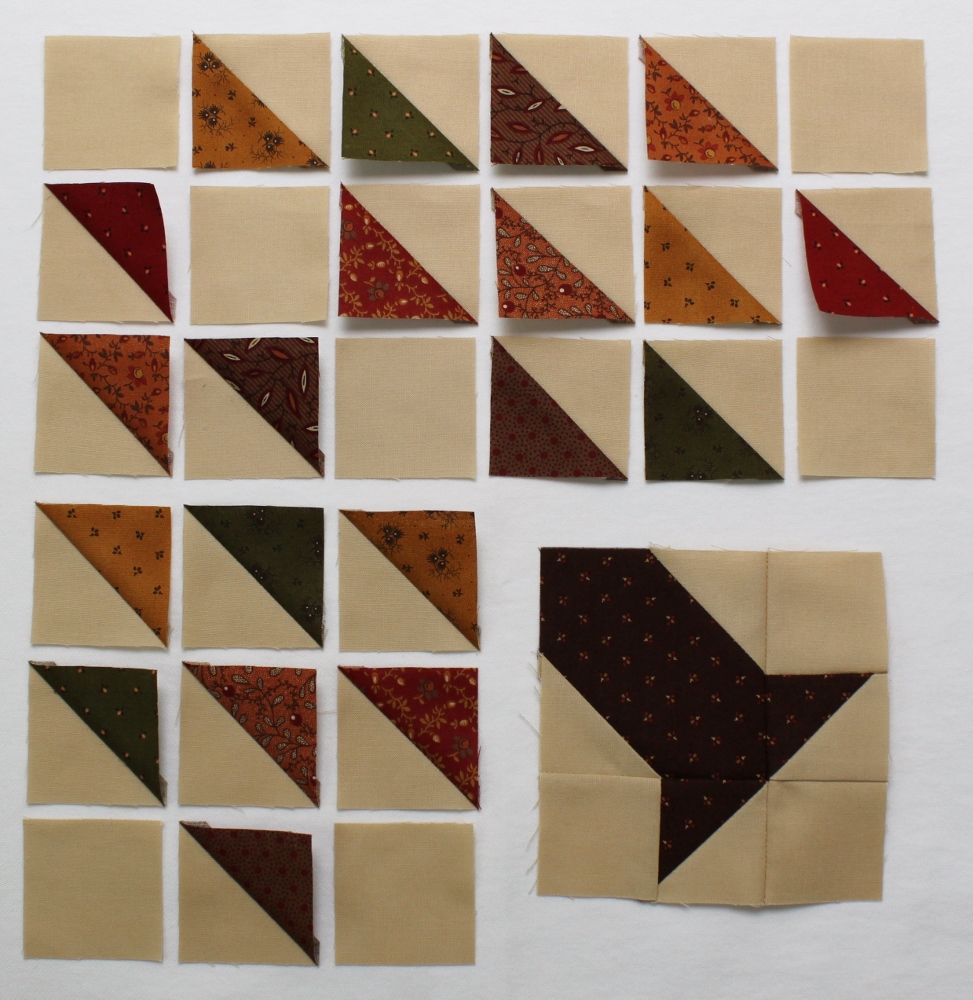
2. Join together the pieces in each of the 3 rows to the left of the tree trunk unit. Press seam allowances in one direction, alternating direction in each row.

3. Join together the 3 rows to the left of the tree trunk unit. Press seam allowances open.

4. Join together the pieces in each of the 3 top rows. Press seam allowances in one direction, alternating direction in each row.

5. Join together the top 3 rows. Press seam allowances open.
6. Join together bottom left group of HST rows and tree trunk unit. Press seam allowances open. Then join together the top group of HST rows and bottom unit to complete the block.
Assembling the quilt:
- Matching centers, sew setting triangle to opposite sides of the center block. Press seam allowances toward the setting triangles.
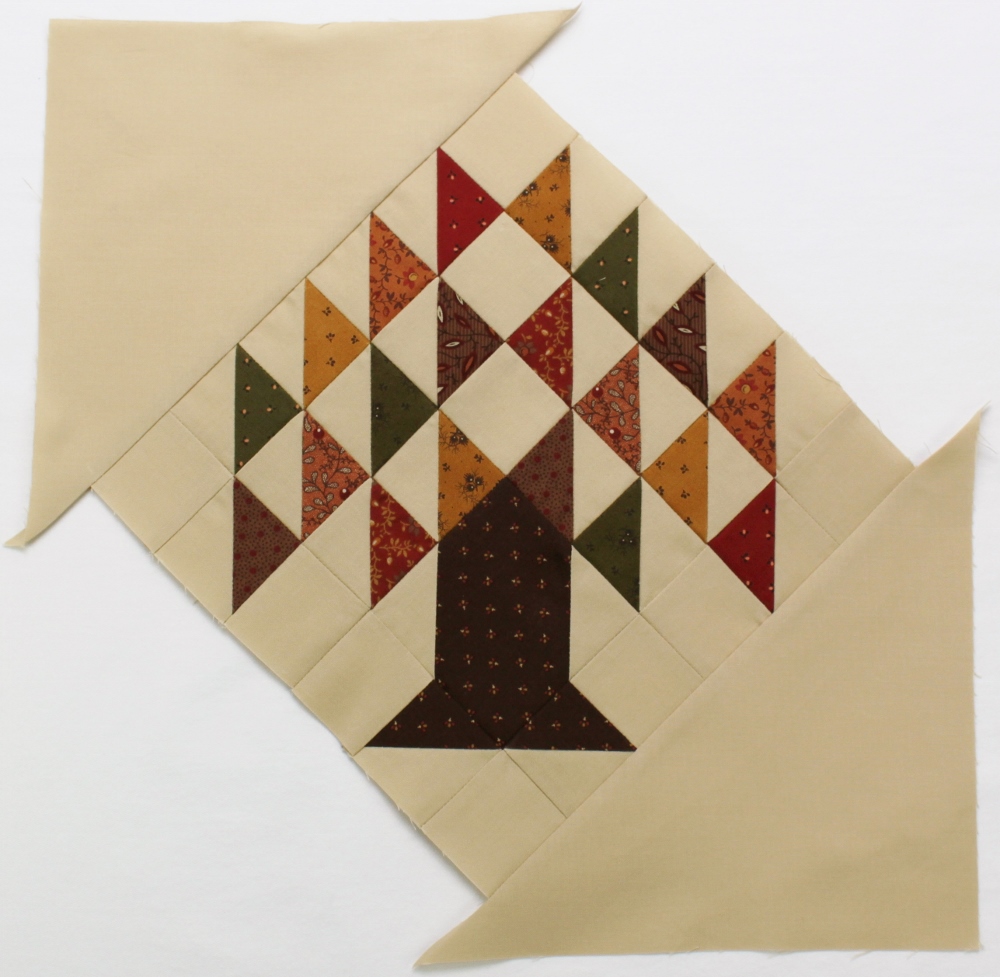
2. Trim the setting triangles even with the center block.
3. Matching centers, sew setting triangles to remaining opposite edges of the center block. Press seam allowances toward the setting triangles. Trim quilt center to measure 14½" x 14½.
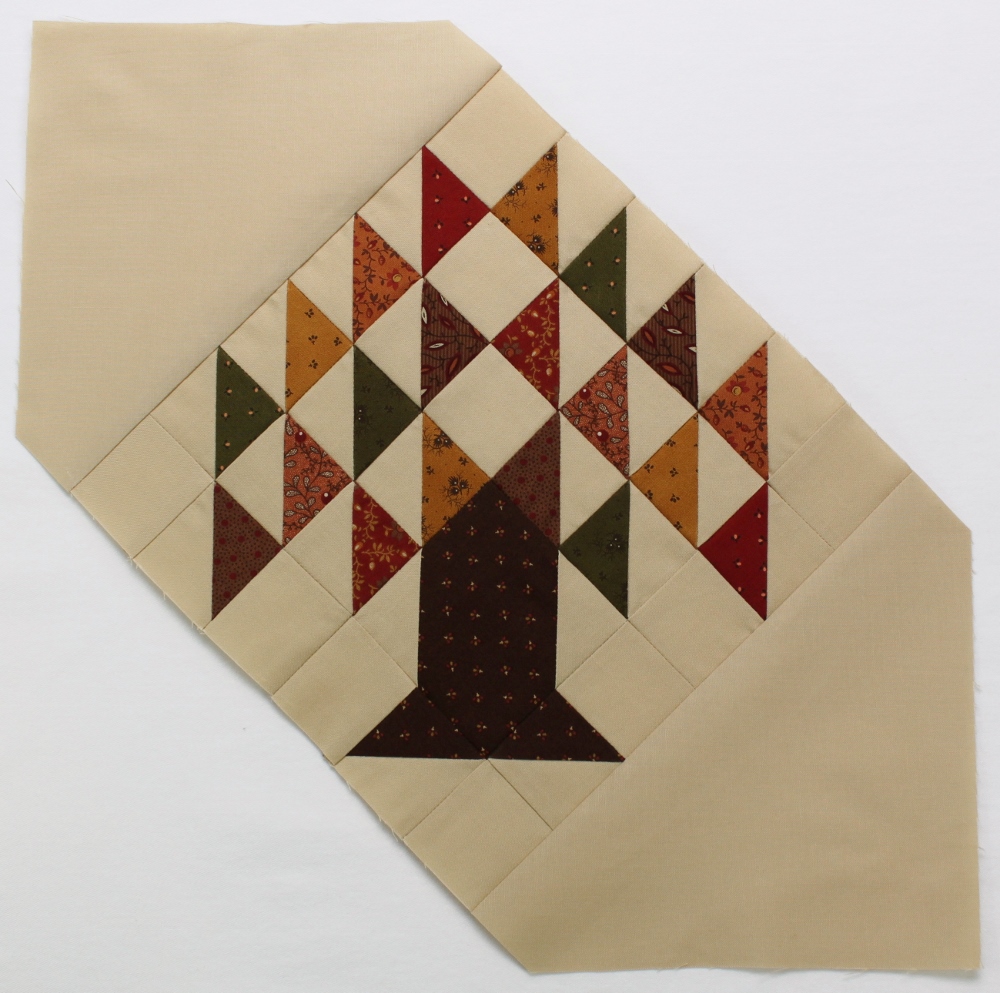
4. Lay out 2 rows of 7 mini charm squares each and 2 rows of 9 mini charm squares each.
5. Join together the pieces in each row. Press seam allowances open.

6. Sew a short border strip to the left and right sides of the quilt center, pressing seam allowances toward the pieced border.
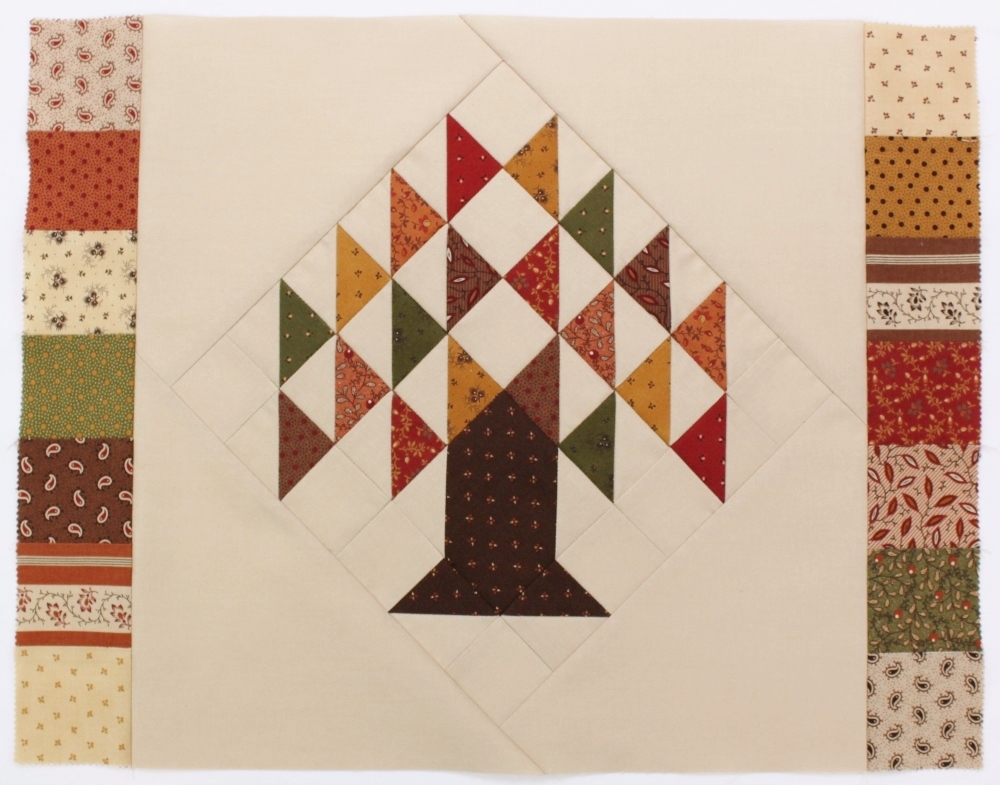
7. Sew a long border strip to the top and bottom of the quilt center, pressing seam allowances toward the pieced border.

Finishing the quilt:
To finish as a mini quilt:
- Layer the quilt top with batting and backing fabric. Baste, quilt as desired and bind. I hand quilted my project in a 1½" cross-hatch pattern.
To finish as a pillow:
- Layer the quilt top with batting and 22" x 22" panel of lining fabric. Baste and quilt as desired.
- From the backing fabric, cut 2 panels 14" x 18½".
- Fold one long edge of a backing panel toward the wrong side 1/2" twice and press to form a hem.
- Stitch hem close to the fold.
- Repeat steps 2-4 to hem the second backing panel.
- Lay quilted pillow top face down on a flat surface. Layer a backing panel on the back of the quilted pillow top with wrong sides together and raw edges aligned.
- Layer the remaining backing panel on the opposite edge of the pillow top with wrong sides together and raw edges aligned. Pin to secure layers and machine baste 1/8" from all raw edges.
- Bind as usual.
- Insert pillow form.
![]()
One 18½" square mini quilt or pillow—your choice!
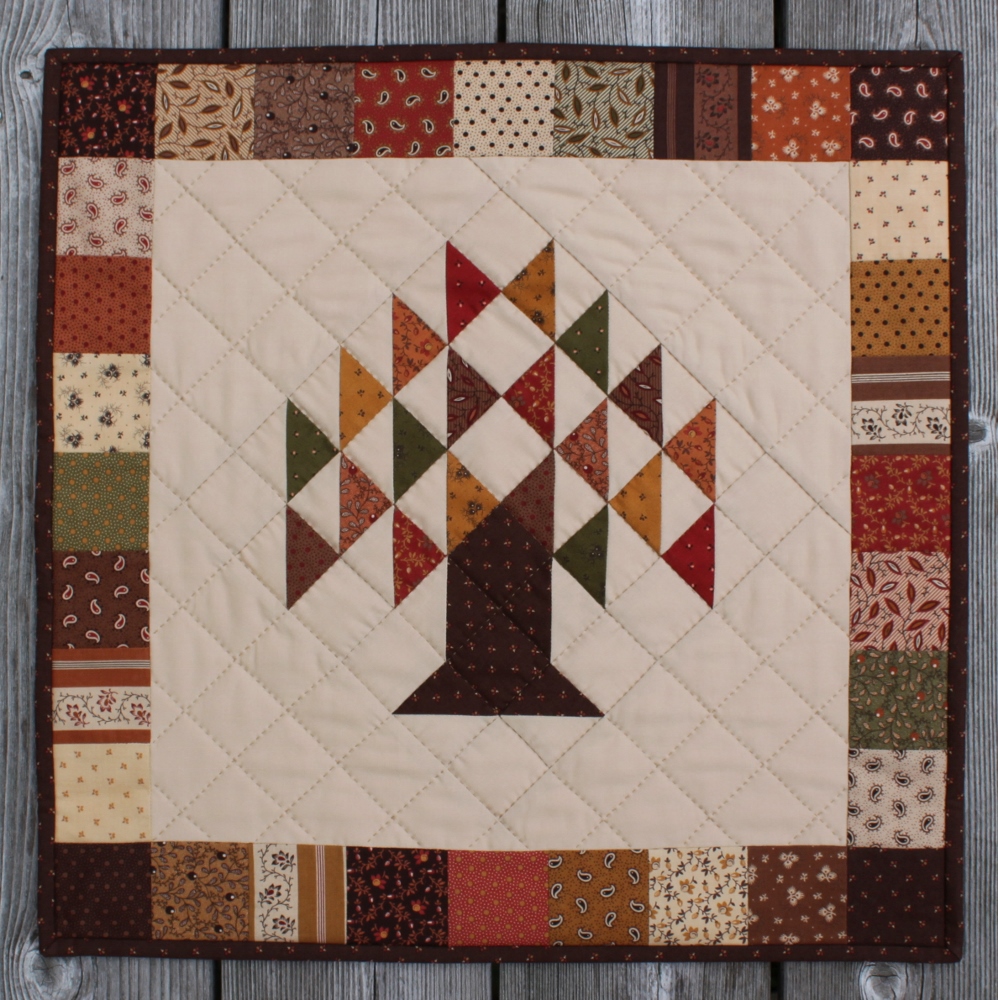
By the way, I love this new technique of using overlapping backing panels and binding the quilt as usual. The binding reads as piping when the project is used as a pillow, but if you want to use it as a mini quilt, you have only to remove the pillow form and give it a quick press. Brilliant!!
Thanks so much for following along with this tutorial. If you share your quilts on Instagram or Facebook, please tag me @JenDalyQuilts—I'd love to see what you make!
Jen Daly
{blog: JenDalyQuilts.com}
{instagram: /jendalyquilts}
{shop: Etsy.com/shop/JenDalyQuilts}
{facebook: /jendalyquilts}
![]()
Posted in:
Comments