Welcome to Moda Fabrics!
Spooky Sew Along- Week 2
Spooky Sew Along- Week 2
Published:
Sep 30 2019 - 23:00
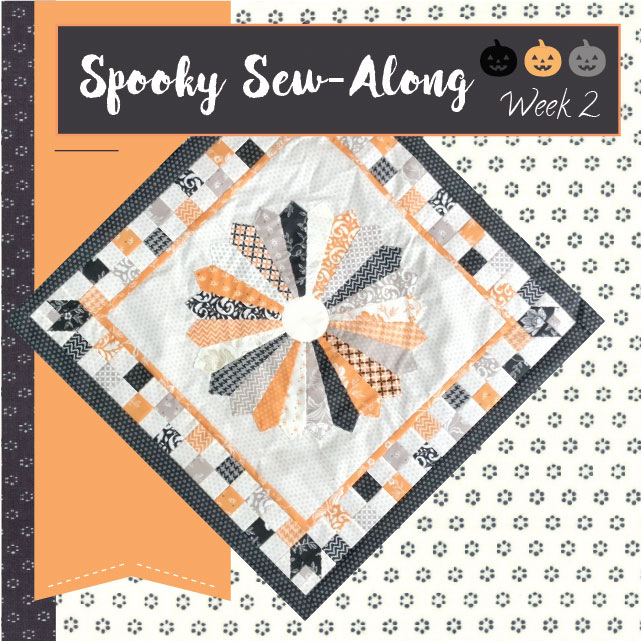
Hi, Everyone! Welcome back to Week 2 of the Spooky Sew Along! I'm Jessica Dayon and I'm here to walk you through this QAL! Here in Week 2, we will be working on Round 2 & Border 2 of our quilt!
NOTE: This is a post in a series of quilt-along posts. To see all of the posts, go {here}.
In case you are just joining in, you can find the schedule below along with the linked posts for the ones that have already been posted.
Here is the schedule we will be following-
Tuesday, September 24th- Round 1, Border 1- Read this Post Here
Tuesday, October 1st (today)- Round 2, Border 2
Tuesday, October 8th- Round 3, Border 3
Tuesday, October 15th- Round 4, Border 4
Tuesday, October 22nd- Round 5, Borders 5 & 6
![]()
Here are the links to the posts of the original QAL that you will need this week for Week 2-
Cornerstone Option- Tulip Field
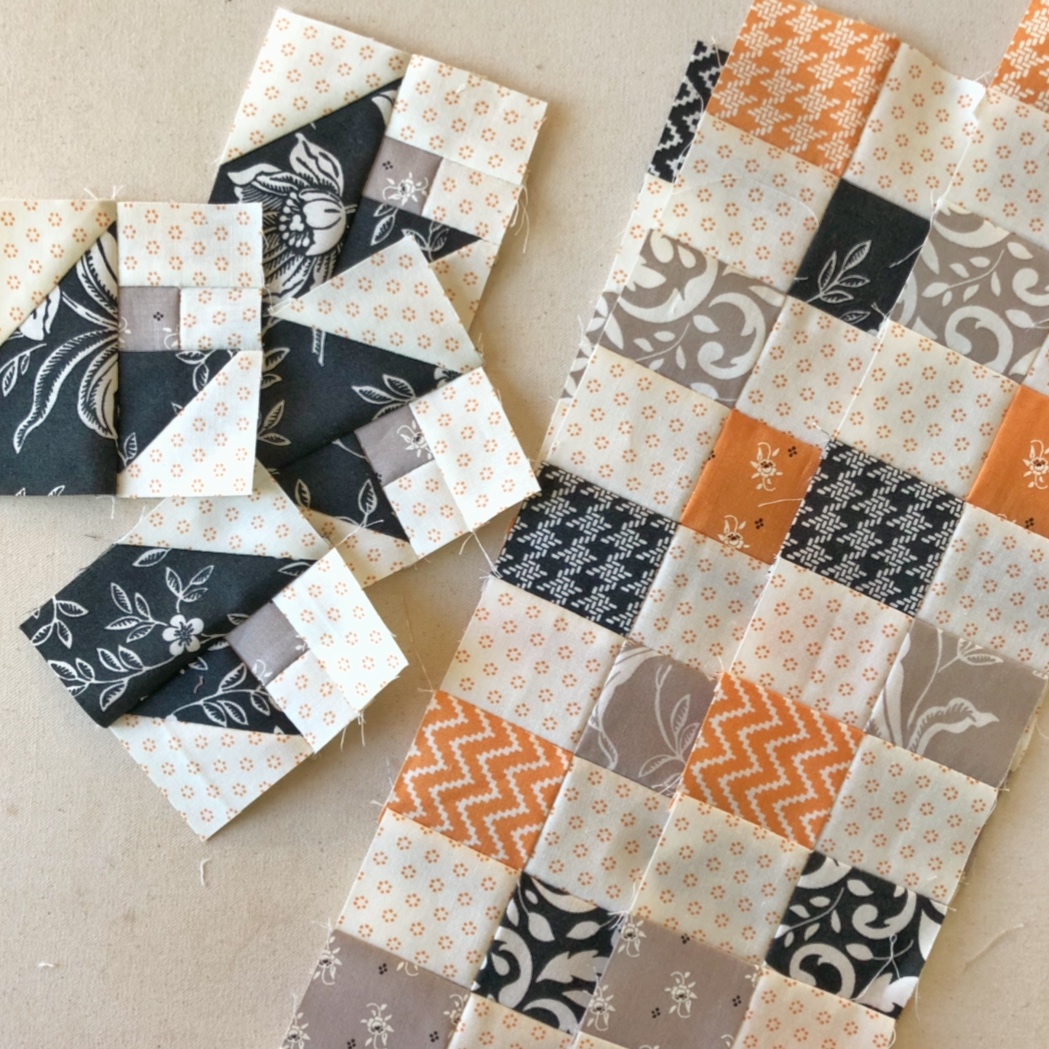
I am making the Four Points round and adding in the Tulip Field Cornerstones.
![]()
If you'd like to make the exact quilt that I am making, I have a detailed schedule with all of the steps broken down for this week to make Four Points & Tulip Field-
Tuesday- Cut the fabric for the four patches. (Note: Since we are using the cornerstone option, we need 28- four patches.)
Wednesday- Assemble the squares that were cut yesterday into 28- four patches.
Thursday- Sew the 4 patches into 4 rows with 7- four patches in each row.
Friday- Cut out the 4- tulip field blocks.
Saturday- Assemble the 4- tulip field blocks.
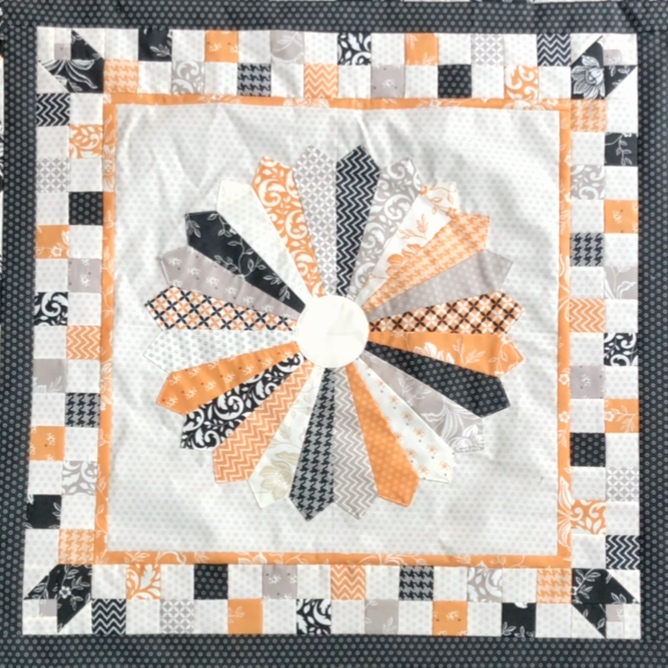
Sunday- Sew one row of 7 four patches to the left of the quilt top (which is composed on round 1 & border 1 that we made last week). Sew one row of 7 four patches to the right of the quilt top. Sew one tulip field block to each end of the two remaining rows of 7 four patches. Sew one four patch/tulip field to the top of the quilt top and one four patch/tulip field to the bottom of the quilt top.
Monday- Add Border 2
Feel free to follow your own schedule, group days together and work on more each day if you have longer periods of time, or adapt this any schedule to fit your needs. I find when I give myself specific tasks each day for a quilt (or quilts), I get more finished quicker because I know exactly what I want to work on and I can just get right to it.
![]()
The Round 1, Border 1, Round 2, + Border 2 should measure 30.5″ square.
Jessica Dayon
[blog: Jessica Dayon]
[instagram: @jessicadayon]
Posted in:
Comments