Welcome to Moda Fabrics!
Charm Pack Log Cabin
Charm Pack Log Cabin
Published:
Dec 29 2020 - 06:40
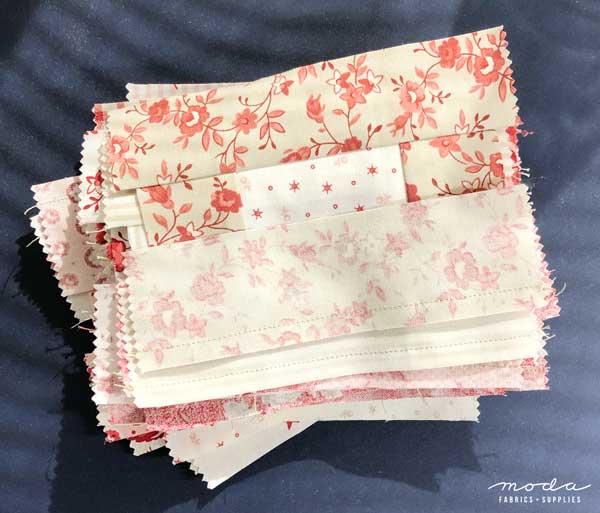
It took me a very long time to embrace charm packs, and charm squares. What could you make with a 5" square of fabric? It turns out there are a lot of things.
Part of the roadblock - mindblock - was that I was making mostly large quilts at the time. I needed Fat Quarters. Fat Eighths at the very least. But there were two very appealing things about using charm packs, both of which persuaded me that I needed these in my life.
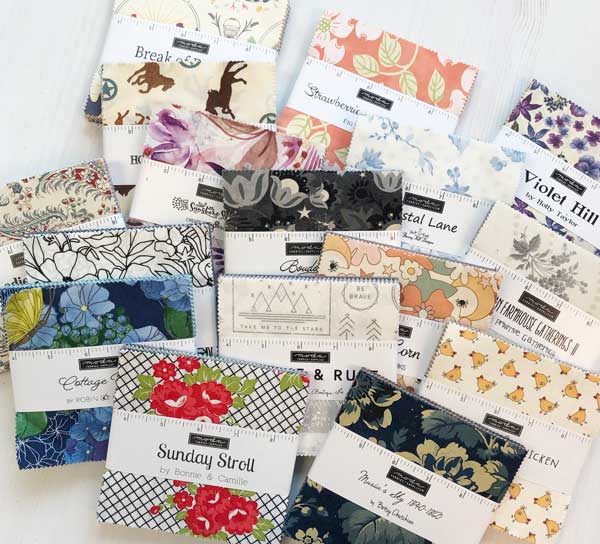
Charm packs are like the food samples at fancy grocery stores and Costco, I can sample something new and different. There are collections and color palettes I love, but that really aren't "me". One or two charm packs let me play with something new without making a huge commitment. A mini for the wall, a table-topper, a quick gift, and my favorite project... a new pillow cover.
The real hook was the variety charm packs gave me, that "instant scrappy". I could mix multiple collections by a favorite designer, or mix a wide variety of very different styles and color palettes.
And I still like seeing what I can make with 5" squares, especially with just one charm pack. Forty-two squares.

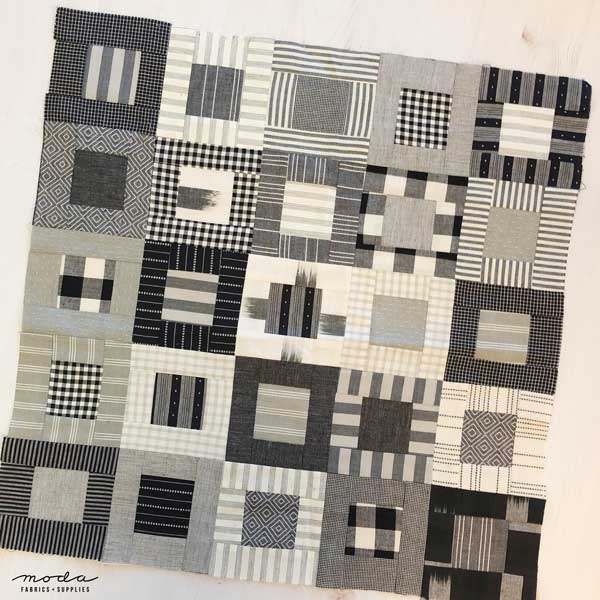
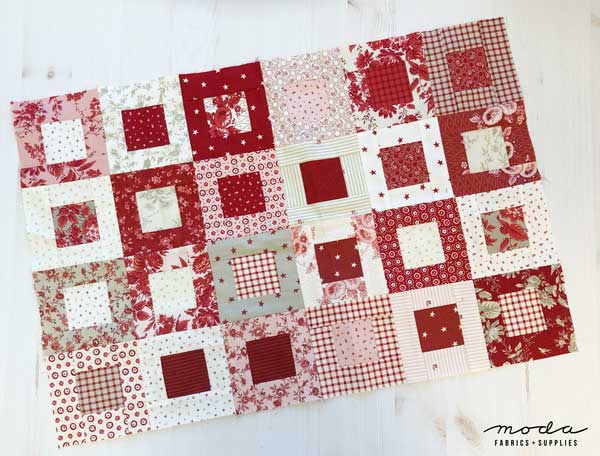
A simple Log Cabin. These blocks finish at 4" x 4".
There are two options for one charm pack.
- 25 blocks - 20" x 20" finished - 32 charm squares required.
- 24 blocks - 16" x 24" finished - 30 charm squares required.
Fabrics - Jen Kingwell Low Volume Wovens. Coming in April 2021.
Pinked Edges. To get the required pieces from a single charm pack, and the 4" finished block, they need to be left there for now. On the cut pieces, there will be pinked edges on the two ends of the 5" strips, and on two sides of the 2½" squares.
Cutting - 25 blocks.
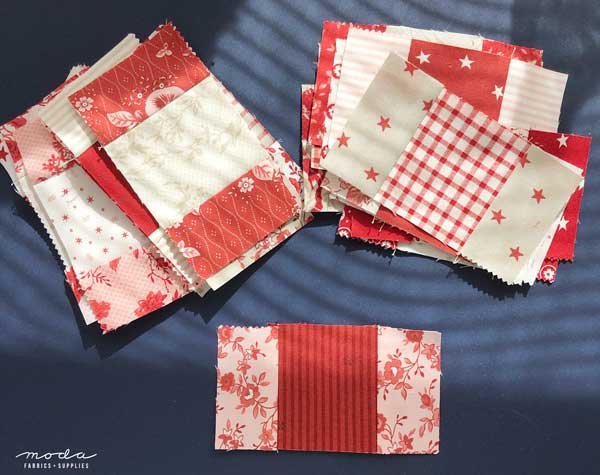
- Select 25 charm squares. From each square, cut 3 strips - 1½" x 5". Do not trim the pinked edges from the ends of the strips.
- Select at least 7 charm squares. From the squares, cut a total of 25 squares - 2½" x 2½".
Fabrics - Roselyn by Minick & Simpson. In shops in February 2021.
Cutting - 24 blocks.
- Select 24 charm squares. From each square, cut 3 strips - 1½" x 5". Do not trim the pinked edges from the ends of the strips.
- Select at least 6 charm squares. From the squares, cut a total of 24 squares - 2½" x 2½".
Piecing. Use a scant 1/4" seam allowance - or your "regular" seam allowance.
Select 1 strip - 1½" x 5" - from each of the fabrics. (There will be two strips left of each fabric.) Cut the strip in half to yield two strips - 1½" x 2½".
Pair each set of short strips with one square - 2½" x 2½". Join the pair of strips to the sides of the square. Press the seam to the strip.
A note about pressing... One of the challenges of log cabins is that strips can be distorted rather easily. If you press with steam, press the seam with a "dry iron" first, then set it with steam.
Depending on how evenly you cut your strips in half, a little bit of trimming might be in order. Or not. (There will be a bit of trimming at the end.)
Select the remaining pairs of two matching strips. These can be trimmed to measure 4½" before joining them to the blocks, or they can be trimmed after.
Guess which one I chose?
You betcha. Trim after.
Porquoi? Because I was planning to trim the blocks when they were complete to check the size, and to "clean them up" a bit.
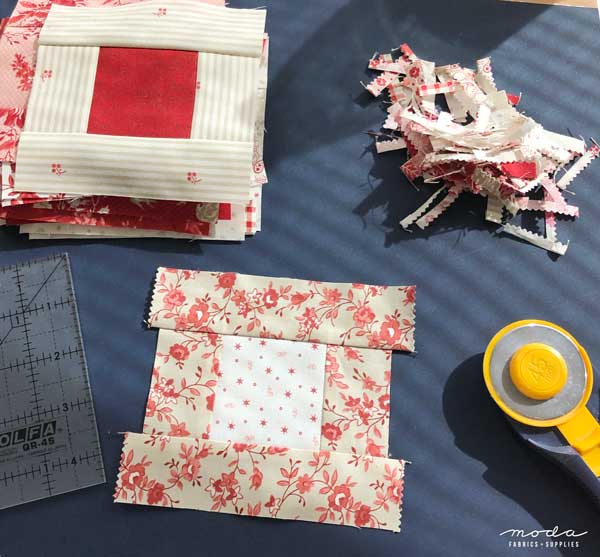
Trim the ends if needed. Square up the blocks to 4½" x 4½".
Full disclosure - as a result of where I lined up the edges of the fabric, and my seam allowance, my blocks measure a skosh under 4½".
Layout. Place the blocks as you like, as follows:
- 25 blocks - 5 rows of 5 blocks each
- 24 blocks - 4 rows of 6 blocks each
Placement. Alternate the direction of the seams on the long strips with alternating blocks. E.g., Row 1 - odd-numbered blocks have the long strips aligned horizontally, even-numbered blocks have the long strips aligned vertically. Row 2 - reverse that. (See pictures above if needed.)
Join the blocks to make rows. Press the seams in one direction, alternating them with each row. Or press them open.
Join the rows to complete the top. Press the seams in one direction, or press them open.
The 25-block project will measure 20½" x 20½", and the 24-block project will measure 16½" x 24½".
Quilt and finish as desired.
A few more things to share...
Alternate sizes. Add a mini charm pack, or a few more squares, and there are even more size options.
- 32 blocks. Use 32 squares for the 1½" x 5" strips, and 8 squares for the 32 - 2½" x 2½" squares. Set in 4 rows of 8 blocks, make a tablerunner that finishes at 16" x 32".
- 27 blocks. Use 27 squares for the 1½" x 5" strips, and 7 squares for the 27 - 2½" x 2½" squares. Set in 3 rows of 9 blocks, make a tablerunner that finishes at 12" x 26".
- 36 blocks. Add a matching Moda Candy - Mini Charm Pack. Use 36 - 2½" x 2½" squares - for the centers, and cut the 1½" x 5"strips from 36 charm pack squares. Make 6 rows of 6 blocks to finish at 24" x 24".
- 49 blocks. Two charm packs! Select 49 squares for the 1½" x 5" strips, and 13 squares for the 2½" x 2½" squares. Make 7 rows of 7 blocks to finish at 28" x 28"... or make 1 - 24 block project and 1 - 25 block project. (Two pillows!)
Background? If you have only a few squares, or want to add a background, the center squares and outer strips could be cut from a background. What about alternating positive-negative blocks? Positive = background center square with print outer strips. Negative = print center square with background outer strips. The 5 x 5 setting would be perfect for this.
Those pinked edges... if they really, really make you nuts, cut/trim the 2½" x 2½" squares at 2¼" x 2¼". The block will finish at 3¾" x 3¾".
The outside strips can also be trimmed down to a smaller size after piecing. As they are, they will measure 1¼" wide. Trim them to 1" to finish at ¾" for a 3½" block.
So many options with such a simple block.
Starch! If you like starching your fabrics, this still works. But pay attention to the size of the square before cutting. My experience is that charm squares will shrink between 1/8" and 1/4" in width. If the 1½" x 5" are cut lengthwise, the half-strips will be long enough. But getting four squares - 2½" x 2½" - will be a challenge. So use more squares, or consider cutting the center square at 2¼" x 2¼".
And there you have it.
We're back Thursday with another log cabin variation to share. This one requires a lot more fabric. But it makes a bigger quilt.
The quiltalong! That starts on Thursday evening - New Year's Eve. There aren't any rules or requirements, we're just having an impromptu "sewing party" with friends. We might share some snacks - favorite treats and maybe a recipe - and our progress. There might even be a giveaway or two for those sewing along and sharing pictures of their log cabins.
#modalogcabinqal
Have a good day - stay well, and stay safe!
And because someone always asks - Charm Pack Log Cabin PDF.
Posted in:
Comments