Welcome to Moda Fabrics!
Letters to Santa QAL - Nov 25
Letters to Santa QAL - Nov 25
Published:
Nov 25 2022 - 07:00
Merry 25th of November! And for those in the United States, a slightly belated Happy Thanksgiving!
This is our fifth and final check-in post for the Letters to Santa QAL. Time flies when you're having fun! Read on for the sashing/assembly instructions for the final 5 words from the main Moda quilt, full quilt finishing instructions & tips, and more!
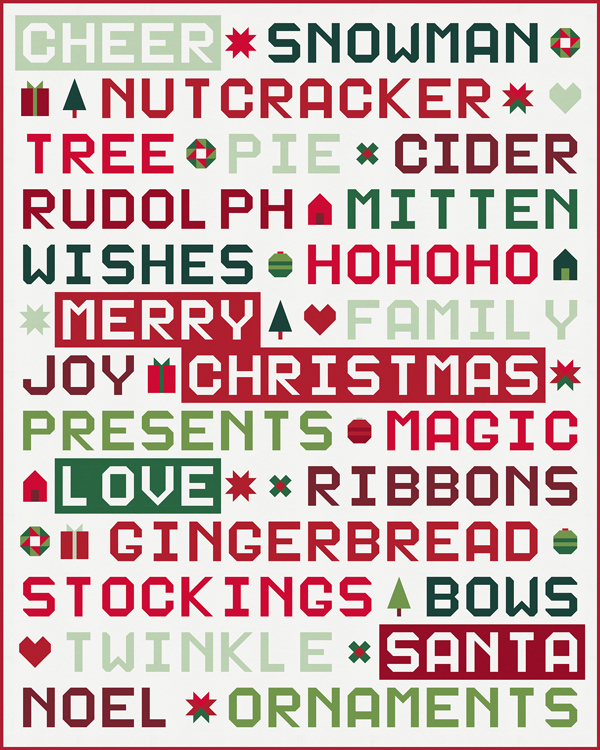
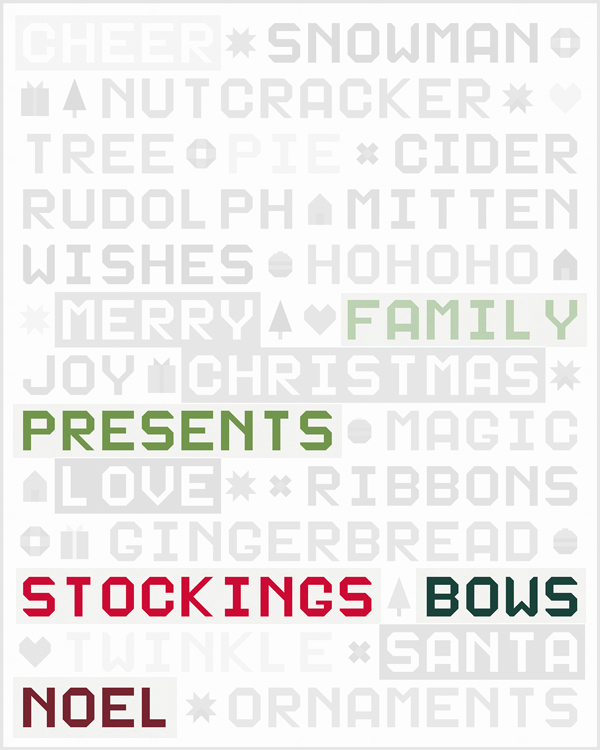
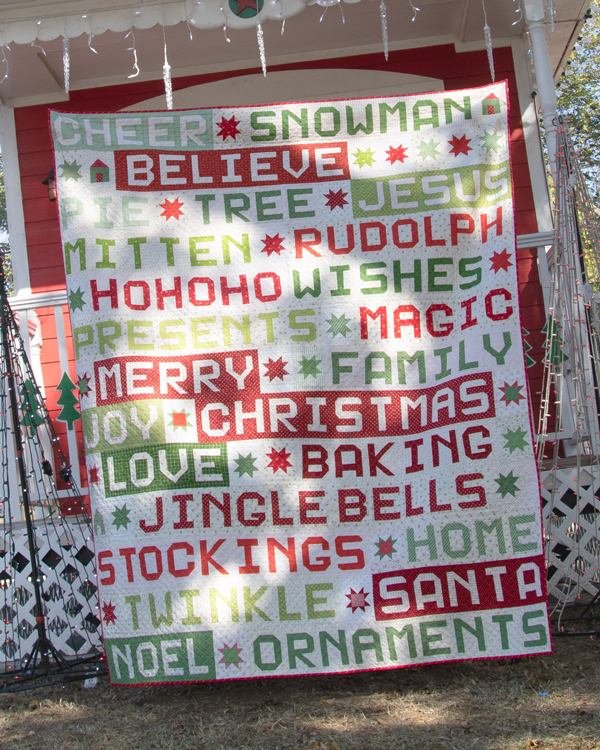
For a reminder of all the details about the Letters to Santa QAL, go back through the previous blog posts, all of which are linked at the end of this post. This is a 'relaxed fit' quilt along, where we just want to have some fun with Crhistmas words with all our extended Moda family! We have our quilts planned, but feel free to jump in with whatever words you like best! The main Moda quilt will finish 75"x94", and include 25 words and 27 filler blocks total. The lettering pattern used is the Mini Alphabet Quilt by Primitive Gatherings, which you can find or ask about at your local quilt shop.
THE BLOCKS
There are 25 words total in Moda's quilt, and we've been sharing the setting instructions 5 blocks at a time. This is the last month of our QAL, so these are the FINAL FIVE words for those sewing this version of the project! Download a PDF with all the piecing details for November's words here.
The blocks shown are from Moda's Lissa Alexander's version of the quilt, and SPOILER--she's been a busy bee and has her quilt all done and quilted and bound already! Keep scrolling down the post to see Lissa's gorgeous scrappy project.
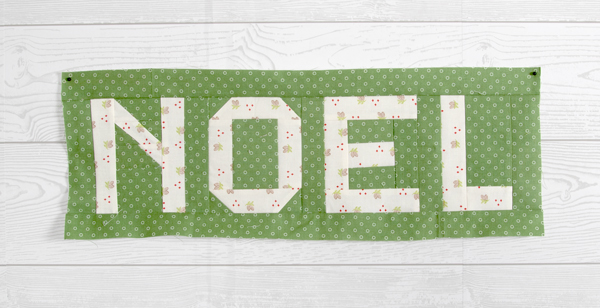
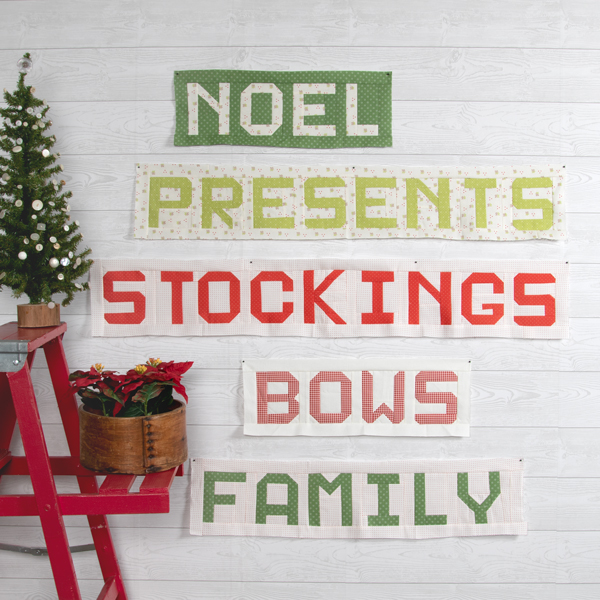
NOEL
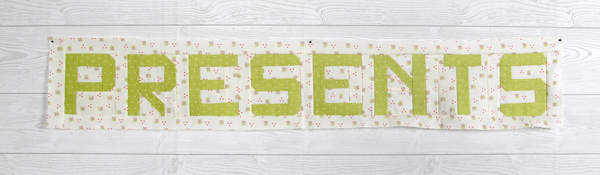
PRESENTS

STOCKINGS
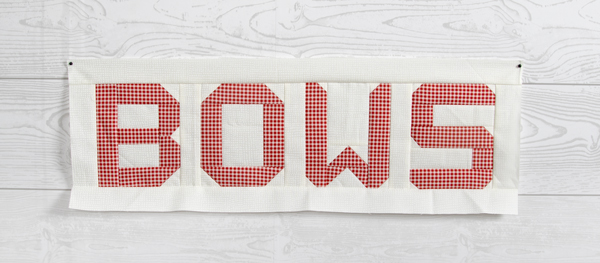
BOWS
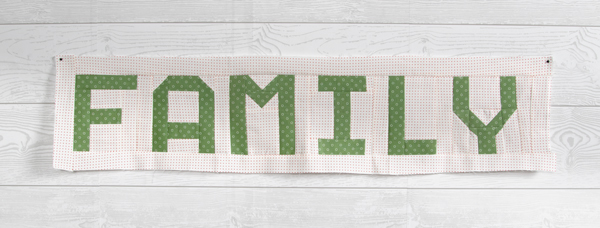
FAMILY
Before we get to all the details for finishing the quilt top, here's a look at where these final 5 words fall in the Moda quilt plan:
Not to fear if you're following the Bella Solids version of the quilt shown in our mockups, all of the Bella colors used are noted for each block.
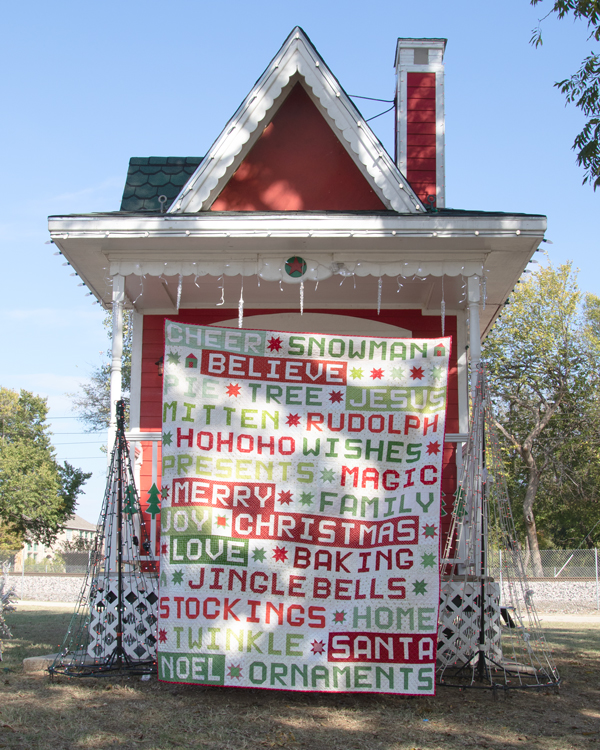
FINISHED QUILT!
Now that we're through all of the info for blocks this month, have a look at what we've all really been waiting for!
Lissa's finished Letters to Santa quilt fits right in at Santa's house!
The good news is, once you've made all of your word blocks & filler blocks, the hardest work is already done! We've put together finishing instructions for those following the Moda quilt along exactly as designed, download them here.
You can see even in Lissa's quilt, she made a few substitutions with words that were more appropriate for her family and how they celebrate the holidays, and stuck with just a few of the filler block options repeated more frequently. So, if you've made some changes, or want to add a bit more space around your words, or are doing your own totally different plan, don't panic! Measure out your rows as you go, and if there are any that need a bit extra fabric, you can always throw in an extra piece of background, or trim down the sides of your blocks if needed. The Moda finishing instructions have 2 rows where you add an extra 1.5"x7.5" piece and 1 row where you have to shave off 1" from one of the filler blocks (or split from either end)--it all works out in the end.
A few tips from Lissa after she assembled her quilt top:
- No matter how accurate your piecing is, there are a lot of seams on each row. Fold each row in half to mark the center of the row, and then repeat for the sides to mark the quarter sections. Pin each row together using these points and at the beginning and end. If there is any fullness, it can be eased between the pins.
- Sew into sets of 2 rows, and then join the sets of 2's into 4's. There are 13 rows, so add the last row onto a set of 4 to make (2) sets of 4, and (1) set of 5.
- Press each set of rows as you sew them, either open or to one side.
- It's very easy to accidentally sew a row in upside down, so be careful! (Ask me how I know! - Lissa)
- Stay stitch around the edge of the quilt before sending it to your quilter. This keeps any seams from coming apart when loading it on the longarm.
MORE TO SEW
Lissa's pieced scrappy backing deserves a mention all it's own, because it is equally as stunning as the front!
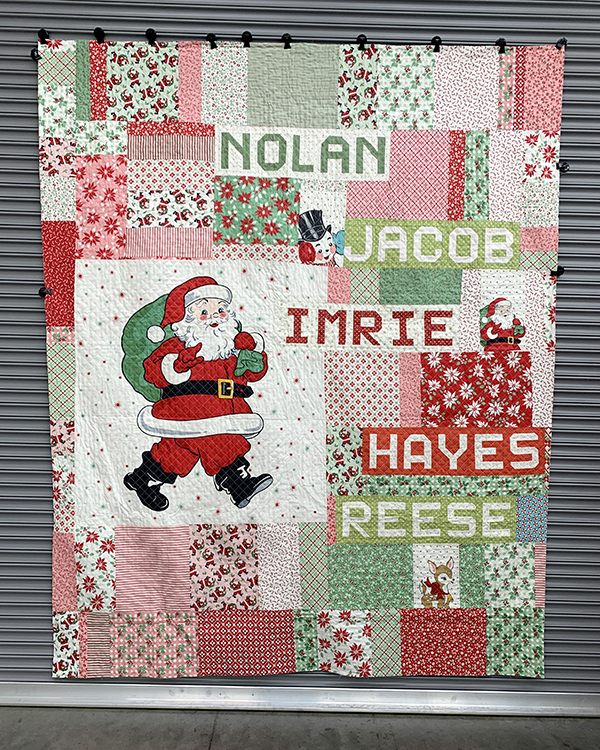
Christmas is all about her family, so Lissa made blocks for each of her grandkids names to include in her backing. And once you're going a little scrappy, why not go all the way? She's even gone the extra step to use pieces of Santa panels from Holly Jolly by Urban Chiks in a few places. Talk about 2 sided quilts!
As if she hadn't made enough word blocks, Lissa also put together this fun alternate project as a gift for a friend, using all the names of their family members to form a Christmas tree.
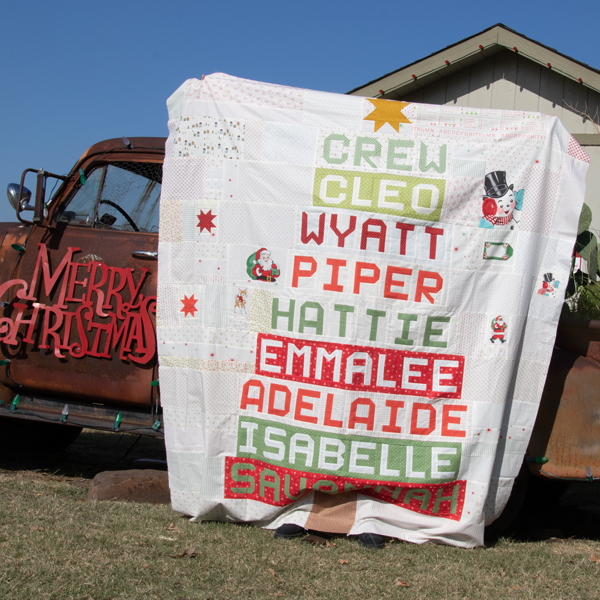
When making a name or word tree of your own, arrange the words in order from short to long. You can see where there are a few names of the same length in this quilt (Crew and Cleo right at the top), where switching the background/letter color created just a little extra size for the second block down, and keeps the angle going to form the sides of the tree.
If you've been following along our posts the last few months, you'll recall Moda's Tammy V. has been making our filler blocks out of Candy Cane Lane fabric by April Rosenthal. Well she and her bestie Dawn got a little crafty, and started turning those filler blocks into ornaments just by popping them into an embroidery hoop and adding some ribbon for bows. They are too cute!
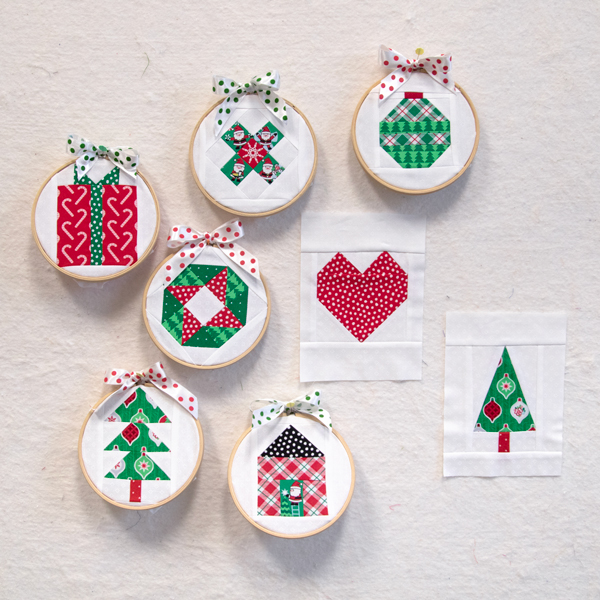
These use a 6" embroidery hoop, so if you're using blocks you've already made, you'll want just a dab of glue to keep the short sides of the block (5 1/2") from popping out of the hoop. If you haven't sewn yet, just make your blocks a little wider rather than the 5 1/2" written, to give a little extra fabric to fit into the hoop.
ALL THE LINKS
Whether you missed one or two links along the way, or are catching up starting with this post on the Letters to Santa QAL, we're making it easy on you to find all of the patterns and previous posts, which include bonus projects and extra tips.
BLOG POSTS:
Month 5 / November Blog Post (no link needed, you're here!)
WORD FINISHINGS PER MONTH:
Month 1: JOY, MERRY, CHRISTMAS, TWINKLE, RUDOLPH
Month 2: SANTA, GINGERBREAD, PIE, MITTEN, WISHES
Month 3: CHEER, TREE, NUTCRACKER, MAGIC, SNOWMAN
Month 4: HOHOHO, CIDER, LOVE, ORNAMENTS, RIBBONS
Month 5 (this post): BOWS, STOCKINGS, FAMILY, NOEL, PRESENTS
FILLER BLOCKS:
Thank you so much for sewing along with us, we hope seeing these Letters to Santa projects has helped get you in the holiday spirit! Keep sewing and sharing your quilts and other projects on social media using #LetterstoSantaQAL and tag @ModaFabrics, because we love to see how you make it your own. Happy sewing!
Posted in:
Comments