Welcome to Moda Fabrics!
Falling Leaves Quilt
Falling Leaves Quilt
Published:
May 8 2017 - 23:00

This gorgeous quilt will have you ready for fall before the leaves start changing!

Hello! I am Charlene McCain from Just Because Quilts. I am so excited to be cooking up my first recipe with you in the Moda Bake Shop. All you need is a dash of color and a pinch of patience to make this quick and easy lap quilt. This quilt goes together quickly, using beginner-friendly Rail Fence and Maple Leaf blocks, and is perfect to snuggle under on cool evenings. Falling Leaves looks beautiful in autumn/winter colors, as featured in Moda's Gooseberry Lane, but any color scheme would work as well. So grab your favorite Moda Jelly Roll and join me in whipping up this fun recipe.
This quilt finishes at 42" x 58".
![]()
1 Jelly Roll {Gooseberry Lane by Kansas Troubles Quilters}
1/2 yard background fabric
2 yards backing fabric
1/2 yard binding fabric
46" x 62" batting
![]()
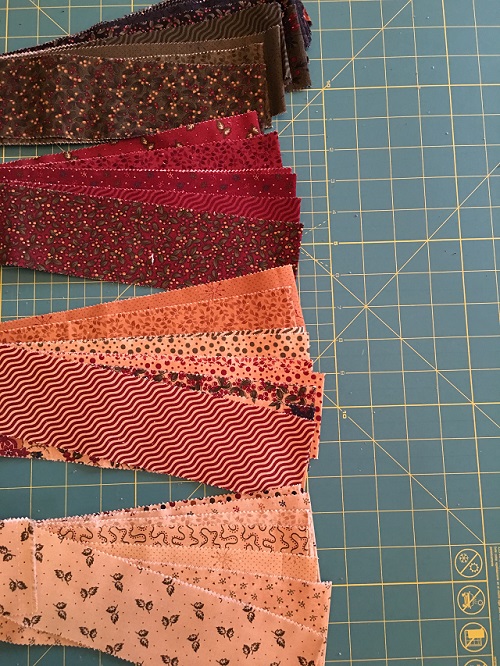
Separate jelly roll strips by color, from dark to light.
From Jelly Roll strips cut:
112 - 2 1/2" x 8 1/2" rectangles
49 - 2 1/2" x 2 1/2" squares
7 - 1" x 3 1/2" rectangle
From Background fabric cut:
7 - 2 1/2" x 8 1/2" rectangles
7 - 2 1/2" x 6 1/2" rectangles
42 - 2 1/2" x 2 1/2" squares
Rail Fence Block (Make 28):
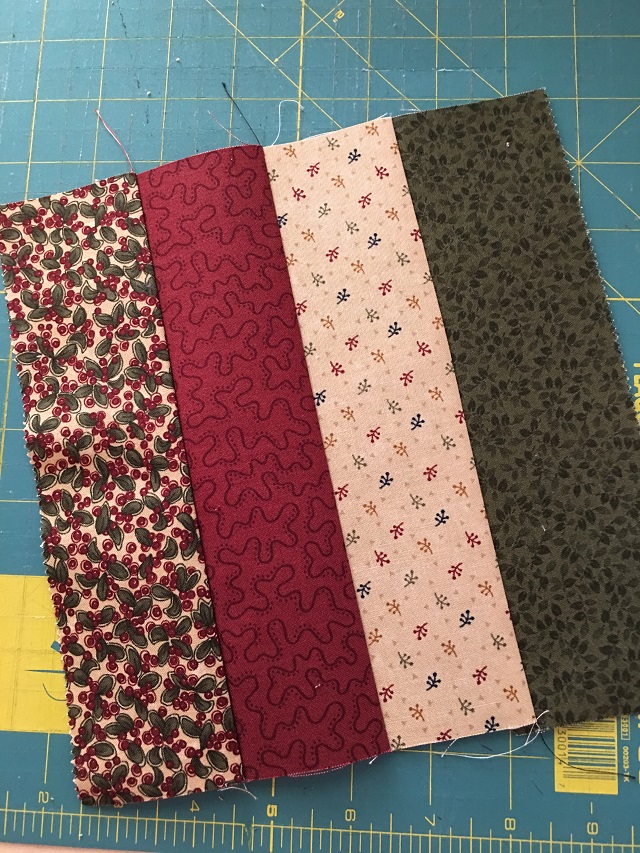
Choose 4 - 2 1/2" x 8 1/2" rectangles of varying colors and sew together. Press seams going in one direction. Finished size 8 1/2" x 8 1/2".

Beginning with a horizontal (sideways) block, sew 7 blocks together, alternating between vertical and horizontal directions.
Beginning with a vertical (up and down) block, sew 3 more rows of 7 together.
Set one row beginning with vertical block on top aside. Sew the remaining 3 rows together, placing the row beginning with the horizontal block in the middle of the other 2.
(For my quilt I chose to have 3 rows beginning with a vertical block and only 1 horizontal row, but you can choose to make 2 vertical and 2 horizontal. Your choice.)
Maple Leaf Block (Make 7):
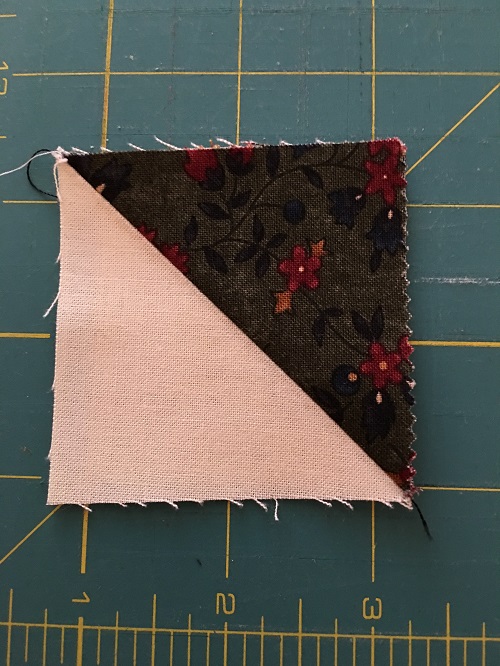
Begin building your Maple Leaf Block by sewing together Half Square Triangles (HST). You will need 4 HSTs per block, for a total of 28 HSTs to complete all 7 blocks.
I like to use the Stitch and Flip method. To do this, press a 2 1/2" square of background fabric in half diagonally from corner to corner. Place pressed square on top of a print square, right sides together, and sew on the diagonal crease. Press to set seam. Flip open and press print square toward the corner. Trim seam allowance to 1/4".

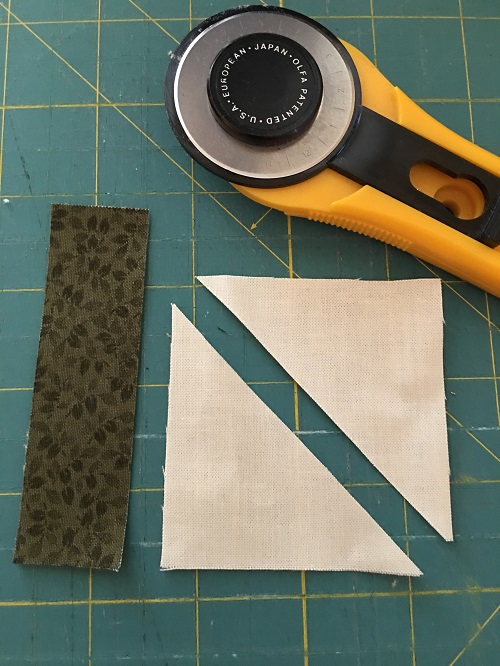
Leaf Stem (Make 7)
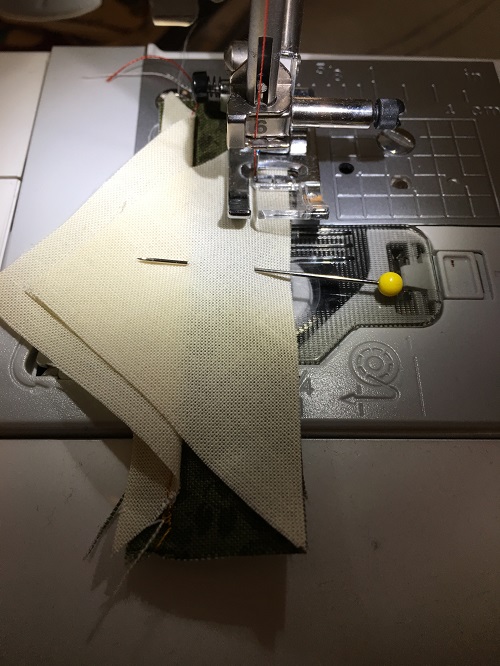
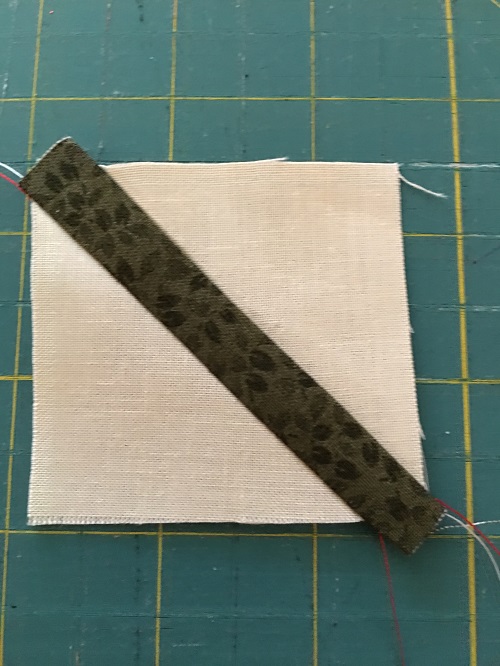
For each stem, cut a 2 1/2" background square diagonally from corner to corner. Align the stem print 1" x 3 1/2" piece across the long side of triangle, right sides together. Pin in place and sew across long side of triangle. Place other half of triangle on top of print sem, right sides together, and pin in place. Sew across long side of triangle. Press flat. (I prefer to press the print toward the dark side to prevent it from showing through the background fabric.) Line up with ruler and trim to 2 1/2" x 2 1/2" square.

To assemble your Maple Leaf block, refer to picture for layout direction of HSTs.
First Row:
HST - HST - Background Square
Second Row:
Print Square - Print Square - HST
Third Row:
Stem - Print Square - HST
Press each row, alternating direction of seam. Line up seams and sew rows together. Press flat. Finished size 6 1/2" x 6 1/2".

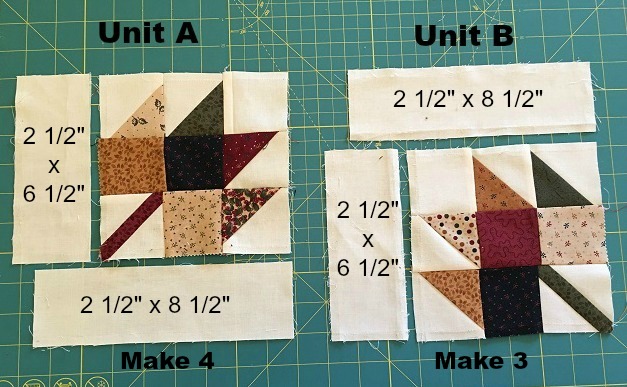
To each Maple Leaf Block add an 8 1/2" rectangle and a 6 1/2" rectangle as shown. Finished block size 8 1/2" x 8 1/2". Make 4 Unit A blocks and 3 Unit B blocks.
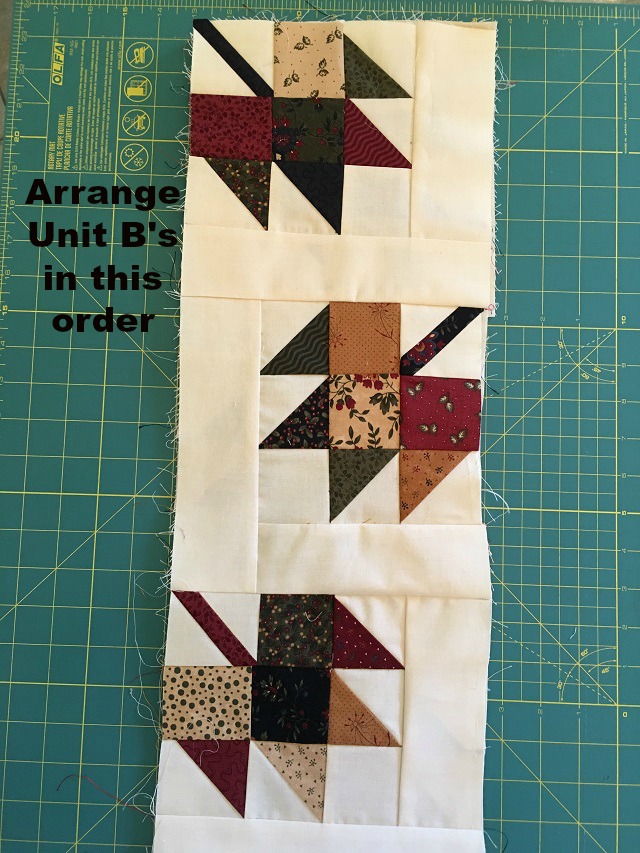
Assemble the leaf row by sewing blocks together as shown. Sew Unit B blocks to top of Unit A blocks. Completed blocks will cascade downward in a helter skelter fashion.

Complete your quilt top by sewing together the Maple Leaf row to the lone Rail Fence row, then sewing this section to the 3-row Rail Fence section.

Baste, quilt and bind as desired.
This lap quilt finishes at 42" x 58".
Hope you enjoy and have lots of fun making this quilt. If you get a chance, stop by and visit me at Just Because Quilts. I love to make new friends!
Charlene McCain
{justbecausequilts.com}
![]()
Posted in:
Comments